# SiteCove Learning Center
Welcome to the SiteCove Learning Center\ We've built out a comprehensive hub that will show you how to manage all aspects of SiteCove, and give you tips and tricks on how to manage your website.
#### **Welcome to the** **SiteCove Learning Center.**
We've built out a comprehensive hub that will show you how to manage all aspects of SiteCove, and give you tips and tricks on how to manage your website.
Head to our [Getting Started guide](/getting-started/getting-started-with-sitecove) to get your **SiteCove** experience underway.
### Discover SiteCove
# Getting Started With SiteCove
### **Welcome to the SiteCove Knowledgebase / Learning Center.**
We've built out a really comprehensive documentation system that will show you how to manage all aspects of your SiteCove Subscription, as well as give you tips and tricks on how to manage your website and domains.
#### **Logging in to cPanel**
Once you've ordered your website management from SiteCove, you'll receive a welcome email with details of how to log in to your hosting control panel with us once your hosting is activated (it should be within a few minutes of your order going through). If for some reason you don't receive your welcome email, please get in touch and we can check that everything has gone through OK.
In terms of logging in to your hosting, the first step is to log in to the [https://clients.sitecove.com](https://clients.sitecove.com/) area. Once you have logged in here, click Services and then My Services. Your package(s) will be listed here - click the one you want to log in to and then on the next page click Login to cPanel.
Your login credentials are stored as a secure token in this area (rather than a plaintext username and password) - if the log-in fails for any reason please get in touch and we can reset this to enable you to log in.
#### **Email**
Once you've logged in to cPanel, you'll be presented with a number of icons that enable you to manage all aspects of your hosting with SiteCove. One of the most common things to get set up straight away is Email - click Email Accounts and from here you can start setting up email addresses @yourdomain.com.
To access your email, you can use an email client like Mac Mail, Outlook or Thunderbird, or you can use webmail. Webmail can be accessed by visiting ]. You'll need to log in with the mailbox username and password you created earlier. If you need any help getting set up in your email client, please let us know - we can talk you through the setup.
#### **Installing Applications (e.g. WordPress)**
In cPanel, scroll down and find the icon that says \`Softaculous Apps Installer. Click the icon of the application you'd like to install, for example - WordPress, Magento, Prestashop, Joomla - and then the system will ask you for some more information. Click 'Install' once you've entered that and then you'll be able to log in to the admin area to get started with your application.
#### **Nameservers**
If you have transferred a domain, or if you want to use a domain you have registered elsewhere, you'll need to update the nameservers to:-
ns1.scservx.com\
ns2.scservx.com\
ns3.scservx.com\
ns4.scservx.com
After making the change, it can take up to 24 hours for the change to propagate and to see that in your browser.
# Quickstart
Beautiful documentation starts with the content you create — and GitBook makes it easy to get started with any pre-existing content.
{% hint style="info" %}
Want to learn about writing content from scratch? Head to the [Basics](https://github.com/GitbookIO/onboarding-template/blob/main/getting-started/broken-reference/README.md) section to learn more.
{% endhint %}
### Import
GitBook supports importing content from many popular writing tools and formats. If your content already exists, you can upload a file or group of files to be imported.
### Sync a repository
GitBook also allows you to set up a bi-directional sync with an existing repository on GitHub or GitLab. Setting up Git Sync allows you and your team to write content in GitBook or in code, and never have to worry about your content becoming out of sync.
# Publish your docs
Once you’ve finished writing, editing, or importing your content, you can publish your work to the web as a docs site. Once published, your site will be accessible online only to your selected audience.
You can publish your site and find related settings from your docs site's homepage.
# Web Hosting
# Getting Started
# What is Web Hosting?
Web hosting is a service that allows individuals and organizations to make their websites accessible on the internet. Hosting providers, like SiteCove, allocate space on their servers to store website files and ensure they are available to users online.
#### **Types of Web Hosting**
**1. Shared Hosting** – Multiple websites share a single server’s resources. Ideal for small websites and beginners.
**2.** **VPS Hosting** – A virtualized private server with dedicated resources, offering better performance and control.
**3.** **Dedicated Hosting** – A physical server dedicated to one client, providing maximum performance and customization.
**4.** **Cloud Hosting** – Websites are hosted on multiple interconnected servers, ensuring scalability and reliability.
**5**. **Managed Hosting** – The provider handles server management, security, and updates for you.
#### **How Web Hosting Works**
When a user enters your website’s domain name, the browser sends a request to your hosting provider’s server. The server then retrieves the website files and displays them to the user.
#### **How to Choose the Right Hosting Plan**
Selecting the right hosting plan depends on your website’s needs, traffic expectations, and technical expertise.
#### **Factors to Consider:**
**1. Traffic Volume** – Estimate the number of visitors your site will receive.
**2. Resource Requirements** – Look at storage, Bandwidth, and CPU needs.
**3. Website Type** – Static sites require less power, while dynamic sites (e.g., e-commerce) need more resources.
**4. Scalability** – Ensure the hosting plan can grow with your website.
**5. Security Features** – Check for SSL, firewalls, and DDoS protection.
**6. Support &** Uptime – A reliable hosting provider should offer 24/7 support and 99.9% uptime.
#### **Comparison of Hosting Plans:**
\- **For Beginners:** Shared Hosting
\- **For Growing Businesses:** VPS Hosting
\- **For Large Websites:** Dedicated Hosting
\- **For High Traffic & Scalability:** Cloud Hosting
#### **How to Sign Up for SiteCove**
Follow these steps to get started with SiteCove:
**Step-by-Step Guide:**
1\. **Select a Plan** – Pick a plan that suits your needs (Shared, VPS, Dedicated, Cloud).
2\. **Register a Domain Name** – Many providers offer a free domain with hosting plans.
3\. **Set Up Your Account** – Provide your details and create an account.
4\. **Complete the Payment** – Select your billing cycle and make a payment.
5\. **Access Your Hosting Dashboard** – After purchase, log into your control panel (e.g., cPanel, Plesk) to start managing your website.
# How to Log in to Your Hosting Account
#### Introduction
Accessing your hosting account is essential for managing your website, email accounts, databases, and other hosting-related features. Whether you need to update website files, configure settings, or monitor performance, knowing how to log in is the first step. This guide will walk you through the various methods to access your hosting account.
#### Step 1: Gather Your Login Credentials
Before logging in, ensure you have the necessary credentials. Typically, you need:
* Your hosting account username or email
* Your password
* The URL to the hosting provider's login page
These details are usually sent to you via email after signing up for a hosting plan.
#### Step 2: Log in via the Hosting Provider’s Website
Most hosting providers offer a centralized login portal on their website. Follow these steps:
1. Open your web browser and go to your hosting provider’s website.
2. Look for a **Login** or **Sign In** button, usually located at the top-right corner.
3. Enter your email/username and password.
4. Click **Login** to access your hosting dashboard.
If you forgot your password, use the **Forgot Password** option to reset it via email.
#### Step 3: Access cPanel or Other Control Panels
If your hosting provider uses cPanel or another control panel, you can log in directly:
1. Open your web browser.
2. Type your hosting login URL, usually in one of the following formats:
* `https://yourdomain.com/cpanel`
* `https://yourhost.com/cpanel`
* `https://yourdomain.com:2083`
3. Enter your cPanel username and password.
4. Click **Login** to access the control panel.
If your hosting provider uses a different control panel (e.g., Plesk, DirectAdmin), the login process will be similar but with a different URL.
#### Step 4: Log in via Your Hosting Provider’s Client Area
Some hosting companies have a dedicated client portal where you can manage billing, support, and hosting settings.
1. Visit your hosting provider’s main website.
2. Click on **Client Area**, **My Account**, or similar options.
3. Enter your login credentials.
4. Navigate to the **Hosting** section and select your hosting account.
From here, you can usually find a one-click login option to access cPanel or your control panel.
#### Step 5: Log in via SSH (Advanced Users)
For advanced users managing a VPS or dedicated server, logging in via SSH is an option.
1. Open a terminal (Linux/Mac) or Command Prompt (Windows).
2. Type the following command:
```plaintext
ssh username@yourserver.com
```
Plain textCopy
3. Enter your password when prompted.
4. Once authenticated, you have command-line access to your hosting server.
#### Step 6: Log in via FTP (For File Management)
If you need to upload or download website files, use an FTP client like FileZilla:
1. Open your FTP client.
2. Enter your FTP credentials:
* Host: `ftp.yourdomain.com`
* Username: Your FTP username
* Password: Your FTP password
3. Click **Connect** to access your website files.
#### Conclusion
Logging into your hosting account is simple once you know the available methods. Whether through the provider’s website, cPanel, client area, SSH, or FTP, accessing your hosting dashboard allows you to manage your website efficiently. If you experience login issues, check your credentials, reset your password, or contact your hosting provider’s support team for assistance.
# How to Connect a Domain to Your Hosting
#### Introduction
Connecting your domain to your hosting account is a crucial step in getting your website online. Whether you’ve purchased your domain separately from your hosting provider or with the same company, the process involves configuring your domain’s DNS (Domain Name System) settings to point to your hosting server. This guide will walk you through the necessary steps to successfully connect your domain to your hosting.
#### Step 1: Determine Your Hosting Provider’s Nameservers
Nameservers are a crucial part of DNS that direct your domain to the correct web hosting server. When you purchase hosting, your provider will provide Nameserver details, usually via email or within the hosting dashboard.
Common nameserver formats:
* `ns1.yourhostingprovider.com`
* `ns2.yourhostingprovider.com`
To find your nameservers:
1. Log in to your hosting account.
2. Navigate to the DNS settings or domain management section.
3. Locate the nameservers assigned to your account.
#### Step 2: Access Your Domain Registrar’s Settings
If you purchased your domain separately from your hosting provider, you’ll need to update the nameservers at your domain registrar.
1. Log in to your domain registrar (e.g., GoDaddy, Namecheap, Google Domains).
2. Navigate to the domain management section.
3. Look for the option to update nameservers.
#### Step 3: Update Nameservers
1. In the nameserver settings section of your registrar’s dashboard, select the option to change or update nameservers.
2. Replace the existing nameservers with those provided by your hosting provider.
3. Save the changes and confirm the update if required.
#### Step 4: Verify DNS Propagation
DNS changes take time to propagate across the internet. This process can take anywhere from a few minutes to 48 hours.
To check if your domain is pointing correctly:
* Use online tools like [https://www.whatsmydns.net](https://www.whatsmydns.net/)
* Run the command `nslookup yourdomain.com` in the terminal (Windows) or use `dig yourdomain.com` (Mac/Linux)
#### Step 5: Add the Domain to Your Hosting Account
Once the domain is pointing to your hosting provider, you may need to add it to your hosting control panel.
For cPanel:
1. Log in to your cPanel account.
2. Navigate to **Addon Domains** or **Domain Manager**.
3. Enter your domain name and save the settings.
For Other Hosting Panels:
* The process varies, but look for “Add a Domain” or “Manage Domains” in your hosting dashboard.
#### Step 6: Configure Additional DNS Records (Optional)
If you are using additional services like email hosting, you may need to configure DNS records such as A records, MX records, or CNAME records.
* A records: Point to a specific IP Address.
* MX records: Direct email to the correct mail server.
* CNAME records: Create subdomains or point to external services.
#### Conclusion
By following these steps, you can successfully connect your domain to your hosting account, ensuring that visitors can access your website. If you encounter any issues, contact your hosting provider’s support team for assistance. With proper configuration, your website will be live and accessible in no time!
# Difference Between a Domain and Hosting
When setting up a website, two fundamental components are required: a domain name and web hosting. While they work together to make your website accessible online, they serve distinct purposes. Understanding the difference between a domain and hosting is crucial for anyone looking to establish a website. This article will explain both terms in detail, highlighting their roles, how they interact, and why they are both necessary for a functional website.
#### What is a Domain Name?
A domain name is the address that users type into their web browsers to access your website. It is essentially the human-readable version of an IP Address, making it easier for users to find websites without remembering complex numerical strings.
#### Key Features of a Domain Name:
1. **Unique Identification:** Each domain name is unique, meaning no two websites can have the same domain.
2. **Easy Navigation:** Instead of using numerical IP addresses, users can type a simple name like `www.example.com`.
3. **Extensions and TLDs:** Domains come with extensions such as `.com`, `.org`, `.net`, and country-specific ones like `.au` for Australia or `.uk` for the United Kingdom.
4. **Renewal and Registration:** Domains must be registered through a domain registrar and renewed periodically (e.g., annually or every few years).
#### Examples of Domain Names:
* `www.google.com`
* `www.facebook.com`
* `www.yourbusinessname.com`
#### What is Web Hosting?
Web hosting is a service that provides the storage and resources needed to keep a website accessible online. Hosting companies allocate space on their servers where website files, databases, and other elements are stored.
#### Key Features of Web Hosting:
1. **Storage for Website Files:** Hosting providers store all necessary website components, including HTML files, images, videos, and databases.
2. **Server Performance:** Different hosting plans offer varying levels of performance, affecting page load speed and reliability.
3. **Security and Backups:** Many hosting services provide security measures like SSL certificates, firewalls, and automatic backups.
4. **Support for Various Technologies:** Hosting platforms may support different programming languages and databases, such as PHP, MySQL, or Python.
#### Types of Web Hosting:
* Shared Hosting**:** Multiple websites share the same server resources, making it cost-effective but limited in scalability.
* **VPS Hosting:** A virtual private server offers more dedicated resources and control than shared hosting.
* **Dedicated Hosting:** A server exclusively for one website, providing maximum performance and customization.
* Cloud Hosting**:** Uses multiple servers to ensure Uptime and scalability.
* **Managed Hosting:** The hosting provider handles server maintenance, updates, and security for you.
#### How Domain and Hosting Work Together
Even though domain names and hosting serve different purposes, they work together to make websites accessible. Here’s how they interact:
1. **Domain Registration:** You purchase a domain name from a domain registrar.
2. **Hosting Subscription:** You sign up for a web hosting service to store your website’s files.
3. **Domain Name System (DNS) Configuration:** You link your domain name to your hosting provider’s server via DNS settings.
4. **Website Accessibility:** When users type your domain name in a browser, it points to the correct hosting server, loading your website.
#### Can You Have One Without the Other?
* **A Domain Without Hosting:** Yes, you can register a domain name without hosting a website. Some people do this for branding purposes, future website projects, or email services.
* **Hosting Without a Domain:** Technically, yes. Hosting providers often assign temporary subdomains, but a custom domain is necessary for a professional online presence.
#### Conclusion
A domain name and web hosting are both essential for creating a fully functional website. While a domain serves as your website’s address, hosting provides the storage and infrastructure needed to keep your site online. Understanding the difference between the two ensures you make informed decisions when setting up your website. Always choose a reliable domain registrar and hosting provider to ensure smooth operation and a great user experience.
# How to Choose the Right Hosting Plan
Selecting the right hosting plan is crucial for the performance, security, and scalability of your website. With numerous hosting options available, understanding your needs and comparing different plans can save you from unnecessary expenses and technical headaches. This guide will walk you through the key factors to consider when choosing the best hosting plan for your website.
#### 1. Understand Your Website’s Needs
Before choosing a hosting plan, evaluate what your website requires in terms of resources and features. Ask yourself:
* Is your website a simple blog, an eCommerce store, or a resource-intensive application?
* How much traffic do you expect?
* Do you need special software, databases, or scripting languages?
* How important is Uptime and speed for your site?
Your answers will help determine the type of hosting that suits you best.
#### 2. Types of Web Hosting
There are different types of hosting plans available, each catering to specific needs:
#### a.Shared Hosting
Ideal for beginners, small blogs, and personal websites. In shared hosting, multiple websites share the same server resources, making it the most affordable option. However, it has limitations in terms of performance and scalability.
**Pros:**
* Low cost
* Easy to set up and manage
* No technical maintenance required
**Cons:**
* Limited resources (CPU, RAM, Bandwidth)
* Slower performance if other sites on the server use too many resources
* Less customization and control
#### b.VPS (Virtual Private Server)**Hosting**
A middle ground between shared hosting and dedicated hosting. A VPS provides dedicated portions of a server with allocated resources, offering better performance and control.
**Pros:**
* More control and customization
* Better performance and reliability than shared hosting
* Scalable to accommodate traffic growth
**Cons:**
* More expensive than shared hosting
* Requires some technical knowledge
c. **Dedicated Hosting**
Best for large websites with high traffic and custom software requirements. A Dedicated Server means you have full access to all server resources.
**Pros:**
* Maximum performance and security
* Full control over server configurations
* Can handle high traffic loads
**Cons:**
* Expensive
* Requires technical expertise to manage
#### d.Cloud Hosting
A flexible and scalable option where your website is hosted across multiple servers. This ensures high availability and reliability.
**Pros:**
* Scalable resources (pay for what you use)
* High uptime and redundancy
* Great for fluctuating traffic
**Cons:**
* Can be more expensive based on usage
* Requires some understanding of cloud infrastructure
e. **Managed Hosting**
A hosting provider handles server maintenance, security, updates, and performance for you. Ideal for businesses that don’t want to manage their own servers.
**Pros:**
* Hassle-free server management
* Security and performance optimizations included
* Support and backups handled by the provider
**Cons:**
* More expensive than unmanaged hosting
* Less control over custom configurations
#### 3. Key Features to Look for in a Hosting Plan
When comparing hosting plans, consider the following factors:
* **Performance:** Look for SSD storage, sufficient bandwidth, and optimized servers for speed.
* **Uptime Guarantee:** A good host should provide at least a 99.9% uptime guarantee.
* **Scalability:** Ensure your hosting plan allows for upgrades as your website grows.
* **Security:** Check for SSL certificates, DDoS protection, automatic backups, and Malware scanning.
* **Customer Support:** 24/7 customer support is crucial in case of emergencies.
* **Control Panel:** A user-friendly control panel like cPanel or Plesk makes website management easier.
* **Pricing and Renewal Fees:** Compare initial costs and renewal rates, as some providers charge significantly higher fees upon renewal.
#### 4. Choosing the Right Provider
There are many hosting providers, but some of the most reputable ones include:
* **Bluehost** (Best for WordPress sites)
* **SiteGround** (Great customer support and performance)
* **HostGator** (Affordable and beginner-friendly)
* **A2 Hosting** (Fast and reliable)
* **Cloudways** (Best for cloud hosting flexibility)
Compare reviews and features before making a decision.
#### Conclusion
Choosing the right hosting plan depends on your website’s needs, budget, and technical expertise. If you’re starting with a small blog, shared hosting is a great option. For growing businesses, VPS or cloud hosting provides better scalability. Large businesses should consider dedicated hosting for maximum performance. Managed hosting is ideal if you prefer a hands-off approach.
By evaluating your needs and comparing hosting features, you can make an informed decision that ensures your website runs smoothly, securely, and efficiently.
# Types of Web Hosting: Shared, VPS, Dedicated, and Cloud
#### **Introduction**
Web hosting is the backbone of any website, providing the necessary storage, Bandwidth, and server resources to keep it accessible online. Choosing the right type of web hosting is crucial, as it impacts your website’s **performance, security, scalability, and cost**.
There are four main types of web hosting:
1\. Shared Hosting – Affordable and beginner-friendly
2\. **VPS Hosting (Virtual Private Server)** – Offers more control and better performance
3\. **Dedicated Hosting** – Provides an entire server for maximum performance and security
4\. Cloud Hosting – Scalable and highly reliable for fluctuating traffic
In this article, we’ll break down each hosting type, explaining how they work, their advantages, disadvantages, and ideal use cases.
#### **1. Shared Hosting – Best for Beginners & Small Websites**
**What is Shared Hosting?**
Shared hosting is a hosting environment where **multiple websites share the same server resources**, including CPU, RAM, and storage. This makes it the most cost-effective and widely used hosting option.
**Advantages of Shared Hosting:**
✅ **Affordable** – It’s the cheapest hosting option, making it ideal for beginners.
✅ **Easy to Use** – No technical knowledge is required; the hosting provider manages server maintenance.
✅ **Pre-configured Settings** – Comes with one-click installers for WordPress and other CMS platforms.
**Disadvantages of Shared Hosting:**
❌ **Limited Resources** – Performance can suffer if other sites on the same server use excessive resources.
❌ **Security Risks** – If one website gets hacked, others may be vulnerable.
❌ **Less Control** – Limited server customization options.
**Who Should Use Shared Hosting?**
✔️ Small businesses, personal websites, blogs, and startups with low traffic.
#### **2. VPS Hosting – Best for Growing Websites & Medium Traffic**
**What is VPS Hosting?**
VPS (Virtual Private Server) hosting provides a **virtualized server environment** where a single physical server is divided into multiple private virtual machines. Each VPS gets its own dedicated resources, offering more power and flexibility than shared hosting.
**Advantages of VPS Hosting:**
✅ **More Performance** – Higher speed and reliability compared to shared hosting.
✅ **Better Security** – Since your resources are isolated, other websites on the server don’t affect your performance.
✅ **Customization** – Root access allows for custom software installations and configurations.
**Disadvantages of VPS Hosting:**
❌ **Higher Cost** – More expensive than shared hosting.
❌ **Requires Some Technical Knowledge** – Managing a VPS requires basic server administration skills.
**Who Should Use VPS Hosting?**
✔️ Medium-sized businesses, growing blogs, eCommerce websites, and developers needing more control.
#### **3. Dedicated Hosting – Best for High-Traffic Websites & Maximum Control**
**What is Dedicated Hosting?**
Dedicated hosting provides an **entire physical server exclusively for your website**, offering **maximum performance, security, and control**. It is the most powerful hosting solution available.
**Advantages of Dedicated Hosting:**
✅ **Full Control** – Complete access to server configurations, including software and security settings.
✅ **High Performance** – Dedicated resources ensure faster load times and higher reliability.
✅ **Enhanced Security** – No risk from other websites, making it a preferred choice for financial institutions and large enterprises.
**Disadvantages of Dedicated Hosting:**
❌ **Expensive** – The most costly hosting option.
❌ **Technical Expertise Needed** – Requires advanced server management skills or hiring an administrator.
**Who Should Use Dedicated Hosting?**
✔️ Large businesses, enterprises, high-traffic websites, and organizations that require maximum security.
#### **4. Cloud Hosting – Best for Scalability & High Reliability**
**What is Cloud Hosting?**
Cloud hosting uses **multiple connected servers** to host your website, ensuring high availability and performance. If one server fails, another takes over, making cloud hosting a **scalable and highly reliable** solution.
**Advantages of Cloud Hosting:**
✅ **Scalability** – Easily increase or decrease server resources as needed.
✅ **High** Uptime – Since multiple servers share the workload, downtime is minimized.
✅ **Pay-As-You-Go Pricing** – You only pay for the resources you use.
\### **Disadvantages of Cloud Hosting:**
❌ **More Expensive Than Shared Hosting** – Pricing can be unpredictable if traffic spikes.
❌ **Complex Setup** – Requires some technical knowledge to configure properly.
**Who Should Use Cloud Hosting?**
✔️ Websites with fluctuating traffic, startups, apps, and businesses needing high reliability.
#### **Final Thoughts: Choosing the Right Hosting**
Choosing the best web hosting type depends on **your website’s needs, budget, and technical expertise**:
\- **For beginners or small businesses**, shared hosting is the best choice.
\- **For growing websites that need better performance**, VPS hosting is ideal.
\- **For high-traffic, resource-intensive websites**, dedicated hosting is the top option.
\- **For websites requiring scalability and high availability**, cloud hosting is the best solution.
By understanding the differences between these hosting types, you can **make an informed decision** and choose the best hosting for your website’s growth and success.
# Control Panel & Server Management
# cPanel Guide: How to Navigate & Use It
#### Introduction
cPanel is one of the most popular web hosting control panels, offering an intuitive interface for managing your website, email accounts, databases, and more. Whether you're a beginner or an experienced user, knowing how to navigate and utilize cPanel effectively can greatly improve your web hosting experience. This guide will walk you through the essential sections and features of cPanel to help you get started.
#### Step 1: Logging into cPanel
To access your cPanel account:
1. Open your web browser and go to one of the following URLs:
* `https://yourdomain.com/cpanel`
* `https://yourhost.com/cpanel`
* `https://yourdomain.com:2083`
2. Enter your cPanel username and password.
3. Click **Log In** to access the cPanel dashboard.
If you’ve forgotten your login credentials, use the **Forgot Password** option or contact your hosting provider for assistance.
#### Step 2: Navigating the cPanel Dashboard
Once logged in, you’ll see the cPanel dashboard, which consists of multiple sections categorized for easy access. Here are the main sections you need to know:
#### 1. **Files Section**
* **File Manager**: Allows you to upload, edit, and manage your website files.
* **Images**: Manage and optimize image files.
* **FTP Accounts**: Set up and manage FTP users for file transfers.
* **Backup**: Create and restore backups of your website files and databases.
#### 2. **Databases Section**
* **MySQL Databases**: Create and manage MySQL databases.
* **phpMyAdmin**: Provides a web-based interface to manage database tables, run queries, and export/import data.
* **MySQL Database Wizard**: Simplifies database creation and user management.
#### 3. **Domains Section**
* **Addon Domains**: Allows you to host multiple domains on one hosting account.
* **Subdomains**: Create subdomains like `blog.yourdomain.com`.
* **Aliases (Parked Domains)**: Point multiple domain names to the same website.
* **Redirects**: Redirect one domain to another URL.
#### 4. **Email Section**
* **Email Accounts**: Create and manage email addresses.
* **Forwarders**: Automatically forward emails to another address.
* **Autoresponders**: Set up automatic email replies.
* **Spam Filters**: Manage spam protection settings.
#### 5. **Metrics Section**
* **Visitors**: See recent traffic statistics for your website.
* **Errors**: Check error logs for troubleshooting website issues.
* Bandwidth: Monitor your website's data usage.
#### 6. **Security Section**
* **SSL/TLS**: Manage SSL certificates to enable HTTPS security.
* **IP Blocker**: Restrict access from specific IP addresses.
* **Leech Protection**: Prevent unauthorized access to restricted directories.
#### 7. **Software Section**
* **Softaculous App Installer**: Install popular applications like WordPress, Joomla, and Drupal.
* **PHP Version Selector**: Manage and update your PHP version.
* **Perl Modules**: Install and manage Perl scripts.
#### 8. **Advanced Section**
* **Cron Jobs**: Automate scheduled tasks.
* Apache **Handlers**: Customize how Apache handles file types.
* **Error Pages**: Customize 404, 500, and other error pages.
#### Step 3: Managing Files with File Manager
The **File Manager** is a powerful tool within cPanel that allows you to manage your website files directly from the browser. To use it:
1. Click **File Manager** under the Files section.
2. Navigate to the `public_html` folder, which is the root directory of your website.
3. Upload, delete, or edit files as needed.
4. Use the built-in code editor to modify scripts and configuration files.
#### Step 4: Setting Up Email Accounts
To create an email account:
1. Click **Email Accounts** under the Email section.
2. Click **Create** and enter your desired email address and password.
3. Choose the storage limit and click **Create**.
4. Access your email through Webmail or set up an email client like Outlook or Thunderbird.
#### Step 5: Installing WordPress Using Softaculous
If you want to install WordPress, follow these steps:
1. Scroll to the **Software** section and click **Softaculous App Installer**.
2. Select **WordPress** and click **Install Now**.
3. Fill in the necessary details such as site name, admin username, and password.
4. Click **Install**, and within minutes, WordPress will be set up.
#### Conclusion
cPanel is a powerful tool that simplifies website and server management. By familiarizing yourself with its sections and features, you can efficiently manage your hosting environment. Whether you need to update files, create databases, set up emails, or install software, cPanel provides an easy-to-use interface for all your web hosting needs. If you run into any issues, consult your hosting provider’s support team for assistance.
# How to Manage Users & Permissions
#### Introduction
Managing users and permissions is crucial for maintaining security and control over your server or hosting environment. Whether you are using a control panel like cPanel, Plesk, or DirectAdmin, or managing a Linux server via SSH, understanding how to create users and assign appropriate permissions ensures that only authorized individuals can access and modify critical files. This guide will walk you through the process of managing users and permissions effectively.
#### Step 1: Understanding User Roles and Permissions
#### **Types of Users**
* **Administrator (Root/Superuser):** Has full control over the server and all files.
* **Reseller:** In control of managing multiple hosting accounts (common in shared hosting environments).
* **Regular Users:** Can manage their websites and email accounts but have limited access to server settings.
* **FTP Users:** Only have access to upload/download files.
#### **Permission Levels**
* **Read (r):** Allows viewing file contents.
* **Write (w):** Allows modifying or deleting files.
* **Execute (x):** Allows running scripts or applications.
* **Owner, Group, Others:** Determines who can access files (owner, specific user groups, or the public).
#### Step 2: Managing Users & Permissions in cPanel
1. **Log into cPanel**
* Access cPanel via `https://yourdomain.com/cpanel`.
2. **Create New Users**
* Navigate to **User Manager** under the **Preferences** section.
* Click **Add User**, enter details (username, email, password), and set privileges.
3. **Assign File Permissions**
* Use the **File Manager** in cPanel.
* Right-click a file or folder and select **Change Permissions** to modify access levels.
4. **Manage FTP Accounts**
* Go to **FTP Accounts** to create and manage access for different users.
#### Step 3: Managing Users & Permissions in Plesk
1. **Log into Plesk**
* Access Plesk via `https://yourdomain.com:8443`.
2. **Create User Accounts**
* Navigate to **Users** > **Add User**.
* Assign roles such as Administrator, Web User, or FTP User.
3. **Set Permissions**
* In **File Manager**, select a file or directory and modify access settings.
4. **Manage FTP & Database Users**
* Under **Websites & Domains**, you can create database and FTP users with restricted access.
#### Step 4: Managing Users & Permissions in DirectAdmin
1. **Log into DirectAdmin**
* Access DirectAdmin via `https://yourdomain.com:2222`.
2. **Add Users**
* Go to **Account Manager** > **User Accounts**.
* Click **Create User** and assign necessary privileges.
3. **Modify File Permissions**
* Use the **File Manager** to adjust file and folder permissions.
#### Step 5: Managing Users & Permissions via SSH (Linux Server)
If you're using a VPS or dedicated server without a control panel, you can manage users via SSH.
#### **Creating Users**
```bash
sudo adduser newusername
```
BashCopy
#### **Assigning User Permissions**
* Change file ownership:
```bash
sudo chown username:groupname /path/to/file
```
BashCopy
* Modify permissions:
```bash
sudo chmod 755 /path/to/file
```
BashCopy
#### **Granting Sudo Privileges**
To give a user administrative privileges, add them to the sudo group:
```bash
sudo usermod -aG sudo newusername
```
BashCopy
#### **Managing User Access**
* List users:
```bash
cat /etc/passwd
```
BashCopy
* Delete a user:
```bash
sudo deluser username
```
BashCopy
#### Best Practices for User Management
* **Use the principle of least privilege (PoLP):** Grant only necessary permissions.
* **Regularly review user access:** Remove or restrict inactive users.
* **Use strong passwords and SSH keys:** Enhance security by enforcing strong authentication methods.
* **Monitor user activity:** Check logs for unauthorized access attempts.
#### Conclusion
Proper user and permission management is essential for maintaining security and efficiency in your hosting environment. Whether using cPanel, Plesk, DirectAdmin, or a Linux server, ensuring the right users have the correct level of access helps protect your data and server integrity.
# Plesk Overview: Managing Your Hosting
#### Introduction
Plesk is a powerful and user-friendly web hosting control panel that allows users to manage websites, domains, emails, databases, and server settings efficiently. Whether you’re a beginner or an experienced web administrator, Plesk simplifies hosting management through an intuitive interface with automation capabilities. This guide provides an overview of Plesk and its essential features to help you manage your hosting effectively.
#### Step 1: Logging into Plesk
To access your Plesk control panel:
1. Open your web browser and enter your Plesk login URL, usually in the following format:
* `https://yourdomain.com:8443`
* `https://yourserverip:8443`
2. Enter your username and password.
3. Click **Log In** to access the Plesk dashboard.
If you have forgotten your credentials, use the **Forgot Password** option or contact your hosting provider.
#### Step 2: Navigating the Plesk Dashboard
After logging in, you’ll see the Plesk dashboard, which consists of several sections that allow you to manage different aspects of your hosting environment. The primary sections include:
**1.Websites & Domains**
This section allows you to manage all aspects of your domains and websites. Key features include:
* Adding and managing domains and subdomains.
* Configuring domain settings such as DNS and redirects.
* Managing SSL/TLS certificates for secure connections.
**2.Files**
The **File Manager** in Plesk enables you to:
* Upload, edit, and delete files directly from the browser.
* Modify file permissions.
* Extract and compress files within the interface.
**3.Databases**
Manage your MySQL and PostgreSQL databases easily with Plesk:
* Create new databases and database users.
* Use **phpMyAdmin** for database management.
* Import and export database backups.
**4.Email**
Plesk provides built-in email management features that let you:
* Create and manage email accounts.
* Configure email forwarding and autoresponders.
* Set up spam filters and anti-virus settings.
**5.Security**
Security is a critical aspect of web hosting, and Plesk offers several tools to keep your website safe:
* **SSL/TLS Certificates**: Easily install free or paid SSL certificates.
* Firewall **Configuration**: Protect your server from unauthorized access.
* **Fail2Ban**: Prevent brute-force attacks by blocking repeated login attempts.
**6.Applications**
Plesk supports a variety of web applications, including:
* One-click installations of WordPress, Joomla, and Drupal.
* E-commerce tools such as Magento and PrestaShop.
* Web development tools like Git and Node.js.
**7.Backup & Restore**
Ensuring your data is safe is crucial, and Plesk allows you to:
* Schedule automatic backups of your websites and databases.
* Restore backups when needed.
* Download backups to your local machine.
**8.Server Management**
For users with VPS or dedicated servers, Plesk offers:
* Resource monitoring for CPU, RAM, and disk usage.
* Log file access to diagnose issues.
* Ability to restart services like Apache, Nginx, and MySQL.
#### Step 3: Managing Websites with Plesk
Plesk makes it simple to manage your websites. Here’s how to perform common tasks:
#### Adding a New Website
1. Navigate to **Websites & Domains**.
2. Click **Add Domain** or **Add Subdomain**.
3. Enter the required details and confirm.
Installing WordPress
1. Go to **Applications** and select **WordPress Toolkit**.
2. Click **Install** and configure your settings.
3. Complete the installation and access your WordPress dashboard.
#### Step 4: Configuring Email Accounts
To create a new email account:
1. Go to **Mail** > **Create Email Address**.
2. Enter your desired email address and password.
3. Choose the mailbox size limit and save the settings.
4. Access your email through Webmail or configure an external client like Outlook.
#### Conclusion
Plesk provides a feature-rich and intuitive platform for managing your hosting efficiently. Whether you need to handle domains, websites, emails, databases, or security, Plesk offers all the tools necessary to streamline hosting management. By familiarizing yourself with its interface and key functionalities, you can easily optimize your web hosting experience. If you encounter issues, consult Plesk’s documentation or reach out to your hosting provider’s support team for assistance.
# How to Enable SSH Access to Your Server
#### Introduction
Secure Shell (SSH) is a crucial tool for remote server management, allowing users to securely access and control their servers via a command-line interface. Whether you're a developer, system administrator, or website owner, enabling SSH access can significantly enhance your ability to manage your server. This guide will walk you through the steps to enable SSH access on your server, covering different control panels and server environments.
#### Step 1: Check if SSH is Already Enabled
Before enabling SSH, check if it is already active on your server.
* On Linux/macOS, open a terminal and type:
```bash
ssh your-user@your-server-ip
```
BashCopy
* If you receive a connection prompt, SSH is already enabled.
* If the connection is refused, follow the next steps to enable SSH.
#### Step 2: Enable SSH Access viacPanel
1. **Log into cPanel**
* Access your cPanel by navigating to `https://yourdomain.com/cpanel`.
2. **Go to SSH Access**
* Find the **SSH Access** option under the **Security** section.
3. **Manage SSH Keys**
* Click **Manage SSH Keys** to create a new key pair (public and private).
* Select **Generate a New Key**, enter a passphrase (optional), and click **Generate Key**.
* Authorize the newly created key under **Manage Keys**.
4. **Download and Use Your SSH Key**
* Click **View/Download** the private key and save it to your computer.
* Use an SSH client like PuTTY (Windows) or OpenSSH (Linux/macOS) to connect.
#### Step 3: Enable SSH Access via DirectAdmin
1. **Log into DirectAdmin**
* Navigate to your DirectAdmin panel: `https://yourdomain.com:2222`.
2. **Check User-Level Access**
* Go to **Account Manager** > **SSH Keys**.
* If the option is not available, contact your hosting provider to enable SSH.
3. **Create an SSH Key Pair**
* Click **Create SSH Key**, generate the keys, and download the private key.
* Use an SSH client to connect.
#### Step 4: Enable SSH Access via Plesk
1. **Log into Plesk**
* Access Plesk via `https://yourdomain.com:8443`.
2. **Enable SSH for Your User Account**
* Navigate to **Websites & Domains** > **Hosting & DNS** > **Web Hosting Access**.
* Set the **Access to the server over SSH** option to **/bin/bash** or another shell.
3. **Use SSH to Connect**
* Open a terminal and connect using:
```bash
ssh your-user@your-server-ip
```
BashCopy
#### Step 5: Enable SSH Access on Linux Servers (Without a Control Panel)
If you are using a VPS or Dedicated Server without a control panel, you may need to enable SSH manually.
#### **Install and Start the SSH Service**
On Ubuntu/Debian-based servers:
```bash
sudo apt update && sudo apt install openssh-server -y
sudo systemctl enable ssh
sudo systemctl start ssh
```
BashCopy
On CentOS/RHEL-based servers:
```bash
sudo yum install -y openssh-server
sudo systemctl enable sshd
sudo systemctl start sshd
```
BashCopy
#### **Adjust**Firewall**Settings**
If your firewall blocks SSH connections, allow SSH access:
```bash
sudo ufw allow ssh # For Ubuntu/Debian
sudo firewall-cmd --permanent --add-service=ssh && sudo firewall-cmd --reload # For CentOS/RHEL
```
BashCopy
#### **Verify SSH Status**
Check if SSH is running with:
```bash
sudo systemctl status ssh
```
BashCopy
#### Step 6: Secure Your SSH Access
To enhance security, follow these best practices:
* **Change the Default SSH Port** (e.g., from 22 to another number):
* Edit the SSH configuration file: `sudo nano /etc/ssh/sshd_config`
* Change `Port 22` to another port (e.g., `Port 2222`), save, and restart SSH: `sudo systemctl restart ssh`
* **Disable Root Login**:
* Edit `sshd_config` and set `PermitRootLogin no`.
* **Use SSH Keys Instead of Passwords**:
* Generate an SSH key using `ssh-keygen` and copy it to the server with `ssh-copy-id your-user@your-server-ip`.
#### Conclusion
Enabling SSH access to your server allows for secure and efficient management. Whether you're using cPanel, DirectAdmin, Plesk, or a standalone Linux server, following these steps ensures you can access your server safely. Always prioritize security by using strong authentication methods and limiting SSH access where necessary.
# DirectAdmin vs. cPanel: Which One to Choose?
#### Introduction
Choosing the right web hosting control panel is crucial for website management, whether you're a beginner or an experienced administrator. DirectAdmin and cPanel are two of the most popular options, each offering a unique set of features, usability, and pricing. This guide compares DirectAdmin and cPanel to help you decide which one suits your needs best.
#### Overview of DirectAdmin and cPanel
#### **What is DirectAdmin?**
DirectAdmin is a lightweight and user-friendly web hosting control panel designed for simplicity and efficiency. It provides essential features to manage domains, websites, emails, and databases without excessive resource consumption.
#### **What is cPanel?**
cPanel is a powerful and widely used web hosting control panel that offers an extensive range of features. It is known for its intuitive graphical user interface (GUI), automation tools, and comprehensive server management capabilities.
#### Key Differences Between DirectAdmin and cPanel
#### **1. User Interface & Ease of Use**
* **DirectAdmin:** Features a minimalistic and straightforward design, making it easy to navigate. It is particularly suited for users who prefer a clutter-free experience.
* **cPanel:** Offers a more feature-rich and visually appealing interface, making it user-friendly but sometimes overwhelming for beginners.
#### **2. Features & Functionality**
* **DirectAdmin:** Includes essential hosting features such as domain management, email accounts, FTP access, and MySQL databases. It supports third-party plugins but is not as extensible as cPanel.
* **cPanel:** Provides a comprehensive suite of tools, including Softaculous for one-click app installations, advanced security options, website backups, and integration with WHM (Web Host Manager) for Reseller Hosting.
#### **3. Performance & Resource Usage**
* **DirectAdmin:** Consumes fewer server resources, making it ideal for VPS and dedicated servers with limited resources.
* **cPanel:** More resource-intensive due to its extensive feature set but provides greater functionality and flexibility.
#### **4. Security Features**
* **DirectAdmin:** Includes standard security measures such as Firewall configuration, SSL management, and brute-force attack protection.
* **cPanel:** Offers advanced security features, including automatic SSL provisioning, Malware detection, and IP blocking.
#### **5. Pricing**
* **DirectAdmin:** Generally more affordable, with a one-time license fee and budget-friendly subscription options.
* **cPanel:** More expensive due to its licensing structure, which charges per account, making it less cost-effective for hosting multiple domains.
#### **6. Support & Community**
* **DirectAdmin:** Offers a smaller but dedicated support team, with community forums for troubleshooting.
* **cPanel:** Boasts extensive documentation, a large user community, and professional support services.
#### Which One Should You Choose?
* **Choose DirectAdmin if:**
* You are looking for a lightweight and budget-friendly control panel.
* You prefer a minimalistic interface with essential features.
* Your server has limited resources and requires efficient performance.
* **Choose cPanel if:**
* You need a feature-rich control panel with extensive customization options.
* You manage multiple websites and require advanced automation tools.
* You prefer comprehensive security features and better customer support.
#### Conclusion
Both DirectAdmin and cPanel offer valuable hosting management solutions, each with its own strengths and weaknesses. DirectAdmin is a great choice for users who need a cost-effective, lightweight, and efficient control panel, while cPanel is ideal for those who require a robust and feature-packed hosting environment. Consider your hosting needs, budget, and technical requirements before making a decision.
# Website Setup & Management
# How to Set Up a Custom Error Page
#### Introduction
A custom error page enhances user experience by providing informative messages when an error occurs, such as a **404 Page Not Found** or **500 Internal Server Error**. Instead of displaying generic error messages, you can design your own error page with branding and helpful navigation links. This guide will walk you through setting up custom error pages for your website.
#### Step 1: Determine Which Error Pages You Need
Common error pages include:
* **404 Not Found** – When a page does not exist.
* **403 Forbidden** – When access is denied.
* **500 Internal Server Error** – When the server encounters an issue.
* **503 Service Unavailable** – When the server is temporarily down.
Identify which pages you want to customize before proceeding.
#### Step 2: Create Your Custom Error Page
1. Open a text editor or an HTML editor (e.g., Notepad++, Visual Studio Code).
2. Create an HTML file with a descriptive message, such as:
```html
Page Not Found
Oops! Page Not Found (404)
The page you are looking for might have been removed or is temporarily unavailable.
Return to Homepage
```
HTMLCOPY
3. Save the file as `404.html`, `403.html`, or the corresponding error name.
#### Step 3: Upload Your Error Page to the Server
1. Open **File Manager** in cPanel or connect via **FTP**.
2. Navigate to the `public_html` directory.
3. Upload the custom error page files (e.g., `404.html`).
#### Step 4: Configure the `.htaccess`File (For ApacheServers)
1. Locate the `.htaccess` file in `public_html` (create one if it doesn’t exist).
2. Open it with a text editor and add the following lines:
```apache
ErrorDocument 404 /404.html
ErrorDocument 403 /403.html
ErrorDocument 500 /500.html
```
ApacheCOPY
3. Save and upload the updated `.htaccess` file.
#### Step 5: Configure Custom Error Pages in cPanel (Alternative Method)
1. Log into **cPanel**.
2. Navigate to **Advanced > Error Pages**.
3. Select the domain for which you want to set up error pages.
4. Click on the error code (e.g., `404`), then enter or paste your custom HTML content.
5. Click **Save**.
#### Step 6: Test Your Custom Error Pages
1. Open a browser and type a non-existent URL (e.g., `yourdomain.com/nonexistentpage`).
2. If configured correctly, your custom 404 error page should appear.
3. Repeat the test for other error pages.
#### Conclusion
Custom error pages improve user experience by offering helpful guidance when an error occurs. Whether using `.htaccess` or cPanel’s built-in options, setting up branded and user-friendly error pages helps maintain engagement and professionalism on your website.
# How to Upload Your Website via FTP
File Transfer Protocol (FTP) is a standard method for transferring files between your computer and a web server. It is commonly used to upload websites, update files, and manage web content efficiently. This guide will walk you through the steps to upload your website via FTP.
***
#### What is FTP?
FTP (File Transfer Protocol) is a method used to transfer files to and from a web server. You need an FTP client, such as **FileZilla**, **Cyberduck**, or **WinSCP**, to connect to your server and upload files.
**Common Uses of FTP:**
* Uploading website files.
* Updating existing website content.
* Managing and organizing files on the server.
* Backing up website files.
***
#### Prerequisites for Using FTP
Before uploading your website via FTP, ensure you have the following:
1. **FTP Client** – Install an FTP program like **FileZilla (Windows/Mac/Linux)** or **Cyberduck (Mac/Windows)**.
2. **FTP Credentials** – Your hosting provider will provide the details:
* **FTP Host (Server Name)**: e.g., `ftp.yourdomain.com`
* **Username**: Your FTP account username
* **Password**: Your FTP password
* **Port**: Default is `21` for FTP and `22` for SFTP
3. **Website Files** – Ensure all website files, including `index.html`, CSS, and scripts, are ready for upload.
***
#### Step-by-Step Guide to Uploading Your Website via FTP
**Step 1: Connect to Your FTP Server**
1. Open your FTP client (e.g., **FileZilla**).
2. Go to **File > Site Manager**.
3. Click **New Site** and enter the following details:
* **Host**: Your FTP server name (e.g., `ftp.yourdomain.com`)
* **Port**: `21` (for FTP) or `22` (for SFTP)
* **Protocol**: Choose **FTP - File Transfer Protocol**
* **Encryption**: Choose **Use explicit FTP over TLS if available** (for security)
* **Logon Type**: Select **Normal**
* **Username** and **Password**: Enter your credentials
4. Click **Connect**.
**Step 2: Navigate to Your Website’s Root Directory**
* Once connected, locate the **public\_html** or **www** folder.
* This is your website’s root directory where all public files are stored.
**Step 3: Upload Website Files**
1. On your computer, find the folder containing your website files.
2. Drag and drop files from your local computer to the **public\_html** folder.
3. Wait for the transfer to complete. The status bar will show progress.
**Step 4: Verify File Uploads**
* After uploading, check that all files appear in the **public\_html** folder.
* Visit your domain (`www.yourdomain.com`) to confirm that your website is live.
***
#### Using FTP with a Website Builder
If you're using a CMS like **WordPress**, Joomla, or Drupal, you may need to upload specific directories such as:
* `/wp-content/themes/` for WordPress themes.
* `/wp-content/plugins/` for WordPress plugins.
* `/images/` for website images.
***
#### Troubleshooting FTP Upload Issues
**Cannot Connect to FTP Server**
* Ensure **FTP details** are correct.
* Check if **FTP access is enabled** in your hosting panel.
* Try using **SFTP** (secure FTP) if standard FTP is blocked.
**Files Not Appearing on Website**
* Ensure files are uploaded to the correct **public\_html** folder.
* Clear your browser cache and refresh the page.
* Check file permissions (use `chmod 644` for files and `chmod 755` for folders).
**Slow File Transfers**
* Compress large files into a `.zip` archive and extract them on the server.
* Switch to **SFTP** for better stability and security.
***
#### Conclusion
Uploading your website via FTP is a reliable and efficient way to manage website files. By following this guide, you can successfully transfer your files and troubleshoot common issues. Regularly updating your website via FTP ensures smooth performance and security.
# How to Create a Staging Site
#### Introduction
A staging site is a clone of your live website that allows you to test updates, new features, or major changes before deploying them to the live site. This ensures that any potential issues can be resolved without affecting your users. Many hosting providers offer built-in staging environments, while others require manual setup. This guide will walk you through creating a staging site using different methods.
#### Step 1: Check If Your Hosting Provider Supports Staging
Before setting up a staging site, check if your hosting provider offers one-click staging. Managed WordPress hosting services like SiteGround, Bluehost, and WP Engine provide built-in staging environments.
#### How to Check
1. **Log into your hosting account**.
2. **Look for a staging option** under your website management section.
3. **If available, use the built-in tool** to create a staging copy.
4. **If not available, follow the manual setup process** outlined below.
#### Step 2: Creating a Staging Site UsingcPanel(Manual Method)
If your hosting provider does not offer built-in staging, you can create a manual staging site using cPanel.
#### 1.**Create a Subdomain for the Staging Site**
1. Log into **cPanel**.
2. Click on **Subdomains** under the **Domains** section.
3. Enter a name for your staging site (e.g., `staging.yourdomain.com`).
4. Click **Create**.
#### 2.**Copy Your Website Files**
1. Open **File Manager** in cPanel.
2. Navigate to `public_html` (your live site directory).
3. Select all files and click **Copy**.
4. Paste them into the subdomain folder (`staging.yourdomain.com`).
#### 3.**Create a Staging Database**
1. In cPanel, go to **MySQL Databases**.
2. Create a new database for the staging site.
3. Create a new database user and assign it to the new database.
4. Grant **All Privileges** to the user.
#### 4.**Update the Staging Site Configuration**
1. Open the `wp-config.php` file in File Manager.
2. Update the database name, username, and password to match the new database.
3. Save the changes.
#### Step 3: Using a Staging Plugin for WordPress
For WordPress users, staging can be simplified using a plugin.
#### Recommended Plugins
* **WP Staging** (Free & Pro versions available)
* **Duplicator** (Manual cloning & migration)
* **All-in-One WP Migration**
#### How to Use WP Staging
1. Install and activate the **WP Staging** plugin.
2. Go to **WP Staging > Create New Staging Site**.
3. Click **Start Cloning**.
4. Once complete, access your staging site and test changes.
#### Step 4: Deploying Changes to Live Site
Once you’ve tested your updates on the staging site, you can push them live.
#### If Using a Hosting Staging Feature
* Click the **Push to Live** button in your hosting panel.
#### If Using a Plugin
* WP Staging Pro allows a one-click deployment.
* Duplicator can be used to migrate changes manually.
#### If Using Manual Staging
1. Copy updated files from the staging site to the live site using FTP or File Manager.
2. Export the updated database and import it into the live database.
#### Conclusion
A staging site is an essential tool for website development and maintenance. Whether you use a hosting provider’s built-in staging, a WordPress plugin, or a manual method via cPanel, setting up a staging site helps prevent errors on your live website. Always test changes thoroughly before deploying them to ensure a smooth user experience.
# How to Use File Manager in cPanel
#### Introduction
The File Manager in cPanel is a powerful tool that allows you to manage website files directly from your web browser, eliminating the need for FTP clients. It provides an intuitive interface to upload, edit, delete, and organize files on your hosting server. This guide will walk you through navigating and using File Manager in cPanel effectively.
#### Step 1: Accessing File Manager in cPanel
1. **Log into cPanel**
* Visit `https://yourdomain.com/cpanel` and enter your credentials.
2. **Locate the File Manager**
* In the **Files** section, click on **File Manager**.
3. **Choose the Directory**
* By default, it opens in the `home` directory. Navigate to `public_html` for your website files.
#### Step 2: Navigating the File Manager Interface
The File Manager interface consists of:
* **Left Sidebar:** Displays the directory structure.
* **Right Panel:** Shows the contents of the selected directory.
* **Toolbar:** Contains options like upload, create, rename, and delete.
#### Step 3: Uploading Files
1. **Navigate to the destination folder** (e.g., `public_html`).
2. **Click on Upload** in the top toolbar.
3. **Select Files** from your local computer.
4. **Monitor the Upload Progress** and return to File Manager once completed.
#### Step 4: Creating and Editing Files
#### Creating a New File
1. Click on **+ File** in the toolbar.
2. Enter the file name and destination folder.
3. Click **Create New File**.
#### Editing a File
1. Select the file you want to edit.
2. Click **Edit** in the toolbar.
3. Modify the content and click **Save Changes**.
#### Step 5: Managing Files and Folders
#### Renaming Files/Folders
1. Select the file/folder.
2. Click **Rename** in the toolbar.
3. Enter the new name and press **Enter**.
#### Deleting Files/Folders
1. Select the file/folder.
2. Click **Delete** in the toolbar.
3. Confirm deletion by clicking **Delete Permanently** or move to Trash.
#### Moving Files/Folders
1. Select the file/folder.
2. Click **Move** in the toolbar.
3. Specify the destination folder and confirm.
#### Step 6: Changing File Permissions
1. Select the file/folder.
2. Click **Permissions** in the toolbar.
3. Adjust the read, write, and execute permissions.
4. Click **Change Permissions**.
#### Step 7: Extracting and Compressing Files
#### Extracting Files
1. Select the compressed file (e.g., `.zip` or `.tar`).
2. Click **Extract** in the toolbar.
3. Choose the destination folder and confirm extraction.
#### Compressing Files
1. Select the files/folders to compress.
2. Click **Compress** in the toolbar.
3. Choose the compression type (ZIP, TAR, etc.).
4. Click **Compress Files**.
#### Conclusion
The File Manager in cPanel is a user-friendly tool for managing your website files without needing additional software. By using its features efficiently, you can upload, edit, organize, and secure your files with ease. Whether you're a beginner or an advanced user, mastering File Manager will streamline website managemen
# How to Install WordPress (or Other CMS)
#### Introduction
Installing a Content Management System (CMS) like WordPress, Joomla, or Drupal is an essential step in setting up a website. A CMS allows you to create, manage, and modify website content without extensive coding knowledge. This guide will walk you through installing WordPress (or other CMS) using different methods, including automated installers and manual installation.
#### Step 1: Choosing a Hosting Environment
Before installing WordPress or any CMS, ensure you have the right hosting setup:
* Shared Hosting: Ideal for beginners, comes with control panels like cPanel or Plesk.
* **VPS or Dedicated Hosting**: Provides more control and requires manual setup.
* **Managed WordPress Hosting**: Optimized for WordPress performance and security.
#### Step 2: Installing WordPress via Auto Installer (cPanel, Plesk, or DirectAdmin)
Most hosting providers offer automated installation tools, such as Softaculous, Installatron, or Plesk’s WordPress Toolkit.
#### **Installing WordPress via cPanel (Softaculous)**
1. **Log into cPanel**
* Access your cPanel by navigating to `https://yourdomain.com/cpanel`.
2. **Open Softaculous Installer**
* Locate **Softaculous Apps Installer** under the Software section.
* Click on **WordPress**.
3. **Configure Installation Settings**
* Choose the domain where you want to install WordPress.
* Set up an admin username, password, and email.
4. **Install WordPress**
* Click **Install** and wait for the process to complete.
* Access your website at `https://yourdomain.com/wp-admin/`.
#### **Installing WordPress via Plesk**
1. **Log into Plesk**
* Access Plesk via `https://yourdomain.com:8443`.
2. **Use WordPress Toolkit**
* Navigate to **Applications** > **WordPress**.
* Click **Install**, select domain, and configure admin details.
3. **Complete Installation**
* Once installed, log in via `https://yourdomain.com/wp-admin/`.
#### **Installing WordPress via DirectAdmin**
1. **Log into DirectAdmin**
* Access DirectAdmin via `https://yourdomain.com:2222`.
2. **Use Installatron**
* Navigate to **Extra Features** > **Installatron**.
* Select **WordPress**, configure details, and install.
#### Step 3: Manual Installation of WordPress
If you prefer manual installation, follow these steps:
#### **Download WordPress**
1. Go to [WordPress.org](https://wordpress.org/download/) and download the latest version.
2. Extract the downloaded zip file.
#### **Upload WordPress Files to Server**
1. Use an FTP client like FileZilla to connect to your server.
2. Upload WordPress files to the root directory (`public_html`).
#### **Create a Database**
1. Log into cPanel or Plesk.
2. Navigate to **MySQL Databases**.
3. Create a new database and user, then assign full privileges.
#### **Configure wp-config.php**
1. Rename `wp-config-sample.php` to `wp-config.php`.
2. Open the file and add database details:
```php
define('DB_NAME', 'your_database');
define('DB_USER', 'your_username');
define('DB_PASSWORD', 'your_password');
define('DB_HOST', 'localhost');
```
PHPCopy
#### **Run the Installation Script**
1. Open your browser and visit `https://yourdomain.com/wp-admin/install.php`.
2. Follow the on-screen instructions to complete the setup.
#### Step 4: Installing Other CMS (Joomla, Drupal, etc.)
The process for installing Joomla or Drupal is similar to WordPress:
* **Use Auto Installers**: Available in cPanel, Plesk, or DirectAdmin.
* **Manual Installation**: Upload CMS files, create a database, and follow the setup instructions from the CMS provider.
#### Conclusion
Installing WordPress or another CMS is straightforward with auto-installers, but manual installation provides more control. Whether you use cPanel, Plesk, DirectAdmin, or a standalone VPS, this guide ensures a smooth CMS setup for your website.
# Email Hosting & Management
# How to Prevent Spam with Email Filters
#### Introduction
Spam emails can clutter your inbox, pose security risks, and reduce productivity. By setting up email filters, you can automatically detect and block unwanted messages before they reach your inbox. This guide will walk you through configuring spam filters in both cPanel and Plesk to help prevent spam effectively.
***
#### Setting Up Spam Filters in cPanel
#### Step 1: Access the Spam Filters Tool
1. Log in to **cPanel**.
2. Navigate to the **Email** section and click on **Spam Filters**.
#### Step 2: Enable Spam Filtering
1. Locate the **SpamAssassin** section.
2. Click the toggle to enable **Spam Filters**.
3. Once enabled, cPanel will begin filtering spam automatically.
#### Step 3: Adjust Spam Threshold Settings
1. Click on **Spam Threshold Score**.
2. Lower scores make the filter stricter (default is 5; setting it to 3 is more aggressive).
3. Save changes to apply the new threshold.
#### Step 4: Auto-Delete Spam (Optional)
1. Toggle **Auto-Delete Spam** to enable automatic deletion of spam emails.
2. Be cautious with this setting to avoid false positives.
#### Step 5: Create Custom Email Filters
1. Navigate to **Email Filters** in cPanel.
2. Click **Create a New Filter** and set up rules based on sender, subject, or keywords.
3. Define the action (e.g., move to Junk folder or delete).
4. Click **Save** to activate the filter.
***
#### Setting Up Spam Filters in Plesk
#### Step 1: Access Spam Filter Settings
1. Log in to **Plesk**.
2. Go to **Mail** and select your email account.
3. Click **Spam Filter**.
#### Step 2: Enable Spam Filtering
1. Check the box to enable spam filtering for the selected email account.
2. Click **Apply** to save changes.
#### Step 3: Adjust Sensitivity Levels
1. Set the spam sensitivity level (lower values mean stricter filtering).
2. Recommended values: 5 for balanced filtering, 3 for stricter filtering.
#### Step 4: Configure Actions for Spam Messages
1. Choose to either **move spam to the Spam folder** or **delete it automatically**.
2. Click **Apply** to finalize your changes.
#### Step 5: Whitelist and Blacklist Senders
1. Add trusted senders to the **Whitelist** to ensure their emails always arrive.
2. Add known spammers to the **Blacklist** to block their messages.
3. Click **Apply** to save these lists.
***
#### Additional Tips to Prevent Spam
* Use **strong passwords** to prevent email account hacks.
* Never click on suspicious links in spam emails.
* Use **CAPTCHAs** on contact forms to reduce spam submissions.
* Report spam emails to improve filtering accuracy.
***
#### Conclusion
Setting up spam filters in cPanel or Plesk is an effective way to reduce unwanted emails and keep your inbox clean. By enabling spam detection, adjusting sensitivity settings, and configuring custom filters, you can significantly decrease the number of spam messages you receive. If you continue to experience spam issues, consider contacting your hosting provider for additional assistance.
# How to Set Up Email Forwarding & Autoresponders
#### Introduction
Email forwarding and autoresponders are useful features for managing email communication efficiently. Email forwarding allows you to automatically redirect emails from one address to another, while autoresponders send predefined replies to incoming messages. This guide will walk you through setting up email forwarding and autoresponders using cPanel or Plesk.
***
#### Setting Up Email Forwarding in cPanel
#### Step 1: Access the Email Forwarding Section
1. Log in to **cPanel**.
2. Navigate to the **Email** section and click on **Forwarders**.
#### Step 2: Add a New Email Forwarder
1. Click **Add Forwarder**.
2. Enter the **Email Address** you want to forward emails from.
3. In the **Destination** field, enter the email address where you want to receive forwarded emails.
4. Click **Add Forwarder** to confirm the setup.
#### Step 3: Verify Forwarding Works
Send a test email to the original address and check if it arrives at the forwarded destination.
#### Managing Forwarders
* To view existing forwarders, go to the **Forwarders** section.
* You can delete a forwarder if it's no longer needed by clicking **Delete** next to it.
***
#### Setting Up Email Forwarding in Plesk
#### Step 1: Access Email Forwarding
1. Log in to **Plesk**.
2. Go to **Mail** and select the email account you want to configure.
3. Click **Forwarding**.
#### Step 2: Configure Forwarding
1. Check the **Switch on mail forwarding** box.
2. Enter one or more email addresses where you want emails forwarded.
3. Click **OK** to save the changes.
***
#### Setting Up an Autoresponder in cPanel
#### Step 1: Open the Autoresponder Tool
1. Log in to **cPanel**.
2. Go to **Email** > **Autoresponders**.
3. Click **Add Autoresponder**.
#### Step 2: Configure Autoresponder Settings
1. Choose the **Character Set** (UTF-8 recommended).
2. Set the **Interval** (how often the auto-reply is sent to the same sender).
3. Enter the **Email Address** for which the autoresponder is being set up.
4. Enter a **From Name** and **Subject** for the automated email.
5. Write your **Message** in the body section.
6. (Optional) Set a start and end time if the autoresponder is temporary.
7. Click **Create/Modify** to enable the autoresponder.
#### Step 3: Test Your Autoresponder
Send an email to the configured address and check if the auto-reply is sent correctly.
***
#### Setting Up an Autoresponder in Plesk
#### Step 1: Navigate to Autoresponder Settings
1. Log in to **Plesk**.
2. Go to **Mail** > Select the email account.
3. Click on **Auto-Reply**.
#### Step 2: Configure Auto-Reply
1. Enable **Auto-Reply**.
2. Enter the **Subject** and **Message**.
3. Set up optional forwarding of incoming messages.
4. (Optional) Specify the start and end time.
5. Click **OK** to save the settings.
***
#### Conclusion
Email forwarding and autoresponders are essential tools for email management. Whether you’re setting up automatic forwarding in cPanel or Plesk or configuring an autoresponder for vacation replies, following these steps will help you optimize your email workflow. If you experience any issues, check your settings or contact your hosting provider for assistance.
# How to Fix Email Sending & Receiving Issues
#### Introduction
Email communication is essential for both personal and business use. However, sometimes you may encounter issues sending or receiving emails. These problems can be caused by incorrect settings, server issues, or email client misconfigurations. This guide will help you troubleshoot and fix common email issues effectively.
#### Step 1: Check Your Email Configuration Settings
Incorrect email settings are a common reason for email problems. Verify the following details in your email client:
* **IMAP (Incoming) Server:** `mail.yourdomain.com`
* **POP3 (Incoming) Server:** `mail.yourdomain.com`
* **SMTP (Outgoing) Server:** `mail.yourdomain.com`
* **Username:** Your full email address (e.g., `you@yourdomain.com`)
* **Password:** Your email account password
* **IMAP Port:** `993` (SSL) or `143` (non-SSL)
* **POP3 Port:** `995` (SSL) or `110` (non-SSL)
* **SMTP Port:** `465` (SSL) or `587` (TLS)
* **Authentication:** SMTP authentication should be enabled
Check these settings in **cPanel > Email Accounts > Connect Devices** to ensure they match your email client.
***
#### Step 2: Verify Your Internet Connection
If your internet connection is unstable or down, your email client may not be able to send or receive messages. Try these steps:
1. Open a web browser and visit any website to confirm connectivity.
2. Restart your modem or router if the connection is slow.
3. Use a different network (e.g., mobile hotspot) to test email functionality.
***
#### Step 3: Check Webmail Access
If you're experiencing issues in an email client (e.g., Outlook, Gmail), try logging into your email through webmail:
1. Go to `https://yourdomain.com/webmail`.
2. Enter your email address and password.
3. If you can send and receive emails here, the problem is likely with your email client settings.
***
#### Step 4: Verify Email Account Storage
If your email account has exceeded its storage limit, new emails may not be received. To check and free up space:
1. Log into cPanel and navigate to **Email Accounts**.
2. Locate your email address and check its storage usage.
3. Delete old emails or increase storage limits if necessary.
***
#### Step 5: Check SMTP Authentication
Outgoing email issues often occur due to missing SMTP authentication. To enable it:
1. In your email client, go to **Account Settings**.
2. Navigate to **Outgoing Mail Server (SMTP)**.
3. Ensure **My outgoing server requires authentication** is enabled.
4. Use the same credentials as the incoming mail server.
***
#### Step 6: Check Spam and Junk Folders
Sometimes, incoming emails may be marked as spam and moved to the junk folder. Check these folders and mark legitimate emails as "Not Spam" to prevent future filtering.
***
#### Step 7: Check DNS & MX Records
Incorrect DNS or MX records can affect email delivery. Verify these records in your domain settings:
1. Log into your domain registrar or hosting panel.
2. Ensure the **MX records** point to your mail server (`mail.yourdomain.com`).
3. Add or update SPF, DKIM, and DMARC records to improve email deliverability.
***
#### Step 8: Contact Your Hosting Provider
If none of the above steps resolve the issue, your hosting provider may be experiencing email server problems. Contact their support and provide details such as error messages and the troubleshooting steps you've taken.
***
#### Conclusion
Email sending and receiving issues can often be resolved by verifying settings, checking webmail access, ensuring storage availability, and confirming authentication details. Following these steps will help you quickly troubleshoot and resolve common email issues.
# How to Configure Email in Outlook & Gmail
#### Introduction
Once you've created an email account in cPanel, the next step is configuring it with your preferred email client, such as Microsoft Outlook or Gmail. This allows you to send and receive emails seamlessly from your domain-based email. This guide will walk you through setting up your email in both Outlook and Gmail.
#### Step 1: Gather Email Configuration Settings
Before setting up your email in Outlook or Gmail, you’ll need the following details:
* **IMAP (Incoming) Server:** `mail.yourdomain.com`
* **POP3 (Incoming) Server:** `mail.yourdomain.com`
* **SMTP (Outgoing) Server:** `mail.yourdomain.com`
* **Username:** Your full email address (e.g., `you@yourdomain.com`)
* **Password:** The password you set when creating the email account
* **Port for IMAP:** 993 (SSL) or 143 (non-SSL)
* **Port for POP3:** 995 (SSL) or 110 (non-SSL)
* **Port for SMTP:** 465 (SSL) or 587 (TLS)
You can find these settings in cPanel by navigating to **Email Accounts > Connect Devices**.
***
#### Step 2: Configure Email in Outlook
#### 1. Open Outlook & Add a New Account
1. Open **Microsoft Outlook**.
2. Click **File** > **Add Account**.
3. Select **Manual setup or additional server types**, then click **Next**.
4. Choose **POP or IMAP** and click **Next**.
#### 2. Enter Account Details
1. **Your Name:** Enter your full name or business name.
2. **Email Address:** Enter your domain email (e.g., `you@yourdomain.com`).
3. **Account Type:** Choose **IMAP** (recommended) or **POP3**.
4. **Incoming Mail Server:** Enter `mail.yourdomain.com`.
5. **Outgoing Mail Server (SMTP):** Enter `mail.yourdomain.com`.
6. **Username:** Your full email address.
7. **Password:** Your email password.
#### 3. Configure Advanced Settings
1. Click **More Settings** > **Outgoing Server** tab.
2. Check **My outgoing server (SMTP) requires authentication**.
3. Under the **Advanced** tab:
* Set **IMAP port** to `993` and encryption to **SSL**.
* Set **SMTP port** to `465` (SSL) or `587` (TLS).
4. Click **OK**, then **Next**.
5. Outlook will test the settings; if successful, click **Finish**.
***
#### Step 3: Configure Email in Gmail
#### 1. Add Your Domain Email to Gmail
1. Open **Gmail** and go to **Settings** (gear icon) > **See all settings**.
2. Click the **Accounts and Import** tab.
3. Under **Check mail from other accounts**, click **Add a mail account**.
4. Enter your email address (e.g., `you@yourdomain.com`) and click **Next**.
#### 2. Configure Incoming Mail (POP3)
1. Choose **Import emails using POP3** and click **Next**.
2. Enter the following details:
* **Username:** Your full email address.
* **Password:** Your email password.
* **POP Server:** `mail.yourdomain.com`
* **Port:** `995`
* Check **Always use a secure connection (SSL)**.
3. Click **Add Account**.
#### 3. Configure Outgoing Mail (SMTP)
1. Select **Yes, I want to be able to send mail as** [**you@yourdomain.com**](mailto:you@yourdomain.com), then click **Next**.
2. Enter your name and check **Treat as an alias**.
3. Enter the following SMTP details:
* **SMTP Server:** `mail.yourdomain.com`
* **Port:** `465` (SSL) or `587` (TLS)
* **Username:** Your full email address
* **Password:** Your email password
4. Click **Add Account**.
5. Gmail will send a confirmation email to your domain email. Click the verification link to complete the setup.
***
#### Conclusion
Configuring your domain email in Outlook and Gmail ensures smooth communication and professional email management. Whether you prefer a desktop client like Outlook or web-based Gmail, following these steps will enable you to send and receive emails efficiently.
# How to Create an Email Account in cPanel
#### Introduction
Creating an email account in cPanel allows you to set up professional email addresses using your domain (e.g., `yourname@yourdomain.com`). cPanel provides an easy-to-use interface for managing email accounts, setting storage limits, and configuring access. This guide will walk you through the process of creating an email account in cPanel.
#### Step 1: Log into cPanel
1. Open your web browser and go to `https://yourdomain.com/cpanel`.
2. Enter your cPanel username and password.
3. Click **Log In** to access the cPanel dashboard.
#### Step 2: Navigate to the Email Accounts Section
1. Once in cPanel, locate the **Email** section.
2. Click on **Email Accounts**.
3. You will be directed to the email account management page.
#### Step 3: Create a New Email Account
1. Click on the **Create** button.
2. Select the domain for the email address (if you have multiple domains).
3. Enter your desired email address (e.g., `info@yourdomain.com`).
4. Set a strong password or use the **Generate Password** feature.
5. Choose the **Storage Space** for the account (e.g., 500MB, 1GB, or unlimited).
6. Click **Create** to finalize the email account setup.
#### Step 4: Access Your New Email Account
After creating the email account, you can access it in multiple ways:
#### 1. Using Webmail
1. Go to `https://yourdomain.com/webmail`.
2. Enter your email address and password.
3. Choose a webmail client (e.g., **Roundcube** or **Horde**).
4. Click **Open** to access your inbox.
#### 2. Configuring in an Email Client (e.g., Outlook, Gmail, Thunderbird)
To use your email with a desktop or mobile email client:
1. In cPanel, go to **Email Accounts** and find your newly created email address.
2. Click **Connect Devices**.
3. Note the IMAP, POP3, and SMTP server settings provided.
4. Open your email client and enter the settings as prompted.
#### Step 5: Manage Email Account Settings
Once your email is set up, you can manage it under **Email Accounts** in cPanel:
* **Change Password** – Click **Manage** and update your email password.
* **Adjust Storage Limits** – Increase or decrease the allocated storage.
* **Delete an Email Account** – If no longer needed, remove it to free up space.
#### Step 6: Set Up Email Forwarding (Optional)
1. In cPanel, go to **Forwarders** under the **Email** section.
2. Click **Add Forwarder**.
3. Enter the email address you want to forward emails from.
4. Enter the destination email address where emails should be sent.
5. Click **Add Forwarder**.
#### Conclusion
Setting up an email account in cPanel is a straightforward process that allows you to create professional email addresses for your domain. Whether you access it via webmail, an email client, or set up forwarding, cPanel provides all the tools necessary to manage your email effectively.
# Security & Backups
# How to Enable SSL for Your Website
#### Introduction
SSL (Secure Sockets Layer) is essential for securing your website by encrypting data transferred between your site and its visitors. Enabling SSL not only improves security but also boosts your website's SEO ranking and builds trust with users. This guide will walk you through enabling SSL on your website using cPanel and Plesk.
***
#### Enabling SSL in cPanel
#### Step 1: Access SSL/TLS Manager
1. Log in to **cPanel**.
2. Navigate to the **Security** section and click on **SSL/TLS**.
#### Step 2: Install an SSL Certificate
#### Option 1: Use AutoSSL (Free SSL)
1. Click on **Manage AutoSSL** under the SSL/TLS section.
2. Ensure AutoSSL is enabled for your domain.
3. Click **Run AutoSSL** to install the certificate.
4. Wait a few minutes for the process to complete.
#### Option 2: Install a Custom SSL Certificate
1. Purchase an SSL certificate from a provider.
2. In cPanel, go to **SSL/TLS > Manage SSL Sites**.
3. Select your domain and paste the **CRT, Private Key, and CA Bundle** from your SSL provider.
4. Click **Install Certificate**.
#### Step 3: Force HTTPS Redirection
1. Go to **Domains** in cPanel.
2. Locate your domain and enable **Force HTTPS Redirect**.
3. Alternatively, add the following redirect rule to your `.htaccess` file:
```apache
RewriteEngine On
RewriteCond %{HTTPS} !=on
RewriteRule ^ https://%{HTTP_HOST}%{REQUEST_URI} [L,R=301]
```
ApacheCopy
***
#### Enabling SSL in Plesk
#### Step 1: Navigate to SSL/TLS Settings
1. Log in to **Plesk**.
2. Select **Websites & Domains** from the left menu.
3. Click on **SSL/TLS Certificates**.
#### Step 2: Install an SSL Certificate
#### Option 1: Use Let’s Encrypt (Free SSL)
1. Click **Install Let’s Encrypt**.
2. Ensure you select the options to **Include www subdomain** and **Secure mail**.
3. Click **Install** and wait for the certificate to be issued.
#### Option 2: Install a Purchased SSL Certificate
1. Click **Add SSL/TLS Certificate**.
2. Upload the **CRT, Private Key, and CA Bundle** provided by your SSL provider.
3. Click **Apply** to install the certificate.
#### Step 3: Enforce HTTPS
1. In Plesk, go to **Hosting Settings**.
2. Enable **Permanent SEO-safe 301 redirect from HTTP to HTTPS**.
3. Save changes.
***
#### Verifying SSL Installation
* Visit your website using [**https://yourdomain.com**](https://yourdomain.com/).
* Use an SSL checker tool (e.g., ) to verify installation.
* If you see a security warning, clear your cache or reissue the SSL certificate.
***
#### Conclusion
Enabling SSL on your website is crucial for security and credibility. Whether using AutoSSL in cPanel or Let’s Encrypt in Plesk, setting up SSL ensures encrypted communication and enhances user trust. If you experience issues, check your installation settings or contact your hosting provider for support.
# How to Backup & Restore Your Website
#### Introduction
Backing up your website is crucial to safeguarding your data and ensuring business continuity. Whether you’re updating your website, migrating to a new server, or recovering from unexpected data loss, having a reliable backup gives you peace of mind. This guide will show you how to back up and restore your website using both cPanel and Plesk.
***
#### Backing Up Your Website in cPanel
#### Step 1: Access the Backup Tool
1. Log in to **cPanel**.
2. Go to the **Files** section and click **Backup**.
#### Step 2: Create a Full Website Backup
1. Under **Full Backup**, click **Download a Full Website Backup**.
2. Select the **Backup Destination** (e.g., Home Directory).
3. Enter your **Email Address** to receive a notification when the backup completes.
4. Click **Generate Backup** and wait for the process to finish.
#### Step 3: Download the Backup
1. Once the backup is ready, click the download link.
2. Save the backup file to a secure location on your computer or cloud storage.
#### Step 4: Partial Backups (Optional)
* **Download Home Directory**: Backs up your website files.
* **Download MySQL Databases**: Backs up your databases.
* **Download Email Forwarders & Filters**: Backs up email settings.
***
#### Restoring Your Website in cPanel
#### Step 1: Access the Restore Tool
1. In **cPanel**, go to **Files** > **Backup**.
#### Step 2: Restore Website Files
1. Under **Restore a Home Directory Backup**, click **Choose File**.
2. Select your backup file and click **Upload**.
#### Step 3: Restore Databases
1. Under **Restore a MySQL Database Backup**, click **Choose File**.
2. Select your database backup and click **Upload**.
#### Step 4: Restore Email Settings (Optional)
1. Under **Restore Email Forwarders & Filters**, upload the respective backup files.
***
#### Backing Up Your Website in Plesk
#### Step 1: Access Backup Manager
1. Log in to **Plesk**.
2. Go to **Websites & Domains** > **Backup Manager**.
#### Step 2: Create a Backup
1. Click **Back Up**.
2. Choose what to back up:
* **Website files and databases**
* **Email configuration and content**
3. Select **Store in Plesk** or an external storage option.
4. Click **OK** to start the backup.
#### Step 3: Download the Backup
1. Once the backup completes, go to **Backup Manager**.
2. Click the download icon next to your backup file.
***
#### Restoring Your Website in Plesk
#### Step 1: Access Backup Manager
1. Go to **Websites & Domains** > **Backup Manager**.
#### Step 2: Choose a Backup to Restore
1. Click on the backup you want to restore.
2. Select **Restore All Objects** or choose specific items (e.g., files, databases, emails).
#### Step 3: Confirm the Restore
1. Click **Restore** and wait for the process to complete.
***
#### Additional Backup Tips
* **Automate backups**: Schedule daily or weekly backups for convenience.
* **Use external storage**: Save backups on cloud services for added security.
* **Test your backups**: Periodically restore backups on a test server to ensure they work.
***
#### Conclusion
Regular backups are vital for website security and reliability. Whether using cPanel or Plesk, following these steps ensures you can quickly back up and restore your website when needed. For additional support, reach out to your hosting provider.
# How to Protect Your Website from Hackers
#### Introduction
Website security is crucial for safeguarding your data, maintaining your site's reputation, and protecting users' information. Hackers often exploit vulnerabilities in websites to steal data, disrupt operations, or inject malicious code. In this guide, we’ll walk you through essential steps to protect your website from hackers and minimize security risks.
***
#### Keep Software and Plugins Updated
One of the most common ways hackers gain access to websites is through outdated software and plugins. Developers regularly release updates that patch security vulnerabilities, so keeping everything current is crucial.
* **Update CMS platforms** like WordPress, Joomla, and Drupal.
* **Update plugins and themes** regularly.
* **Remove unused plugins** to reduce potential entry points.
Enabling automatic updates where possible can make this process easier.
***
#### Use Strong Passwords and Two-Factor Authentication (2FA)
Weak passwords are an easy target for hackers. Use strong, unique passwords for your website’s admin area, database, and hosting accounts.
* **Create complex passwords**: Use a mix of uppercase, lowercase, numbers, and symbols.
* **Avoid common words** and easily guessed information.
* **Enable 2FA**: Add an extra layer of security by requiring a second form of verification, like a code sent to your phone.
***
#### Install an SSL Certificate
An SSL certificate encrypts data transferred between your website and visitors, making it harder for hackers to intercept sensitive information.
* **Use HTTPS instead of HTTP**.
* **Get a free SSL certificate** from Let’s Encrypt or use your hosting provider’s SSL options.
* **Force HTTPS redirection** in your website settings.
***
#### Set Up Web Application Firewalls (WAF)
A Web Application Firewall protects your website by filtering and monitoring HTTP traffic.
* **Use a cloud-based WAF** like Cloudflare or Sucuri.
* **Enable your hosting provider’s firewall** if available.
* **Configure security rules** to block suspicious activity.
***
#### Limit Login Attempts and User Access
Reducing the number of login attempts and managing user access minimizes the risk of brute-force attacks and insider threats.
* **Limit failed login attempts** using security plugins.
* **Change default admin usernames** to something unique.
* **Assign proper roles and permissions** to users — avoid giving admin access unless necessary.
***
#### Perform Regular Backups
Even with robust security, breaches can happen. Regular backups ensure you can quickly restore your website if it’s compromised.
* **Schedule automatic backups** through your hosting panel.
* **Store backups in multiple locations**, such as cloud storage and local drives.
* **Test your backups** periodically to ensure they work.
***
#### Monitor and Scan Your Website
Regular monitoring and malware scans help identify suspicious activity before it becomes a bigger problem.
* **Use security plugins** like Wordfence or Sucuri for website scanning.
* **Monitor file changes** and unauthorized logins.
* **Set up email alerts** for suspicious activity.
***
#### Conclusion
Protecting your website from hackers requires proactive steps and ongoing maintenance. By keeping your software updated, using strong passwords, enabling SSL, and setting up firewalls, you can significantly reduce the risk of attacks. Regular backups and monitoring further ensure you’re prepared for any eventuality. For advanced security measures, consider consulting with your hosting provider or a cybersecurity expert.
# How to Enable Two-Factor Authentication (2FA)
#### Introduction
Two-Factor Authentication (2FA) is an essential security feature that adds an extra layer of protection to your website, server, and online accounts. By requiring a second form of verification—like a code sent to your phone or generated by an authenticator app—2FA makes it much harder for hackers to gain access even if your password is compromised. In this guide, we’ll walk you through the steps to enable 2FA for your website and hosting accounts.
***
#### Why Enable Two-Factor Authentication?
Enabling 2FA significantly improves your website’s security by:
* **Preventing unauthorized access**: Even if your password is stolen, hackers can’t log in without the second verification step.
* **Protecting sensitive data**: Keeps personal, financial, and customer information safe.
* **Reducing the risk of brute force attacks**: Adds an extra barrier against automated login attempts.
***
#### How to Enable 2FA in cPanel
#### Step 1: Access Security Settings
1. Log in to your **cPanel** account.
2. Go to the **Security** section and click **Two-Factor Authentication**.
#### Step 2: Set Up 2FA
1. Click **Set Up Two-Factor Authentication**.
2. Open your preferred authenticator app (like Google Authenticator or Authy).
3. Scan the **QR code** displayed on your screen.
4. Enter the **6-digit code** from your app and click **Configure 2FA**.
#### Step 3: Confirm Setup
Once configured, cPanel will confirm that 2FA has been successfully enabled. You’ll now be required to enter a code from your authenticator app whenever you log in.
***
#### How to Enable 2FA in Plesk
#### Step 1: Access Extensions
1. Log in to your **Plesk** control panel.
2. Go to **Extensions** and search for **Google Authenticator** or a similar 2FA extension.
3. Install and activate the extension.
#### Step 2: Configure 2FA
1. Go to **My Profile** and click **Two-Factor Authentication**.
2. Open your authenticator app and scan the **QR code**.
3. Enter the **6-digit code** from the app and save your settings.
***
#### How to Enable 2FA for WordPress
#### Step 1: Install a 2FA Plugin
1. Log in to your **WordPress dashboard**.
2. Go to **Plugins** > **Add New**.
3. Search for a 2FA plugin like **Two-Factor** or **Wordfence Login Security**.
4. Install and activate the plugin.
#### Step 2: Set Up 2FA
1. Navigate to the plugin’s settings.
2. Choose your **authentication method** (e.g., an authenticator app).
3. Scan the **QR code** and enter the **verification code**.
#### Step 3: Test and Confirm
Log out and log back in to ensure that 2FA is working correctly.
***
### Additional Security Tips
* **Backup recovery codes**: Store recovery codes in a safe place in case your device is lost.
* **Use a trusted authenticator app**: Google Authenticator, Authy, and Microsoft Authenticator are widely recommended.
* **Enable 2FA on your hosting account**: If your hosting provider offers it, enable 2FA for your main hosting login.
***
### Conclusion
Two-Factor Authentication is one of the simplest and most effective ways to secure your website and online accounts. By following these steps, you add a powerful layer of security, protecting your data and reducing the risk of unauthorized access. Make sure to enable 2FA wherever possible and regularly review your security settings.
# Understanding DDoS Protection & How to Mitigate Attacks
#### Introduction
Distributed Denial of Service (DDoS) attacks are among the most common and disruptive threats faced by websites and online services. These attacks overwhelm a server, network, or application with a flood of internet traffic, making it unavailable to users. Understanding DDoS protection and how to mitigate such attacks is crucial for maintaining your website’s uptime, performance, and security.
***
#### What is a DDoS Attack?
A DDoS attack works by sending an overwhelming number of requests to your server from multiple compromised devices, often forming a botnet. This flood of traffic can:
* **Slow down your website** or make it entirely inaccessible.
* **Exhaust server resources**, leading to crashes.
* **Disrupt normal business operations** and cause revenue loss.
Types of DDoS attacks include:
* **Volume-based attacks**: Overwhelm the server’s bandwidth with massive traffic.
* **Protocol attacks**: Exploit server vulnerabilities by overwhelming network protocols.
* **Application layer attacks**: Target specific applications with slow and stealthy traffic.
***
#### How DDoS Protection Works
DDoS protection involves detecting and mitigating malicious traffic before it reaches your server. Key components include:
* **Traffic Analysis**: Monitoring incoming traffic for unusual patterns.
* **Rate Limiting**: Restricting the number of requests a single user can make.
* **IP Blacklisting/Whitelisting**: Blocking suspicious IP addresses while allowing trusted sources.
* **Web Application Firewalls (WAF)**: Filtering malicious HTTP/S requests.
* **Content Delivery Networks (CDN)**: Distributing traffic across multiple servers to absorb spikes.
***
#### How to Mitigate DDoS Attacks
#### 1. Use a DDoS Protection Service
Cloud-based services like Cloudflare, Akamai, and AWS Shield offer robust DDoS protection by filtering out malicious traffic before it reaches your server.
#### 2. Configure Firewalls and Security Plugins
* **Enable Web Application Firewalls (WAF)** to block suspicious requests.
* **Install security plugins** like Wordfence for WordPress or Imunify360 for cPanel.
#### 3. Monitor Traffic and Set Alerts
Use tools like Google Analytics or your hosting control panel’s monitoring tools to track traffic spikes and set up alerts for unusual activity.
#### 4. Optimize Server Resources
* **Use load balancers** to distribute traffic across multiple servers.
* **Increase server capacity** to handle higher traffic loads.
#### 5. Implement Rate Limiting and IP Blocking
* **Limit login attempts** and access to sensitive areas.
* **Blacklist suspicious IPs** and allow only trusted sources.
***
#### Additional Security Measures
* **Enable Two-Factor Authentication (2FA)** for admin accounts.
* **Regularly update software and plugins** to patch vulnerabilities.
* **Backup your website frequently** to ensure quick recovery.
***
#### Conclusion
DDoS attacks can cripple your website, but with proper protection and mitigation strategies, you can minimize their impact. By using DDoS protection services, configuring firewalls, monitoring traffic, and optimizing server resources, you safeguard your website’s performance and security. Stay vigilant and proactive to keep your online presence safe from malicious threats.
# Performance Optimization
# How to Speed Up Your Website (Caching & CDN)
#### Introduction
Website speed is a critical factor for user experience, SEO rankings, and conversion rates. A slow website can drive visitors away and hurt your search engine performance. Two of the most effective ways to speed up your website are caching and using a Content Delivery Network (CDN). In this guide, we’ll explain how caching and CDNs work and how to implement them for faster load times and better performance.
***
#### Why Website Speed Matters
A fast-loading website provides several benefits:
* **Better User Experience**: Visitors expect quick responses and seamless browsing.
* **Higher Search Rankings**: Google and other search engines prioritize faster websites.
* **Increased Conversions**: Faster websites often see lower bounce rates and higher sales or lead generation.
* **Improved Mobile Performance**: Speed is even more crucial for mobile users with slower connections.
***
#### What is Caching?
Caching stores copies of your website’s files in a temporary storage location so they can be served faster to users.
#### Types of Caching
* **Browser Caching**: Stores static files (like images, CSS, and JavaScript) on a user’s device.
* **Server-Side Caching**: Stores frequently accessed data on your web server to reduce load times.
* **Object Caching**: Speeds up database queries by storing results in memory.
* **Page Caching**: Saves entire pages as static files to avoid generating them dynamically each time.
#### How to Enable Caching
1. **Via cPanel**:
* Go to **Optimize Website** in cPanel.
* Enable **compression** for faster loading of text-based content.
2. **Using Plugins (WordPress)**:
* Install a caching plugin like **WP Super Cache** or **W3 Total Cache**.
* Configure page, object, and browser caching.
3. **Manual Configuration**:
* Edit your **.htaccess** file to add caching rules for static content.
***
#### What is a Content Delivery Network (CDN)?
A CDN is a network of servers distributed worldwide that store and deliver copies of your website’s content from the server closest to the user.
#### Benefits of a CDN
* **Faster Load Times**: Content is served from geographically closer locations.
* **Reduced Server Load**: CDN offloads traffic from your main server.
* **Enhanced Security**: Many CDNs offer DDoS protection and security features.
* **Improved Availability**: CDNs can keep your website online even during traffic surges.
#### Popular CDN Providers
* **Cloudflare**: Offers free and premium plans with performance and security features.
* **Amazon CloudFront**: High-performance CDN integrated with AWS.
* **Akamai**: Enterprise-grade CDN with global reach.
***
#### How to Implement a CDN
1. **Sign Up for a CDN Service** (e.g., Cloudflare).
2. **Update Your DNS Settings** to point to the CDN’s nameservers.
3. **Configure CDN Settings** for caching, security, and content optimization.
4. **Test Your Website’s Speed** using tools like **GTmetrix** or **Google PageSpeed Insights**.
***
#### Additional Speed Optimisation Tips
* **Minify CSS, JavaScript, and HTML**: Reduces file sizes and speeds up load times.
* **Optimize Images**: Use tools like **TinyPNG** or **ImageOptim** to compress images without quality loss.
* **Use Lazy Loading**: Defers the loading of offscreen images until they’re needed.
* **Enable GZIP Compression**: Compresses web pages for faster delivery.
***
#### Conclusion
Speeding up your website with caching and a CDN is one of the best ways to improve user experience, SEO performance, and overall site efficiency. By implementing these tools and following best practices for optimization, you ensure that your website remains fast, accessible, and competitive. Stay proactive in monitoring and tweaking your site’s performance for the best results.
# How to Optimize Images for Faster Load Times
#### Introduction
Image optimization is one of the simplest and most effective ways to speed up your website. Unoptimized images can slow down page load times, affecting user experience, SEO rankings, and conversion rates. In this guide, we’ll explore the importance of image optimization and how to do it properly without sacrificing quality.
***
#### Why Image Optimization Matters
Optimizing images reduces file sizes without noticeable quality loss, leading to:
* **Faster Load Times**: Smaller image files load quicker, speeding up your website.
* **Improved SEO**: Google rewards fast websites with better search rankings.
* **Better User Experience**: Visitors stay longer on fast, responsive sites.
* **Reduced Bandwidth Usage**: Smaller files reduce server load and hosting costs.
***
#### Choosing the Right Image Format
Different image formats suit different needs:
* **JPEG**: Best for photographs and images with lots of colors. Offers good compression with slight quality loss.
* **PNG**: Ideal for transparent images and graphics. High quality but larger file size.
* **WebP**: Modern format offering excellent compression and quality. Supported by most browsers.
* **SVG**: Best for simple graphics like logos and icons. Scalable without quality loss.
***
#### How to Optimize Images
#### 1. Resize Images
Ensure your images aren’t larger than necessary. Use tools like **Adobe Photoshop**, **GIMP**, or **Online Image Resizer** to scale them down to the right dimensions.
#### 2. Compress Images
Compression reduces file size without a significant loss of quality. Use tools like:
* **TinyPNG**: Great for PNG and JPEG compression.
* **ImageOptim**: Works well for Mac users.
* **ShortPixel**: A WordPress plugin for automated image compression.
#### 3. Use Lazy Loading
Lazy loading defers loading images until they’re needed. This reduces initial page load time. Enable lazy loading via:
* **WordPress Plugins**: Like **Smush** or **Lazy Load by WP Rocket**.
* **HTML Attribute**: Add `loading="lazy"` to image tags.
#### 4. Implement a Content Delivery Network (CDN)
A CDN caches your images on multiple servers worldwide, delivering them from the nearest location to the user for faster load times. Popular CDN services include **Cloudflare**, **Amazon CloudFront**, and **Akamai**.
#### 5. Optimize Image Alt Text and File Names
* **Descriptive File Names**: Use meaningful, keyword-rich file names (e.g., `beach-sunset.jpg` instead of `IMG12345.jpg`).
* **Alt Text**: Helps search engines understand your images and improves accessibility.
***
#### Tools for Image Optimization
* **Online Tools**: TinyPNG, JPEG-Optimizer, and Compressor.io.
* **WordPress Plugins**: Smush, ShortPixel, and EWWW Image Optimizer.
* **Desktop Software**: Adobe Photoshop, GIMP, and ImageOptim.
***
#### Conclusion
Optimizing images is crucial for a fast, efficient, and user-friendly website. By choosing the right formats, resizing, compressing, and using lazy loading and CDNs, you ensure your site loads quickly without compromising visual quality. Make image optimization a regular part of your web development process to keep your website performing at its best.
# How to Reduce Server Resource Usage
#### Introduction
Reducing server resource usage is essential for maintaining a fast, stable, and cost-effective website. High resource usage can lead to slow load times, server crashes, and increased hosting costs. In this guide, we’ll explore practical strategies to optimize server performance and keep resource consumption in check.
***
#### Why Reducing Server Resource Usage Matters
Minimizing resource usage benefits your website and hosting environment in several ways:
* **Improved Website Speed**: Reduces server response time and improves load speeds.
* **Enhanced Stability**: Prevents server overloads and downtime.
* **Cost Savings**: Helps avoid exceeding hosting limits and paying for extra resources.
* **Better Scalability**: Prepares your site to handle traffic spikes more efficiently.
***
#### Monitor Server Resource Usage
Before making changes, identify what’s using the most resources:
* **cPanel Metrics**: Check CPU, memory, and disk usage stats.
* **Plesk Monitoring**: Use Plesk’s resource usage tools.
* **Third-Party Tools**: Tools like New Relic or Datadog offer advanced monitoring.
***
#### Optimize Website Performance
#### 1. Enable Caching
Caching reduces server load by serving static content:
* **Page Caching**: Saves full HTML pages to reduce dynamic requests.
* **Object Caching**: Stores database query results.
* **Browser Caching**: Uses user-side storage for static files.
#### 2. Use a Content Delivery Network (CDN)
A CDN reduces server load by distributing content across global servers:
* **Cloudflare**: Free and premium plans.
* **Amazon CloudFront**: Integrated with AWS.
* **Akamai**: Enterprise-grade CDN.
#### 3. Optimize Images and Media
Large files consume server bandwidth and slow load times:
* **Compress Images**: Use tools like TinyPNG or ImageOptim.
* **Resize Images**: Ensure images are appropriately scaled.
* **Use Next-Gen Formats**: WebP offers better compression and quality.
#### 4. Minify CSS, JavaScript, and HTML
Reducing file sizes decreases server load:
* **Online Minifiers**: Use tools like Minify or CSSNano.
* **WordPress Plugins**: Autoptimize and WP Rocket.
***
#### Manage Server Resources
#### 1. Limit Background Processes
Disable unnecessary cron jobs and background tasks.
#### 2. Optimize Databases
Reduce server strain by keeping databases efficient:
* **Regular Cleanups**: Remove old revisions and spam comments.
* **Optimize Tables**: Use phpMyAdmin’s optimization features.
#### 3. Use Lightweight Themes and Plugins
Heavy themes and plugins increase CPU and memory usage:
* **Choose Efficient Themes**: Use well-coded, lightweight options.
* **Limit Plugins**: Only install essential plugins.
***
#### Advanced Optimization
#### 1. Implement GZIP Compression
Compress web content before sending it to the browser.
#### 2. Adjust PHP Settings
Optimize memory limits and execution times in the PHP configuration.
#### 3. Use Server-Level Caching
Tools like Varnish or Redis offer advanced caching capabilities.
***
#### Conclusion
Reducing server resource usage improves website performance, stability, and cost-efficiency. By monitoring usage, optimizing files, and managing server processes, you ensure your site runs smoothly even under heavy traffic. Implement these strategies regularly for long-term server health and efficiency.
# How to Use Cloudflare for Performance & Security
#### Introduction
Cloudflare is a powerful service that enhances your website’s performance and security. Acting as a reverse proxy, it helps to speed up your website, protect against cyber threats, and manage traffic efficiently. This guide will walk you through the benefits of Cloudflare and how to set it up and optimize it for your site.
***
#### Why Use Cloudflare?
Cloudflare offers a range of performance and security features, including:
* **Improved Website Speed**: Cloudflare’s global content delivery network (CDN) ensures faster load times by caching content on servers closer to your users.
* **DDoS Protection**: Safeguards your site from distributed denial-of-service (DDoS) attacks.
* **SSL Encryption**: Provides free SSL certificates for secure connections.
* **Web Application Firewall (WAF)**: Blocks malicious traffic and prevents common security threats.
* **DNS Management**: Faster and more secure domain name system (DNS) resolution.
***
#### Setting Up Cloudflare
#### 1. Create a Cloudflare Account
* Go to [Cloudflare.com](https://www.cloudflare.com/) and sign up.
* Enter your website’s domain and click **Add Site**.
#### 2. Choose a Cloudflare Plan
* **Free Plan**: Ideal for small websites.
* **Pro Plan**: Enhanced performance and security for growing sites.
* **Business & Enterprise Plans**: Advanced features for high-traffic and mission-critical websites.
#### 3. Update DNS Nameservers
* Cloudflare provides new nameservers (e.g., `dora.ns.cloudflare.com`).
* Log in to your domain registrar (e.g., GoDaddy, Namecheap) and replace existing nameservers with Cloudflare’s.
#### 4. Verify Setup
* Once nameservers propagate (can take up to 24 hours), Cloudflare will confirm your site is active.
***
#### Optimizing Cloudflare for Performance
#### 1. Enable CDN Caching
* Go to **Caching** in your Cloudflare dashboard and set **Caching Level** to **Standard**.
* Enable **Always Online** to serve cached pages when your server is down.
#### 2. Use Brotli Compression
* Navigate to **Speed** and turn on **Brotli Compression** for faster page load times.
#### 3. Optimize Images with Polish
* Under **Speed**, enable **Polish** to compress and optimize images automatically.
#### 4. Minify CSS, JavaScript, and HTML
* In **Speed**, enable minification for CSS, JS, and HTML to reduce file sizes.
***
### Enhancing Security with Cloudflare
#### 1. Activate SSL/TLS Encryption
* Go to **SSL/TLS** and choose **Full (Strict)** for the highest security.
#### 2. Enable Web Application Firewall (WAF)
* Under **Security**, turn on the **WAF** to block common threats.
#### 3. Configure DDoS Protection
* Cloudflare automatically mitigates DDoS attacks, but you can set custom rules for additional protection.
#### 4. Set Up Security Rules
* Use **Firewall Rules** to block or challenge suspicious traffic.
***
### Conclusion
Cloudflare is an essential tool for boosting website performance and security. By enabling caching, compression, and security features, you ensure faster load times and robust protection against online threats. Setting up and optimizing Cloudflare is straightforward and provides long-term benefits for your website.
# How to Monitor Website Uptime
#### Introduction
Website uptime is crucial for maintaining user satisfaction, search engine rankings, and business credibility. Uptime monitoring ensures your site remains accessible and alerts you when downtime occurs. In this guide, we’ll explore why uptime monitoring matters, the tools you can use, and how to set up and manage monitoring for your website.
***
#### Why Website Uptime Monitoring Matters
Monitoring your website uptime offers several key benefits:
* **Improved Reliability**: Quickly detect and resolve outages.
* **Enhanced User Experience**: Ensure consistent site availability.
* **Protect Search Rankings**: Downtime impacts SEO performance.
* **Business Continuity**: Avoid revenue loss from inaccessible services.
***
#### Popular Website Uptime Monitoring Tools
Choose from a variety of tools based on your needs and budget:
* **UptimeRobot**: Free and premium plans with simple uptime checks.
* **Pingdom**: Comprehensive monitoring and detailed reporting.
* **Site24x7**: Advanced monitoring for websites, servers, and applications.
* **StatusCake**: Affordable plans with global monitoring.
***
#### Setting Up Website Uptime Monitoring
#### 1. Sign Up for a Monitoring Service
* Visit the monitoring tool’s website and create an account.
* Choose a plan based on your site’s needs and traffic volume.
#### 2. Add Your Website
* Enter your website’s URL in the monitoring tool’s dashboard.
* Select monitoring intervals (e.g., every 1, 5, or 10 minutes).
#### 3. Configure Alerts
* Set up email, SMS, or app notifications for downtime alerts.
* Add multiple contacts to ensure key team members are informed.
#### 4. Test Monitoring
* Verify the service is correctly detecting your site’s status.
* Simulate downtime (if possible) to check alert responsiveness.
***
#### Analyzing Uptime Reports
#### 1. Review Downtime Logs
* Identify patterns or recurring issues causing outages.
* Note the duration and frequency of downtime events.
#### 2. Monitor Response Times
* Ensure your site loads quickly to maintain user experience.
* Investigate slow response times for potential server issues.
#### 3. Track Uptime Percentages
* Aim for at least **99.9% uptime** (also known as “three nines”).
* Address any dips below this standard promptly.
***
#### Troubleshooting Downtime Issues
#### 1. Check Server Status
* Confirm your hosting provider isn’t experiencing issues.
* Restart your server if it’s unresponsive.
#### 2. Investigate DNS Problems
* Ensure your domain’s DNS records are configured correctly.
* Verify nameserver settings and propagation status.
#### 3. Optimize Website Performance
* Minimize heavy plugins, large files, and inefficient code.
* Use caching and a Content Delivery Network (CDN) for faster load times.
***
#### Conclusion
Monitoring website uptime helps you maintain site reliability, protect your business reputation, and ensure a positive user experience. By using monitoring tools and responding swiftly to downtime alerts, you can minimize disruptions and keep your website accessible around the clock.
# Troubleshooting & Error Fixes
# Common WordPress Errors & How to Fix Them
#### Introduction
WordPress is a powerful and widely used content management system, but like any software, it can sometimes run into errors. These issues can be frustrating, especially if they disrupt your website’s functionality. This guide covers some of the most common WordPress errors and how to troubleshoot and fix them.
***
#### 1. White Screen of Death (WSOD)
#### Cause
* Incompatible themes or plugins
* Exhausted memory limit
* Syntax errors in code
#### Fix
* **Disable Plugins**: Access your WordPress files via FTP, navigate to `wp-content/plugins`, and rename the plugins folder to deactivate them.
* **Switch to a Default Theme**: Rename your active theme folder and WordPress will revert to a default theme.
* **Increase PHP Memory Limit**: Add this line to your `wp-config.php` file: `define('WP_MEMORY_LIMIT', '256M');`
***
#### 2. 500 Internal Server Error
#### Cause
* Corrupted `.htaccess` file
* Plugin or theme conflict
* PHP memory limit exceeded
#### Fix
* **Check `.htaccess` File**: Rename `.htaccess` to `.htaccess_old` and see if the site works.
* **Increase Memory Limit**: As mentioned above, increase PHP memory.
* **Re-upload Core Files**: Replace WordPress core files via FTP, excluding `wp-content`.
***
#### 3. Error Establishing a Database Connection
#### Cause
* Incorrect database credentials
* Corrupted database
* Server issues
#### Fix
* **Verify `wp-config.php` Settings**: Ensure database name, username, password, and host are correct.
* **Repair Database**: Add `define('WP_ALLOW_REPAIR', true);` to `wp-config.php` and visit `/wp-admin/maint/repair.php`.
* **Check Hosting Status**: Confirm your database server isn’t down.
***
#### 4. 404 Page Not Found
#### Cause
* Broken permalinks
* Deleted or missing content
#### Fix
* **Reset Permalinks**: Go to **Settings > Permalinks** and click **Save Changes**.
* **Check URLs**: Ensure the correct URL structure for pages and posts.
***
#### 5. Stuck in Maintenance Mode
#### Cause
* Interrupted updates
#### Fix
* **Delete `.maintenance` File**: Access your site via FTP and remove the `.maintenance` file from the root directory.
***
#### 6. WordPress Not Sending Emails
#### Cause
* Server misconfiguration
* Spam filters
#### Fix
* **Use SMTP Plugin**: Install and configure an SMTP plugin like **WP Mail SMTP**.
* **Check Email Settings**: Ensure the “From” address matches your domain.
***
#### Conclusion
Understanding and fixing common WordPress errors ensures your site remains functional and user-friendly. With the right approach, most issues can be resolved quickly, keeping your website running smoothly.
# How to Fix "Error Establishing a Database Connection"
The **"Error Establishing a Database Connection"** is a common issue that prevents a website from accessing its database. This error is often seen in WordPress and other database-driven websites when the connection between the website and the database server is disrupted. It can be caused by incorrect credentials, a corrupted database, server issues, or high traffic loads. In this guide, we will go through various troubleshooting steps to fix this error effectively.
***
#### **1. Check Database Credentials**
Incorrect database credentials are one of the most common reasons for this error. To verify them:
1. **Access the website files** via FTP or File Manager in your hosting control panel.
2. Locate and open the `wp-config.php` file (for WordPress sites).
3. Look for the following lines:
```php
define('DB_NAME', 'your_database_name');
define('DB_USER', 'your_database_user');
define('DB_PASSWORD', 'your_database_password');
define('DB_HOST', 'localhost');
```
4. Cross-check these details with the database information in your hosting control panel under **MySQL Databases**.
5. If the credentials are incorrect, update them in the `wp-config.php` file and save the changes.
After making the corrections, refresh your website to check if the error is resolved.
***
#### **2. Check if the Database Server is Down**
Sometimes, the issue is due to the database server being temporarily down.
* If you have access to **phpMyAdmin**, try logging in to see if the database is accessible.
* Contact your **hosting provider** to check for any ongoing server issues.
* If using a VPS or dedicated server, restart the MySQL service:
```bash
sudo service mysql restart
```
For cPanel users, you may need to restart MySQL from the hosting dashboard.
***
#### **3. Repair the WordPress Database**
A corrupted database can also cause this error. WordPress has a built-in repair tool:
1. Open the `wp-config.php` file and add this line:
```php
define('WP_ALLOW_REPAIR', true);
```
2. Save the file and go to:
```
https://yourwebsite.com/wp-admin/maint/repair.php
```
3. Click **Repair Database** or **Repair and Optimize Database**.
4. Once done, remove the `WP_ALLOW_REPAIR` line from `wp-config.php` for security reasons.
***
#### **4. Check for Corrupt WordPress Files**
If core WordPress files are corrupted, re-uploading fresh files may fix the issue:
1. Download the latest WordPress version from [wordpress.org](https://wordpress.org/).
2. Extract the files and **delete the `wp-content` folder** (to preserve your themes and plugins).
3. Upload the remaining files via FTP to overwrite existing ones.
4. Refresh your website to check if the error is fixed.
***
#### **5. Restore a Recent Backup**
If the issue started after recent changes, restoring a previous backup might resolve it:
* Use your **hosting provider’s backup service** if available.
* If using a backup plugin (e.g., UpdraftPlus, VaultPress), restore the latest working backup.
***
#### **6. Increase PHP Memory Limit**
A low PHP memory limit can cause database connection errors. To increase it:
1. Open the `wp-config.php` file and add:
```php
define('WP_MEMORY_LIMIT', '256M');
```
2. Save the file and reload your site.
If that doesn’t work, modify the `php.ini` file (if accessible):
```ini
memory_limit = 256M
```
Then restart the web server.
***
#### **7. Disable Plugins and Themes**
Sometimes, a faulty plugin or theme can cause database connection issues.
#### **Disable Plugins**
1. Access your website files via FTP.
2. Navigate to `wp-content/plugins/` and rename the `plugins` folder to `plugins_backup`.
3. Refresh your site. If the error is resolved, a plugin is the culprit.
4. Rename the folder back and disable plugins one by one to identify the problem.
#### **Switch to a Default Theme**
1. Go to `wp-content/themes/`.
2. Rename your active theme folder (e.g., `mytheme` to `mytheme_backup`).
3. WordPress will automatically switch to a default theme.
4. Check if the issue is resolved.
***
#### **8. Restart Your Web Server**
For VPS or dedicated hosting users, restarting the web server can resolve connection issues:
* Restart Apache:
```bash
sudo service apache2 restart
```
* Restart Nginx:
```bash
sudo service nginx restart
```
* Restart MySQL:
```bash
sudo service mysql restart
```
***
### **9. Check for High Traffic or Server Overload**
A sudden spike in traffic can overload the server and cause the database to become unresponsive.
* Monitor server resource usage via cPanel or SSH (`top` or `htop` commands).
* Optimize the database using a plugin like **WP-Optimize**.
* Upgrade your hosting plan if necessary.
***
#### **10. Contact Your Web Host**
If none of the above steps work, reach out to your hosting provider’s support team. Provide details such as:
* The error message displayed.
* Steps you have taken to troubleshoot.
* Any recent changes made to the site.
***
### **Conclusion**
The **"Error Establishing a Database Connection"** can occur due to incorrect database credentials, server issues, corrupted files, or resource limits. By systematically checking credentials, server status, database integrity, and file corruption, you can resolve the issue efficiently. If the problem persists, contacting your web host for support is the best option.
# How to Fix 500 Internal Server Error
A **500 Internal Server Error** is a common and frustrating issue that can occur on websites running on various platforms, including WordPress, PHP applications, and custom-built websites. This error typically indicates that something went wrong on the server, but the exact cause is not specified. Fortunately, there are multiple ways to troubleshoot and resolve this issue.
In this guide, we will explore various methods to fix a **500 Internal Server Error** efficiently.
***
#### 1. Refresh the Page and Clear Browser Cache
Sometimes, the error is temporary and can be fixed by simply refreshing the page. Try the following:
* Press **Ctrl + F5** (Windows) or **Cmd + Shift + R** (Mac) to force reload the page.
* Clear your browser cache and try again.
* Try accessing the website from a different browser or device.
If the error persists, proceed with further troubleshooting steps.
***
#### 2. Check the .htaccess File
A corrupted **.htaccess** file is one of the most common causes of a **500 Internal Server Error**. To check:
1. Access your website files using **FTP** or **File Manager** in your hosting control panel.
2. Locate the **.htaccess** file in the root directory of your website.
3. Rename it to **.htaccess\_backup**.
4. Try reloading your website. If the error disappears, generate a new **.htaccess** file by following these steps:
* Log in to your WordPress dashboard.
* Navigate to **Settings > Permalinks**.
* Click **Save Changes** without modifying anything. This will create a fresh **.htaccess** file.
***
#### 3. Increase PHP Memory Limit
A **500 Internal Server Error** can occur if your PHP script exceeds the allowed memory limit. To increase it:
1. Open your **wp-config.php** file (if using WordPress).
2. Add the following line before the `/* That's all, stop editing! */` comment:
```php
define('WP_MEMORY_LIMIT', '256M');
```
3. Save the file and refresh your site.
Alternatively, you can modify the **php.ini** file:
1. Locate **php.ini** in your hosting directory.
2. Increase the `memory_limit` value:
```ini
memory_limit = 256M
```
3. Save and restart your web server if applicable.
If you don’t have access to **php.ini**, try increasing memory in **.htaccess**:
```apache
php_value memory_limit 256M
```
***
#### 4. Check for Corrupt Plugins or Themes (WordPress Users)
Sometimes, a faulty plugin or theme can cause the **500 Internal Server Error**.
#### Disable Plugins:
1. Access your website via **FTP**.
2. Navigate to the **wp-content/plugins/** directory.
3. Rename the **plugins** folder to **plugins\_backup**.
4. Try reloading your site.
5. If the site works, rename the folder back and disable plugins one by one to find the culprit.
#### Switch to Default Theme:
1. Access the **wp-content/themes/** directory.
2. Rename your active theme folder (e.g., `mytheme` to `mytheme_backup`).
3. WordPress will automatically switch to a default theme (like Twenty Twenty-Three).
4. Check if the site works.
***
#### 5. Check File Permissions
Incorrect file permissions can also cause the **500 Internal Server Error**. The correct permissions should be:
* **Folders:** `755`
* **Files:** `644`
To fix permissions via FTP:
1. Right-click on the root folder and select **File Permissions**.
2. Apply `755` for directories and `644` for files.
3. Save and retry loading your site.
***
#### 6. Enable Debugging Mode
If you're using WordPress, enabling debugging can help identify the cause of the error.
1. Open the **wp-config.php** file.
2. Add the following lines:
```php
define('WP_DEBUG', true);
define('WP_DEBUG_LOG', true);
define('WP_DEBUG_DISPLAY', false);
```
3. Save the file.
4. Check the **wp-content/debug.log** file for error messages.
***
#### 7. Check Server Logs
Your hosting provider’s error logs can provide clues to the issue. To check logs:
* In **cPanel**, go to **Metrics > Errors**.
* If using an Apache server, access the log via:
```bash
tail -f /var/log/apache2/error.log
```
* For Nginx:
```bash
tail -f /var/log/nginx/error.log
```
Look for recent errors and troubleshoot accordingly.
***
#### 8. Reinstall Core Files (WordPress Users)
If core WordPress files are corrupted, reinstall them:
1. Download the latest WordPress version from [wordpress.org](https://wordpress.org/).
2. Extract the files and **delete the wp-content folder** to keep your themes and plugins.
3. Upload the rest of the files via FTP.
4. Check if the site works.
***
#### 9. Contact Your Web Host
If none of the above steps resolve the issue, reach out to your hosting provider’s support team. Provide them with details, including:
* The steps you’ve taken to troubleshoot.
* Any error logs or debugging information.
***
#### Conclusion
The **500 Internal Server Error** can be caused by various factors, including corrupt **.htaccess** files, PHP memory limits, faulty plugins, or incorrect file permissions. By following the steps outlined in this guide, you should be able to identify and resolve the issue efficiently. If the error persists, your hosting provider can assist in diagnosing server-related problems.
# How to Fix 403, 404 & 502 Errors
Website errors can be frustrating for both users and website owners. Among the most common HTTP errors are **403 Forbidden**, **404 Not Found**, and **502 Bad Gateway**. Each of these errors indicates a different issue with the website. In this guide, we will discuss the causes and step-by-step solutions for fixing these errors.
***
#### **How to Fix 403 Forbidden Error**
The **403 Forbidden** error occurs when the server denies access to a requested resource. This can be due to incorrect file permissions, misconfigured `.htaccess` files, or security settings.
#### **1. Check File and Folder Permissions**
Incorrect permissions may restrict access to files and directories. The correct settings should be:
* **Folders:** `755`
* **Files:** `644`
To fix permissions via FTP:
1. Connect to your site via FTP.
2. Right-click on the root folder and choose **File Permissions**.
3. Set folder permissions to `755` and file permissions to `644`.
4. Apply changes and refresh your website.
#### **2. Review the .htaccess File**
A misconfigured `.htaccess` file can cause a **403 Forbidden** error.
1. Locate the `.htaccess` file in your website’s root directory.
2. Rename it to `.htaccess_backup`.
3. Try reloading the site. If the error is resolved, generate a new `.htaccess` file by going to **WordPress Dashboard > Settings > Permalinks** and clicking **Save Changes**.
#### **3. Disable Security Plugins**
Security plugins can sometimes block legitimate access. To check:
1. Access the **wp-content/plugins/** directory via FTP.
2. Rename the security plugin folder (e.g., `wordfence` to `wordfence_backup`).
3. Refresh the site to check if the error is resolved.
#### **4. Check IP Restrictions**
Some websites block access based on IP restrictions in the `.htaccess` file. Look for lines like:
```
Deny from all
Allow from 123.45.67.89
```
If your IP is not allowed, edit or remove these lines.
***
### **How to Fix 404 Not Found Error**
The **404 Not Found** error occurs when the requested page or resource cannot be found on the server. This usually happens due to broken links, missing files, or incorrect URL structures.
#### **1. Refresh and Check the URL**
* Ensure the URL is correctly spelled and formatted.
* Try clearing your browser cache and reloading the page.
#### **2. Reset Permalinks (WordPress Users)**
1. Log in to WordPress.
2. Go to **Settings > Permalinks**.
3. Click **Save Changes** to regenerate the `.htaccess` file.
#### **3. Restore Missing Files**
If a page is missing, restore it from a backup or re-upload the necessary files via FTP.
#### **4. Redirect Broken URLs**
Use a redirection plugin to point missing pages to a working URL. In `.htaccess`, add:
```
Redirect 301 /old-page.html https://yourwebsite.com/new-page.html
```
#### **5. Check for Plugin or Theme Conflicts**
Disable plugins one by one to see if a plugin is causing 404 errors. If using a custom theme, switch to a default theme (like Twenty Twenty-Three) and check if the issue persists.
***
### **How to Fix 502 Bad Gateway Error**
A **502 Bad Gateway** error occurs when the server acting as a gateway or proxy receives an invalid response from the upstream server. This is often due to server overload, network issues, or misconfigured server settings.
#### **1. Refresh the Page and Clear Cache**
* Press **Ctrl + F5** (Windows) or **Cmd + Shift + R** (Mac) to force reload the page.
* Clear your browser cache and cookies.
#### **2. Check Server Status**
* If using shared hosting, check if your hosting provider is experiencing downtime.
* Use online tools like **DownDetector** to check server status.
#### **3. Restart PHP and Web Server**
If you have access to your server:
* Restart Apache:
```bash
sudo service apache2 restart
```
* Restart Nginx:
```bash
sudo service nginx restart
```
* Restart PHP:
```bash
sudo service php-fpm restart
```
#### **4. Disable CDN and Firewall Temporarily**
If using a CDN (like Cloudflare), try disabling it temporarily:
1. Log in to your CDN provider.
2. Pause or bypass the CDN service.
3. Refresh your site and check if the error is resolved.
#### **5. Check for High Resource Usage**
A sudden spike in traffic can overload your server. Check for excessive CPU or memory usage in your hosting control panel.
#### **6. Update or Reconfigure Server Settings**
If you have server access, try increasing server buffers by editing the **nginx.conf** file:
```
proxy_buffers 8 16k;
proxy_buffer_size 32k;
```
Restart Nginx after saving the changes.
***
### **Conclusion**
The **403 Forbidden**, **404 Not Found**, and **502 Bad Gateway** errors each have different causes and solutions. By following the troubleshooting steps outlined in this guide, you can quickly identify and fix these issues, ensuring a smooth user experience on your website. If the problem persists, reach out to your hosting provider for further assistance.
# How to Check & Fix DNS Issues
Domain Name System (DNS) issues can cause websites to become inaccessible, disrupt email services, or slow down browsing. DNS is responsible for translating domain names (e.g., `example.com`) into IP addresses that computers use to identify servers. If DNS fails, users may experience errors such as "DNS Server Not Found" or "DNS\_PROBE\_FINISHED\_NXDOMAIN." This guide covers how to check and fix DNS issues effectively.
***
#### **1. How to Check for DNS Issues**
Before fixing DNS issues, determine the source of the problem using the following methods:
#### **1.1 Use Command Line Tools**
**Check DNS Resolution with nslookup**
Run the following command in the terminal (Windows, Mac, Linux) to check if the domain resolves correctly:
```bash
nslookup example.com
```
If the response does not return an IP address, the DNS server may be down or misconfigured.
**Test with Ping**
To check connectivity to the server:
```bash
ping example.com
```
If the ping fails but resolves an IP address, the issue may be with the website’s server rather than DNS.
**Use dig (Linux/Mac)**
To query DNS records:
```bash
dig example.com
```
This will display the DNS response from the queried server, helping diagnose propagation issues.
#### **1.2 Check DNS Status with Online Tools**
* [Google Dig Tool](https://toolbox.googleapps.com/apps/dig/)
* [DNS Checker](https://www.whatsmydns.net/)
* [MXToolBox](https://mxtoolbox.com/)
These tools help verify DNS records across different locations.
#### **1.3 Flush DNS Cache**
Cached DNS records may cause incorrect or outdated resolutions. To clear the cache:
* **Windows**:
```bash
ipconfig /flushdns
```
* **Mac**:
```bash
sudo killall -HUP mDNSResponder
```
* **Linux**:
```bash
sudo systemd-resolve --flush-caches
```
***
#### **2. How to Fix DNS Issues**
If DNS issues persist, try the following solutions.
#### **2.1 Restart Your Router and Modem**
A simple router reboot can resolve network-related DNS issues. Turn off the modem and router, wait 10 seconds, then turn them back on.
#### **2.2 Change DNS Servers**
If your ISP’s DNS is slow or unreliable, switch to a public DNS provider:
* **Google DNS**: `8.8.8.8` and `8.8.4.4`
* **Cloudflare DNS**: `1.1.1.1` and `1.0.0.1`
* **OpenDNS**: `208.67.222.222` and `208.67.220.220`
**Windows:**
1. Open **Control Panel > Network and Internet > Network and Sharing Center**.
2. Click **Change adapter settings**.
3. Right-click your network and select **Properties**.
4. Select **Internet Protocol Version 4 (TCP/IPv4)** and click **Properties**.
5. Choose **Use the following DNS server addresses** and enter the new DNS addresses.
6. Click **OK** and restart your connection.
**Mac:**
1. Open **System Preferences > Network**.
2. Select your connection and click **Advanced**.
3. Go to the **DNS** tab and add the new DNS servers.
4. Click **OK** and **Apply**.
#### **2.3 Check Your Hosts File**
A misconfigured hosts file can override DNS settings.
**Windows:**
1. Open Notepad as an administrator.
2. Navigate to `C:\Windows\System32\drivers\etc\hosts`.
3. Ensure no incorrect entries are redirecting domains.
**Mac/Linux:**
1. Open Terminal and run:
```bash
sudo nano /etc/hosts
```
2. Remove incorrect entries and save the file.
#### **2.4 Check Firewall and Security Software**
Firewalls and antivirus programs can block DNS queries. Temporarily disable security software to see if it resolves the issue.
#### **2.5 Check Domain’s DNS Records**
If you're troubleshooting a website’s DNS, check its DNS records:
* **A Record**: Maps the domain to an IP address.
* **CNAME Record**: Alias for another domain.
* **MX Record**: Defines mail servers for email delivery.
Use an online DNS lookup tool or your hosting provider’s DNS management panel to verify these settings.
#### **2.6 Restart DNS Services (Advanced Users)**
On Windows, restart the DNS client service:
```bash
net stop dnscache
net start dnscache
```
On Linux:
```bash
sudo systemctl restart systemd-resolved
```
#### **2.7 Check for DNS Propagation Delays**
If you’ve recently changed DNS records, propagation can take up to 48 hours. Use [WhatsMyDNS](https://www.whatsmydns.net/) to check global propagation.
***
#### **3. When to Contact Your ISP or Hosting Provider**
If none of the above solutions work:
* Contact your **Internet Service Provider (ISP)** if all websites fail to resolve.
* Contact your **domain registrar or hosting provider** if only your website is affected.
***
#### **Conclusion**
DNS issues can be frustrating, but with systematic troubleshooting, they can be identified and resolved. Start by checking DNS resolution, clearing cache, and switching to reliable DNS servers. If problems persist, verify DNS records, inspect firewall settings, and check for misconfigurations. Following these steps will help ensure a smooth and reliable browsing experience.
# Database Management
# How to Access phpMyAdmin & Manage Databases
phpMyAdmin is a widely-used web-based tool for managing MySQL and MariaDB databases. It provides an intuitive graphical interface to create, modify, and delete databases, tables, and records without requiring command-line expertise. This guide will walk you through how to access phpMyAdmin and perform common database management tasks.
***
#### How to Access phpMyAdmin
**Accessing phpMyAdmin via cPanel**
1. **Log in to your hosting account** and go to **cPanel**.
2. Scroll down to the **Databases** section and click on **phpMyAdmin**.
3. This will open the phpMyAdmin interface where you can manage your databases.
**Accessing phpMyAdmin via Direct URL**
If your hosting provider allows direct access, use this URL:
```
https://yourdomain.com/phpmyadmin
```
You may be prompted to enter your database username and password, which can be found in your hosting account or `wp-config.php` file (for WordPress users).
**Accessing phpMyAdmin on a Local Server**
For local development using tools like XAMPP, MAMP, or WAMP:
1. Start your Apache and MySQL services.
2. Open your web browser and go to:
```
http://localhost/phpmyadmin/
```
This will give you access to phpMyAdmin on your local machine.
***
#### How to Create a New Database
1. In phpMyAdmin, click on the **Databases** tab.
2. Enter a name for your new database in the **Create database** field.
3. Select a **collation** (usually `utf8mb4_general_ci` for general use).
4. Click **Create**.
Your new database will now appear in the list of available databases.
***
#### How to Import a Database
If you have an existing database backup, follow these steps to import it:
1. Select the database where you want to import the data.
2. Click on the **Import** tab.
3. Click **Choose File** and select your `.sql` file.
4. Click **Go** to start the import process.
5. You will see a success message once the import is complete.
***
#### How to Export a Database
To back up your database:
1. Select the database you want to export.
2. Click the **Export** tab.
3. Choose the **Quick** export method and select `SQL` as the format.
4. Click **Go** to download the backup file.
For advanced users, the **Custom** option allows you to fine-tune export settings.
***
#### How to Manage Tables in phpMyAdmin
**Creating a New Table**
1. Select the database where you want to create a table.
2. Click on the **Structure** tab and scroll down to the **Create Table** section.
3. Enter a table name and specify the number of columns.
4. Define column names, data types, and constraints.
5. Click **Save** to create the table.
**Editing an Existing Table**
* Click on a table name to view its structure.
* Select **Change** next to a column to modify its type, name, or default value.
* Click **Save** to apply changes.
**Deleting a Table**
1. Navigate to the **Structure** tab.
2. Click **Drop** next to the table you want to delete.
3. Confirm the deletion.
**Warning:** Deleting a table permanently removes all its data.
***
#### How to Manage Database Users
**Creating a New Database User**
1. Click on the **User Accounts** tab.
2. Click **Add user account**.
3. Enter a **username** and **password**.
4. Under **Global Privileges**, assign the necessary permissions.
5. Click **Go** to create the user.
**Assigning User Privileges**
1. Select a database and go to the **Privileges** tab.
2. Click **Edit privileges** next to the user.
3. Select the privileges needed (e.g., SELECT, INSERT, DELETE, etc.).
4. Click **Go** to save the changes.
**Deleting a User**
1. Go to the **User Accounts** tab.
2. Click **Drop** next to the user you want to remove.
3. Confirm deletion.
***
#### How to Run SQL Queries in phpMyAdmin
phpMyAdmin allows users to execute SQL commands directly.
1. Select your database.
2. Click the **SQL** tab.
3. Enter your SQL query, e.g.:
```sql
SELECT * FROM users;
```
4. Click **Go** to execute the query.
5. Results will be displayed below.
***
#### How to Fix Common phpMyAdmin Errors
**Error: "Access Denied for User"**
* Ensure that the **username** and **password** are correct.
* If using WordPress, check the `wp-config.php` file for correct credentials.
* Reset the database user password in your hosting panel.
**Error: "Connection Timed Out"**
* Increase the `max_execution_time` in the `php.ini` file.
* Optimize large queries to improve performance.
**Error: "Database Collation Issues"**
* Change collation settings using the following SQL command:
```sql
ALTER DATABASE database_name CHARACTER SET utf8mb4 COLLATE utf8mb4_general_ci;
```
***
#### Conclusion
phpMyAdmin is a powerful tool for managing MySQL databases without requiring complex command-line operations. By following this guide, you can access phpMyAdmin, create and manage databases, import/export data, assign user privileges, and troubleshoot common issues efficiently. Keeping regular backups and understanding database management best practices will ensure your website or application runs smoothly.
# How to Create & Import MySQL Databases
MySQL is one of the most widely used relational database management systems (RDBMS) for web applications and software development. Creating and importing MySQL databases is a fundamental task for setting up new applications, migrating data, or restoring backups. This guide provides step-by-step instructions on how to create a MySQL database and import data into it.
***
#### How to Create a MySQL Database
**Creating a Database via cPanel**
If your hosting provider uses **cPanel**, follow these steps:
1. **Log in to cPanel** through your hosting provider.
2. Scroll to the **Databases** section and click on **MySQL Databases**.
3. Under **Create New Database**, enter a name for your database.
4. Click **Create Database**.
5. Once the database is created, you need to create a user:
* Scroll down to **MySQL Users**.
* Enter a username and password.
* Click **Create User**.
6. Assign the user to the database:
* Under **Add User to Database**, select the user and database.
* Click **Add**, then grant **All Privileges**.
* Click **Make Changes**.
Your MySQL database is now ready to use.
**Creating a Database via phpMyAdmin**
1. **Access phpMyAdmin** via cPanel or a direct URL like:
```
https://yourdomain.com/phpmyadmin
```
2. Click on the **Databases** tab.
3. Enter a name for your new database.
4. Click **Create**.
This method is useful for local environments using tools like XAMPP, MAMP, or WAMP.
**Creating a Database via MySQL Command Line**
For users comfortable with the command line:
1. Log in to MySQL:
```bash
mysql -u root -p
```
2. Create a database:
```sql
CREATE DATABASE mydatabase;
```
3. Grant a user access:
```sql
GRANT ALL PRIVILEGES ON mydatabase.* TO 'myuser'@'localhost' IDENTIFIED BY 'mypassword';
```
4. Exit MySQL:
```sql
FLUSH PRIVILEGES;
EXIT;
```
***
#### How to Import a MySQL Database
**Importing a Database via phpMyAdmin**
If you have an existing database `.sql` file, you can import it through phpMyAdmin:
1. Log in to **phpMyAdmin**.
2. Select the database where you want to import data.
3. Click on the **Import** tab.
4. Click **Choose File** and select the `.sql` file from your computer.
5. Click **Go** to begin the import.
6. Wait for the process to complete. A success message will appear once the import is finished.
**Importing a Database via MySQL Command Line**
For large databases, the command line is more efficient:
1. Open a terminal and log into MySQL:
```bash
mysql -u myuser -p mydatabase < /path/to/database.sql
```
2. Replace `myuser` with your database username and `mydatabase` with your database name.
3. Enter the password when prompted.
This method ensures faster imports, especially for large `.sql` files.
**Importing a Database via cPanel Backup Tool**
Some hosting providers allow direct database restoration from backups:
1. Log in to **cPanel**.
2. Go to **Backup Wizard**.
3. Select **Restore** and choose **MySQL Databases**.
4. Upload the backup file and start the restore process.
***
#### Troubleshooting Database Import Errors
**"Unknown Database" Error**
* Ensure that the database you are importing into **already exists**.
* If not, create it manually before running the import.
**"Access Denied for User" Error**
* Verify the **database username and password**.
* Make sure the user has the necessary **privileges** to access the database.
**"Max Execution Time Exceeded" Error**
* For phpMyAdmin, increase the PHP execution time in `php.ini`:
```ini
max_execution_time = 300
```
* Alternatively, use the **command line method** to import the database.
**"Packet Too Large" Error**
* If importing a large `.sql` file, increase the packet size in MySQL configuration:
```ini
max_allowed_packet = 64M
```
* Restart MySQL after making the changes.
***
#### Conclusion
Creating and importing MySQL databases is a crucial task for managing web applications. Whether using **cPanel**, **phpMyAdmin**, or the **command line**, following the correct steps ensures a smooth process. If you encounter errors, troubleshooting using the provided solutions will help resolve issues efficiently. Regular backups are always recommended before making major database changes.
# How to Fix Database Connection Issues
A database connection issue occurs when a website or application cannot establish a link between the database and the server. This is a common problem for platforms like WordPress, Joomla, and other database-driven applications. The causes can range from incorrect database credentials to server downtime. This guide will walk you through troubleshooting and fixing database connection issues effectively.
***
#### Common Causes of Database Connection Issues
Before diving into solutions, it’s important to understand the common reasons why a database connection fails:
* **Incorrect Database Credentials**: The database name, username, password, or hostname is incorrect.
* **Database Server Downtime**: The database server may be down due to maintenance or high traffic.
* **Corrupted Database**: Corruption in tables or database files can prevent a connection.
* **Exceeding Resource Limits**: Shared hosting plans often impose limits on database connections.
* **Corrupt or Missing Files**: Missing core application files (like `wp-config.php` in WordPress) can break the database connection.
***
#### Check Database Credentials
One of the most common reasons for a failed database connection is incorrect database credentials. You need to verify:
1. **Database Name**: Ensure it matches the one set up in your hosting control panel.
2. **Database Username and Password**: Cross-check the credentials with those stored in your website’s configuration file.
3. **Database Hostname**: Most shared hosting providers use `localhost`, but some require a different hostname (e.g., `db.yourdomain.com`).
**How to Verify Credentials in WordPress**
1. Access your website’s files using **FTP** or the hosting control panel.
2. Open the `wp-config.php` file.
3. Locate these lines:
```php
define('DB_NAME', 'your_database_name');
define('DB_USER', 'your_database_user');
define('DB_PASSWORD', 'your_database_password');
define('DB_HOST', 'localhost');
```
4. If incorrect, update them and save the file.
***
#### Check if the Database Server is Down
If the credentials are correct but the connection still fails, check if the database server is running:
* **Use phpMyAdmin**: Log in to phpMyAdmin from your hosting control panel. If you can access it, the server is running.
* **Use MySQL Command Line**:
```bash
mysql -u your_user -p
```
If it connects, the database server is operational.
* **Check with Your Host**: If the server is down, contact your hosting provider.
***
#### Repair a Corrupt Database
A corrupt database can cause connection failures. You can attempt a repair using the following methods:
**Repair Using phpMyAdmin**
1. Log in to **phpMyAdmin**.
2. Select your database.
3. Check all tables and choose **Repair Table** from the dropdown menu.
**Repair Using WordPress Built-in Tool**
1. Open `wp-config.php` and add this line:
```php
define('WP_ALLOW_REPAIR', true);
```
2. Go to:
```
https://yourwebsite.com/wp-admin/maint/repair.php
```
3. Click **Repair Database**.
4. Once complete, remove the repair line from `wp-config.php`.
***
#### Increase Server Resources
If your site is experiencing high traffic, the database server may be overwhelmed. To fix this:
* **Upgrade Hosting Plan**: Consider moving to a VPS or dedicated server if on shared hosting.
* **Increase PHP Memory Limit**:
* Open `wp-config.php` and add:
```php
define('WP_MEMORY_LIMIT', '256M');
```
* Save the file and refresh your site.
***
#### Restore a Backup
If your site was working fine previously, restoring a backup can resolve the issue:
1. **Use Hosting Backups**: Most hosting providers offer daily backups.
2. **Use a Backup Plugin**: If using WordPress, plugins like UpdraftPlus can restore database backups.
3. **Manual Restore**:
* Open **phpMyAdmin**.
* Select your database and go to **Import**.
* Upload your `.sql` backup file.
* Click **Go** to restore.
***
#### Restart Database Services (For VPS/Dedicated Hosting)
If you have root access, restarting the MySQL service can resolve database connection problems:
```bash
sudo service mysql restart
```
For Apache servers:
```bash
sudo service apache2 restart
```
For Nginx servers:
```bash
sudo service nginx restart
```
***
#### Check for Plugin or Theme Conflicts
A poorly coded plugin or theme can interfere with the database connection.
**Disable Plugins**
1. Access your site’s files via FTP.
2. Navigate to `wp-content/plugins/`.
3. Rename the `plugins` folder to `plugins_backup`.
4. Check if the site works.
5. Rename back and enable plugins one by one to find the faulty plugin.
**Switch to a Default Theme**
1. Go to `wp-content/themes/`.
2. Rename your active theme folder.
3. WordPress will default to a built-in theme.
4. Check if the database connection is restored.
***
#### Contact Your Hosting Provider
If none of these solutions work, reach out to your hosting provider. Provide them with:
* Error messages you are seeing.
* Steps you have taken to troubleshoot.
* Recent changes made to the site.
***
#### Conclusion
Database connection issues can be frustrating, but following a systematic approach can help identify and fix the problem. Start by verifying credentials, checking server status, repairing the database, and increasing resources if necessary. If all else fails, restoring a backup or contacting your hosting provider can help resolve the issue.
# How to Optimize & Repair a Database
Over time, databases can accumulate unnecessary data, fragmentation, and corruption, leading to slow performance and errors. Regular optimization and repairs ensure that your database runs efficiently and remains error-free. This guide will walk you through the best methods to optimize and repair your database using different tools and techniques.
***
#### Why Optimize and Repair a Database?
Databases require maintenance for the following reasons:
* **Performance Improvement**: Optimizing tables removes fragmentation, improving query speed.
* **Reduced Storage Usage**: Deleting overhead data frees up disk space.
* **Error Prevention**: Repairing tables prevents crashes and corruption.
* **Improved User Experience**: A fast, responsive database enhances website and application performance.
***
#### How to Optimize a Database
Optimizing a database improves efficiency by reorganizing data storage, defragmenting tables, and removing unnecessary overhead.
**Optimize a Database Using phpMyAdmin**
1. **Log in to phpMyAdmin** via your hosting control panel.
2. Select the **database** you want to optimize.
3. Click on the **Structure** tab.
4. Check the tables you want to optimize or click **Check All**.
5. From the dropdown menu, select **Optimize Table**.
6. phpMyAdmin will optimize the selected tables and confirm completion.
**Optimize a Database Using MySQL Command Line**
If you have command-line access, use the `OPTIMIZE TABLE` command:
```sql
OPTIMIZE TABLE table_name;
```
For all tables in a database, run:
```sql
mysqlcheck -o -u username -p database_name
```
This method is faster for large databases.
**Optimize a WordPress Database with a Plugin**
For WordPress users, plugins can simplify database optimization:
* **WP-Optimize**
* **WP Rocket**
* **Advanced Database Cleaner**
These plugins allow one-click optimization and automatic scheduling.
***
#### How to Repair a Database
If your database is corrupted or showing errors, repairing it can restore functionality.
**Repair a Database Using phpMyAdmin**
1. **Log in to phpMyAdmin**.
2. Select the affected **database**.
3. Click on the **Structure** tab.
4. Check the tables with errors (usually marked in red).
5. From the dropdown menu, select **Repair Table**.
6. phpMyAdmin will attempt to fix the corruption.
**Repair a Database Using MySQL Command Line**
If you have SSH or terminal access, use the `REPAIR TABLE` command:
```sql
REPAIR TABLE table_name;
```
For all tables in a database, run:
```sql
mysqlcheck -r -u username -p database_name
```
**Repair a WordPress Database Using wp-config.php**
If your WordPress site has database issues, enable the built-in repair tool:
1. Open your `wp-config.php` file.
2. Add the following line before `/* That's all, stop editing! */`:
```php
define('WP_ALLOW_REPAIR', true);
```
3. Visit:
```
https://yourwebsite.com/wp-admin/maint/repair.php
```
4. Click **Repair Database**.
5. Remove the added line from `wp-config.php` after repairing.
***
#### Automating Database Maintenance
Regular optimization and repair prevent performance issues. Consider automating maintenance:
* **WordPress Plugins**: Use WP-Optimize for scheduled cleanups.
* **MySQL Event Scheduler**: Run optimization and repair scripts at set intervals.
* **cPanel Cron Jobs**: Set up a cron job to execute MySQL optimization commands automatically.
Example of a cron job command:
```bash
mysqlcheck -o -r -u username -p database_name
```
***
#### When to Contact Your Hosting Provider
If database issues persist despite optimization and repairs:
* Contact your hosting provider for **server-related issues**.
* Request **database recovery** if backups are needed.
* Upgrade your hosting plan if the database is exceeding resource limits.
***
#### Conclusion
Optimizing and repairing your database is essential for maintaining performance and preventing corruption. Whether using phpMyAdmin, command-line tools, or WordPress plugins, regular maintenance ensures a stable and efficient database. Automating these processes further reduces the chances of database-related issues.
# Server & Hosting Settings
# How to Change PHP Version & Settings
PHP is a widely used scripting language for web development, and different applications may require different PHP versions or settings to function properly. Whether you need to upgrade for security reasons, downgrade for compatibility, or modify settings for performance, this guide will show you how to change your PHP version and customize settings on different platforms.
***
#### Why Change PHP Version?
Changing the PHP version can be necessary for several reasons:
* **Application Compatibility**: Some websites and applications require a specific PHP version.
* **Security Updates**: Newer PHP versions include important security patches.
* **Performance Optimization**: Later PHP versions improve performance and reduce resource usage.
* **Feature Support**: Some functions and libraries are only available in newer versions of PHP.
***
#### How to Check Your Current PHP Version
Before making changes, check the current PHP version running on your server.
**Check PHP Version via Command Line**
If you have SSH access, run the following command:
```bash
php -v
```
This will display the installed PHP version.
**Check PHP Version via cPanel**
1. Log in to **cPanel**.
2. Navigate to **Software > Select PHP Version**.
3. Your current PHP version will be displayed at the top of the page.
**Check PHP Version via a PHP Script**
1. Create a new file called `phpinfo.php`.
2. Add the following code:
```php
```
3. Upload the file to your website’s root directory.
4. Visit `https://yourdomain.com/phpinfo.php` in your browser.
***
#### How to Change PHP Version
**Change PHP Version in cPanel**
1. Log in to **cPanel**.
2. Go to **Select PHP Version** under the **Software** section.
3. Use the dropdown menu to choose your desired PHP version.
4. Click **Set as Current** to apply the change.
5. If needed, enable or disable PHP extensions.
**Change PHP Version in Plesk**
1. Log in to **Plesk**.
2. Navigate to **Websites & Domains > PHP Settings**.
3. Use the dropdown menu to select a different PHP version.
4. Click **Apply** or **OK** to save changes.
**Change PHP Version Using .htaccess (Apache Servers)**
If your server allows `.htaccess` overrides, add this line:
```apache
AddHandler application/x-httpd-php81 .php
```
Replace `php81` with your desired PHP version.
**Change PHP Version via Command Line (Linux)**
For VPS or dedicated servers:
1. List available PHP versions:
```bash
update-alternatives --list php
```
2. Change PHP version:
```bash
sudo update-alternatives --set php /usr/bin/php8.1
```
3. Verify the change:
```bash
php -v
```
***
#### How to Modify PHP Settings
Certain applications may require modifications to PHP settings like memory limit, max execution time, and file upload size.
**Modify PHP Settings via cPanel**
1. Log in to **cPanel**.
2. Go to **Select PHP Version > Options**.
3. Adjust settings such as:
* `memory_limit`
* `upload_max_filesize`
* `post_max_size`
* `max_execution_time`
4. Save changes.
**Modify PHP Settings via php.ini**
For servers with direct access to PHP configuration files:
1. Locate the `php.ini` file:
```bash
find /etc -name php.ini
```
2. Edit it using a text editor:
```bash
sudo nano /etc/php/8.1/apache2/php.ini
```
3. Modify values, for example:
```ini
memory_limit = 256M
max_execution_time = 300
upload_max_filesize = 64M
```
4. Save and restart the web server:
```bash
sudo systemctl restart apache2
```
**Modify PHP Settings via .htaccess**
If you do not have access to `php.ini`, modify settings via `.htaccess`:
```apache
php_value memory_limit 256M
php_value max_execution_time 300
php_value upload_max_filesize 64M
```
Save the file and check if the changes take effect.
**Modify PHP Settings via CLI**
For CLI applications:
```bash
php -d memory_limit=256M script.php
```
***
#### Troubleshooting PHP Version Issues
**"500 Internal Server Error" After Changing PHP Version**
* Ensure that required PHP extensions are enabled.
* Check the error log (`/var/log/apache2/error.log` or `/var/log/nginx/error.log`).
* Try switching back to a previous PHP version to see if the issue resolves.
**"php.ini Changes Not Taking Effect"**
* Restart Apache or Nginx:
```bash
sudo systemctl restart apache2
```
```bash
sudo systemctl restart nginx
```
* Check for multiple `php.ini` files using:
```bash
php --ini
```
* Verify changes with `phpinfo()`.
**"Extensions Not Loading"**
* Enable necessary PHP extensions in **cPanel > Select PHP Version**.
* Install missing extensions via CLI:
```bash
sudo apt install php8.1-mbstring
```
* Restart PHP services after installing extensions.
***
#### Conclusion
Changing PHP versions and modifying settings is essential for compatibility, security, and performance. Whether using **cPanel**, **Plesk**, **CLI**, or **.htaccess**, following the correct steps ensures a smooth transition. Regularly updating to supported PHP versions and optimizing settings helps keep your applications running efficiently.
# Understanding .htaccess & How to Edit It
The `.htaccess` file is a powerful configuration file used on Apache web servers to control various website functions, including redirects, security settings, and URL rewriting. Understanding how to use and edit `.htaccess` can help website administrators enhance security, improve performance, and customize website behavior.
***
#### What is .htaccess?
`.htaccess` (Hypertext Access) is a hidden configuration file that allows webmasters to control server settings on a per-directory basis. It is primarily used with **Apache** servers and is supported by most web hosting providers.
**Common Uses of .htaccess**
* URL Redirection (301 & 302 redirects)
* Enforcing HTTPS
* Password Protection
* Blocking IP Addresses
* Custom Error Pages
* Enabling Gzip Compression
***
#### How to Locate and Access .htaccess
**Accessing .htaccess via cPanel**
1. Log in to **cPanel**.
2. Navigate to **File Manager**.
3. Go to the **public\_html** directory (or the root directory of your website).
4. Look for the `.htaccess` file.
5. If you don’t see it, enable hidden files by clicking **Settings > Show Hidden Files**.
**Accessing .htaccess via FTP**
1. Use an FTP client like **FileZilla**.
2. Connect to your server using FTP credentials.
3. Navigate to the **public\_html** directory.
4. Locate the `.htaccess` file.
**Creating a New .htaccess File**
If `.htaccess` does not exist:
1. Open **File Manager** or an FTP client.
2. Create a new file and name it `.htaccess` (ensure there is no file extension).
3. Add basic configurations and save the file.
***
#### How to Edit .htaccess
**Editing .htaccess via cPanel File Manager**
1. Open **File Manager** in cPanel.
2. Locate `.htaccess` and **right-click > Edit**.
3. Make necessary changes and **Save** the file.
**Editing .htaccess via FTP**
1. Download `.htaccess` to your local computer.
2. Open it with a text editor like **Notepad++** or **VS Code**.
3. Make your changes and re-upload it to the server.
**Editing .htaccess via SSH**
For users with **SSH access**:
1. Connect to your server via SSH.
2. Navigate to the website’s root directory:
```bash
cd /var/www/html
```
3. Open the file using a text editor:
```bash
nano .htaccess
```
4. Make changes and save using `Ctrl + X`, then `Y` to confirm.
***
#### Common .htaccess Configurations
**Redirecting HTTP to HTTPS**
Forcing HTTPS ensures all traffic is encrypted:
```apache
RewriteEngine On
RewriteCond %{HTTPS} !=on
RewriteRule ^(.*)$ https://%{HTTP_HOST}/$1 [R=301,L]
```
**Creating 301 Redirects (Permanent Redirect)**
Redirect an old URL to a new one:
```apache
Redirect 301 /old-page.html https://yourwebsite.com/new-page.html
```
**Blocking Specific IP Addresses**
To block unwanted visitors from accessing your site:
```apache
Order Deny,Allow
Deny from 123.45.67.89
Deny from 111.222.333.444
```
**Password Protecting a Directory**
To restrict access to certain directories:
1. Create an `.htpasswd` file:
```bash
htpasswd -c /home/user/.htpasswd username
```
2. Add the following to `.htaccess`:
```apache
AuthType Basic
AuthName "Restricted Area"
AuthUserFile /home/user/.htpasswd
Require valid-user
```
**Custom Error Pages**
Set up a custom 404 error page:
```apache
ErrorDocument 404 /custom-404.html
```
**Enabling Gzip Compression**
Speed up website load times by compressing files:
```apache
AddOutputFilterByType DEFLATE text/html text/plain text/xml text/css application/javascript
```
***
#### Troubleshooting .htaccess Issues
**Internal Server Error (500 Error)**
* Check for syntax errors using an online **.htaccess validator**.
* Rename `.htaccess` to `.htaccess_backup` and check if the error disappears.
**Changes Not Taking Effect**
* Clear your browser and server cache.
* Ensure **mod\_rewrite** is enabled (for Apache servers).
* Restart the Apache server:
```bash
sudo systemctl restart apache2
```
***
#### Conclusion
The `.htaccess` file is a powerful tool for website configuration, security, and optimization. By understanding how to edit and apply common rules, you can customize your website’s behavior, enforce security policies, and improve performance. Always back up your `.htaccess` file before making changes to prevent unexpected errors.
# How to Enable or Disable Directory Listing
Directory listing is a server feature that displays the contents of a directory when no index file (e.g., `index.html` or `index.php`) is found. While enabling directory listing can be useful for certain applications, it can pose security risks if sensitive files are exposed. This guide will explain how to enable or disable directory listing using `.htaccess`, Apache, and Nginx configurations.
***
#### What is Directory Listing?
When a user accesses a directory on a web server without an index file, the server may display a list of all files and subdirectories. This behavior is called **directory listing**.
**Example of Directory Listing Output:**
```
Index of /files
Parent Directory
document1.pdf
image.jpg
script.js
```
This allows users to browse and access files directly, which may not always be desirable.
***
#### Why Enable or Disable Directory Listing?
**Reasons to Enable Directory Listing:**
* To allow users to browse and download shared files.
* Useful for public repositories or documentation directories.
* When you need quick access to files without creating an index page.
**Reasons to Disable Directory Listing:**
* Prevent unauthorized users from accessing sensitive files.
* Reduce exposure to security risks such as **information disclosure attacks**.
* Ensure that only intended pages and files are accessible.
***
#### How to Disable Directory Listing
**Disable Directory Listing via .htaccess (Apache Servers)**
For Apache servers, you can disable directory listing by adding the following line to the `.htaccess` file in your website’s root directory:
```apache
Options -Indexes
```
**Steps:**
1. Open **cPanel** or access your server via **FTP**.
2. Navigate to the **public\_html** directory.
3. Locate or create the `.htaccess` file.
4. Add `Options -Indexes` to the file.
5. Save the file and reload your website.
If directory listing is successfully disabled, visitors attempting to access a directory without an index file will see a `403 Forbidden` error.
**Disable Directory Listing in Apache Configuration (httpd.conf)**
If you have access to Apache’s configuration file (`httpd.conf`), you can disable directory listing globally:
1. Open the Apache configuration file:
```bash
sudo nano /etc/apache2/apache2.conf # For Ubuntu/Debian
sudo nano /etc/httpd/conf/httpd.conf # For CentOS/RHEL
```
2. Look for the `` section and modify it as follows:
```apache
Options -Indexes
```
3. Save the file and restart Apache:
```bash
sudo systemctl restart apache2 # For Ubuntu/Debian
sudo systemctl restart httpd # For CentOS/RHEL
```
**Disable Directory Listing in Nginx**
For Nginx servers, directory listing (autoindex) can be disabled in the configuration file:
1. Open the Nginx configuration file:
```bash
sudo nano /etc/nginx/nginx.conf
```
2. Locate the relevant server block and set `autoindex` to `off`:
```nginx
server {
listen 80;
server_name yourdomain.com;
location / {
autoindex off;
}
}
```
3. Save the file and restart Nginx:
```bash
sudo systemctl restart nginx
```
Now, directory listing will be disabled for your Nginx-powered website.
***
#### How to Enable Directory Listing
**Enable Directory Listing via .htaccess (Apache)**
If you need directory listing for a specific folder, add the following line to `.htaccess`:
```apache
Options +Indexes
```
**Steps:**
1. Navigate to the directory where you want to enable listing.
2. Create or edit the `.htaccess` file.
3. Add `Options +Indexes`.
4. Save the file and refresh the page.
**Enable Directory Listing in Apache Configuration**
To enable directory listing globally in Apache, modify the configuration file:
1. Open `httpd.conf` or `apache2.conf`:
```bash
sudo nano /etc/apache2/apache2.conf # For Ubuntu/Debian
sudo nano /etc/httpd/conf/httpd.conf # For CentOS/RHEL
```
2. Locate the `` section and modify it as follows:
```apache
Options +Indexes
```
3. Save the file and restart Apache:
```bash
sudo systemctl restart apache2 # For Ubuntu/Debian
sudo systemctl restart httpd # For CentOS/RHEL
```
**Enable Directory Listing in Nginx**
To enable directory listing in Nginx, modify the configuration file:
1. Open the Nginx configuration file:
```bash
sudo nano /etc/nginx/nginx.conf
```
2. Locate the server block and set `autoindex` to `on`:
```nginx
server {
listen 80;
server_name yourdomain.com;
location /files/ {
autoindex on;
}
}
```
3. Save the file and restart Nginx:
```bash
sudo systemctl restart nginx
```
Now, visitors can see a directory listing when they access `/files/` on your website.
***
#### Troubleshooting Directory Listing Issues
**Directory Listing Still Enabled After Disabling?**
* Ensure there are no conflicting `.htaccess` files in subdirectories.
* Restart the web server after making changes.
* Check the Apache configuration for other `Options +Indexes` directives.
**403 Forbidden Error After Disabling Directory Listing?**
* This is the expected behavior when directory listing is disabled.
* To allow access only to specific files, create an `index.html` file in the directory.
**Changes Not Reflecting in Nginx?**
* Ensure you restart Nginx after modifying the configuration.
* Check Nginx logs for syntax errors:
```bash
sudo nginx -t
```
***
#### Conclusion
Directory listing can be a useful feature but also poses security risks if not managed properly. By using `.htaccess`, Apache, or Nginx configurations, you can enable or disable directory listing as needed. Always ensure that sensitive files remain protected, and consider alternative file-sharing methods if necessary.
# How to Set Up Custom Cron Jobs
Cron jobs are scheduled tasks that run automatically at specified intervals on Unix-based systems, including Linux and macOS. They are commonly used for automating repetitive tasks such as database backups, script executions, and log cleanups. Understanding how to set up and manage cron jobs can improve efficiency and automate essential processes for websites and applications.
***
#### What is a Cron Job?
A **cron job** is a scheduled command or script that runs at a predetermined time and frequency. The `cron` daemon manages these tasks in the background without user intervention.
**Common Use Cases for Cron Jobs**
* Running backups at regular intervals.
* Clearing temporary files or cache.
* Sending automated emails or reports.
* Executing scripts for data synchronization.
* Updating website content automatically.
***
#### How to Set Up a Cron Job
**Step 1: Access the Crontab File**
The `crontab` (cron table) is the configuration file where cron jobs are stored. To edit it, use the following command:
```bash
crontab -e
```
If this is your first time using `crontab`, it may ask you to select a text editor (e.g., **nano** or **vim**).
**Step 2: Understanding Cron Job Syntax**
A cron job entry follows this format:
```bash
* * * * * /path/to/command-or-script
```
Each asterisk represents a scheduling parameter:
```
┌──────── minute (0 - 59)
│ ┌────── hour (0 - 23)
│ │ ┌──── day of the month (1 - 31)
│ │ │ ┌── month (1 - 12)
│ │ │ │ ┌ day of the week (0 - 6) (Sunday = 0 or 7)
│ │ │ │ │
* * * * * command-to-execute
```
**Step 3: Creating a Custom Cron Job**
To schedule a cron job, add an entry in `crontab` with the desired timing and script.
**Example 1: Running a Backup Every Day at Midnight**
```bash
0 0 * * * /usr/bin/php /home/user/backup.php
```
This executes `backup.php` at **midnight (00:00)** every day.
**Example 2: Clearing Temporary Files Every Hour**
```bash
0 * * * * rm -rf /home/user/temp/*
```
This deletes all files in `/home/user/temp/` at the start of every hour.
**Example 3: Running a Script Every Monday at 6 AM**
```bash
0 6 * * 1 /home/user/scripts/myscript.sh
```
This executes `myscript.sh` at **6:00 AM every Monday**.
***
#### Managing Cron Jobs
**Viewing Existing Cron Jobs**
To list currently scheduled cron jobs, use:
```bash
crontab -l
```
**Removing a Cron Job**
To remove all cron jobs for the current user:
```bash
crontab -r
```
To remove a specific cron job, open `crontab -e`, delete the relevant line, and save the file.
**Running a Cron Job Manually for Testing**
To execute a cron job manually, run the command directly in the terminal:
```bash
/bin/bash /home/user/scripts/myscript.sh
```
Or for PHP scripts:
```bash
/usr/bin/php /home/user/script.php
```
***
#### Setting Up Cron Jobs in cPanel
Many web hosting providers offer cron job management through **cPanel**.
**Steps to Create a Cron Job in cPanel**
1. **Log in to cPanel**.
2. Navigate to **Advanced > Cron Jobs**.
3. Under **Add New Cron Job**, choose a time interval (e.g., "Once Per Day").
4. In the **Command** field, enter your script’s full path, e.g.:
```bash
/usr/bin/php /home/user/public_html/cron.php
```
5. Click **Add New Cron Job**.
***
#### Redirecting Cron Job Output
By default, cron jobs may generate output that gets emailed to the server user. To prevent this, redirect output to a log file or suppress it.
**Redirect Output to a Log File**
```bash
0 0 * * * /path/to/script.sh >> /var/log/cron.log 2>&1
```
This stores cron job output in `cron.log`.
**Suppress Output Completely**
```bash
0 0 * * * /path/to/script.sh > /dev/null 2>&1
```
This discards all output and prevents unnecessary email notifications.
***
#### Troubleshooting Cron Jobs
**Cron Job Not Running?**
* **Check the cron log**:
```bash
cat /var/log/syslog | grep CRON
```
* **Ensure the script has execute permissions**:
```bash
chmod +x /path/to/script.sh
```
* **Use absolute paths in scripts**: Instead of `php script.php`, use:
```bash
/usr/bin/php /home/user/script.php
```
**Syntax Errors in Crontab?**
If your cron job isn’t working, check for syntax errors using:
```bash
crontab -l | grep "your_script_name"
```
**Cron Jobs Overlapping?**
To prevent a script from running multiple instances simultaneously, use `flock`:
```bash
* * * * * /usr/bin/flock -n /tmp/myscript.lock /home/user/script.sh
```
This prevents the script from running again if the previous execution is still in progress.
***
#### Conclusion
Setting up custom cron jobs helps automate essential tasks like backups, file management, and script execution. Whether configuring through the **Linux command line** or **cPanel**, following best practices ensures reliability and efficiency. By testing, monitoring logs, and handling permissions correctly, you can create cron jobs that run smoothly and efficiently.
# Billing & Account Management
# How to Upgrade/Downgrade Your Hosting Plan
Your website’s performance, security, and resource availability depend heavily on your hosting plan. Over time, you may need to **upgrade** to handle increased traffic or **downgrade** to save costs. This guide will walk you through the steps of upgrading or downgrading your hosting plan and explain the key considerations involved.
***
#### Why Upgrade or Downgrade Your Hosting Plan?
**Reasons to Upgrade Your Hosting Plan**
* **Increased Traffic**: If your site experiences a surge in visitors, you may need more resources.
* **Performance Issues**: Slow page loading, frequent downtime, or high server load may indicate a need for an upgrade.
* **Security Enhancements**: Higher-tier plans often include advanced security features such as malware scanning and automated backups.
* **E-commerce Growth**: If you are running an online store, better hosting ensures smooth transactions and higher reliability.
* **Need for More Features**: Advanced features such as SSH access, dedicated IPs, and better database support are often included in premium plans.
**Reasons to Downgrade Your Hosting Plan**
* **Reduced Traffic**: If your website no longer needs high bandwidth or computing resources, you can switch to a lower-tier plan.
* **Cost Savings**: Downgrading helps minimize expenses, especially if you are not using all the resources of your current plan.
* **Simplified Management**: If you no longer need advanced server configurations or management, a simpler plan may be more efficient.
***
#### Steps to Upgrade Your Hosting Plan
**Step 1: Check Your Current Hosting Plan**
Before upgrading, review your existing hosting plan’s features and limitations. Most hosting providers offer an account dashboard where you can see:
* Disk space usage
* Bandwidth consumption
* CPU and RAM utilization
**Step 2: Choose a New Hosting Plan**
Compare available plans offered by your provider. Common types include:
* **Shared Hosting**: Ideal for small websites and blogs.
* **VPS (Virtual Private Server)**: Provides dedicated resources for growing websites.
* **Cloud Hosting**: Scalable solution for handling variable traffic.
* **Dedicated Hosting**: Best for large-scale websites needing full server control.
**Step 3: Backup Your Website**
Before making changes, create a full backup of your site, including:
* **Files** (via FTP or File Manager)
* **Databases** (via phpMyAdmin or MySQL dump)
* **Emails and Configuration Settings**
**Step 4: Initiate the Upgrade**
* **cPanel Users**: Log in to your hosting account, navigate to **Billing > Upgrade Plan**, select your new plan, and confirm.
* **Managed Hosting Users**: Contact customer support to request an upgrade.
* **VPS/Dedicated Server Users**: If upgrading to a higher-tier VPS or dedicated server, you may need a migration plan.
**Step 5: Verify and Test**
After the upgrade:
* Check if your website is functioning correctly.
* Monitor speed improvements and resource availability.
* Update DNS settings if required.
***
#### Steps to Downgrade Your Hosting Plan
**Step 1: Evaluate Resource Usage**
Ensure that your website does not exceed the limits of the lower-tier plan. Check:
* CPU and memory consumption
* Disk space usage
* Bandwidth requirements
**Step 2: Backup Your Website**
Since downgrading may require moving to a different server, take a full backup of your site.
**Step 3: Optimize Website for a Smaller Plan**
Before downgrading, reduce resource usage by:
* **Optimizing images and caching content**
* **Removing unused plugins or scripts**
* **Enabling a Content Delivery Network (CDN)** to reduce server load
**Step 4: Request the Downgrade**
* Log in to your hosting provider’s control panel.
* Navigate to the **Billing or Account section**.
* Select **Change Plan** and choose a lower-tier plan.
* Confirm the downgrade and wait for the changes to take effect.
**Step 5: Test Website Functionality**
After the downgrade:
* Ensure the site loads correctly and no data is missing.
* Check email functionality if hosting includes email services.
* Monitor performance to ensure smooth operation.
***
#### Important Considerations Before Upgrading or Downgrading
**Downtime & Migration**
* Some upgrades/downgrades may require migration, leading to temporary downtime.
* Use a staging site to test before finalizing changes.
**Billing & Payment Changes**
* Upgrades usually charge the price difference immediately.
* Downgrades may only take effect after the current billing cycle.
**Support & Assistance**
* Contact your hosting provider’s support team for guidance.
* Ask if there are any additional charges or conditions.
***
#### Conclusion
Upgrading or downgrading your hosting plan is essential for balancing performance and cost. Whether scaling up for growth or reducing expenses, following proper steps ensures a smooth transition. Always **backup your site**, evaluate your resource needs, and test thoroughly after making changes. If unsure, consult your hosting provider for expert guidance.
# How to Transfer a Domain to Another Host
Transferring a domain to another hosting provider can seem complicated, but with the right steps, it can be done smoothly. Whether you want to switch hosting providers for better performance, pricing, or support, this guide will walk you through the entire process of transferring a domain to another host.
***
#### Understanding Domain Transfer
A **domain transfer** involves moving a domain name from one registrar (domain provider) to another. The hosting provider may remain the same, or you might choose to move both domain registration and hosting services.
**Reasons for Transferring a Domain**
* Better customer support or pricing
* Improved security and management features
* Consolidating domains under one registrar
* Changing hosting providers and moving everything together
***
#### Step-by-Step Guide to Transferring a Domain
**Step 1: Prepare Your Domain for Transfer**
Before initiating a domain transfer, ensure your domain meets the following conditions:
1. **Domain is 60+ Days Old**: ICANN regulations prevent domain transfers within 60 days of registration or previous transfer.
2. **Unlock the Domain**: Most registrars lock domains by default to prevent unauthorized transfers.
* Log in to your current domain registrar.
* Navigate to **Domain Settings** and disable **Domain Lock**.
3. **Obtain the EPP/Authorization Code**: This code is required to authorize the transfer.
* Find it under **Transfer Settings** or **Request Transfer Code**.
4. **Disable WHOIS Privacy (If Enabled)**: Some registrars require this to verify ownership during the transfer.
5. **Verify Domain Contact Information**: Ensure your **email address** is correct, as the new registrar will send verification emails.
**Step 2: Initiate the Transfer with the New Registrar**
Once you have completed the domain preparation:
1. Visit your **new registrar’s website**.
2. Look for the **Transfer a Domain** option.
3. Enter your domain name and the **EPP/Authorization Code**.
4. Confirm the transfer request and make payment (if required).
**Step 3: Approve the Transfer Request**
After submitting the transfer request:
1. You will receive an email from the **current registrar** asking for confirmation.
2. Approve the transfer by clicking the link in the email.
3. Some registrars may take up to **5-7 days** to process the request.
**Step 4: Update DNS Records (If Changing Hosting Providers)**
If you are also changing web hosting providers:
1. Log in to your new **hosting account**.
2. Navigate to **DNS Management**.
3. Update your **Nameservers** to point to the new host (e.g., `ns1.newhost.com`, `ns2.newhost.com`).
4. Save changes and allow up to **24-48 hours** for DNS propagation.
***
#### Checking Domain Transfer Status
Most registrars provide a transfer status dashboard. If the process takes too long, check for issues such as:
* Pending approval from the old registrar.
* Incorrect EPP/Authorization code.
* Registrar transfer restrictions (e.g., 60-day rule).
***
#### Troubleshooting Common Domain Transfer Issues
**Transfer Denied by Current Registrar**
* Ensure the domain is **unlocked**.
* Verify that the domain is **not under a 60-day lock**.
* Contact customer support for further assistance.
**EPP Code is Invalid**
* Double-check the code and request a new one if needed.
* Ensure the EPP code has not expired.
**Email Verification Not Received**
* Check spam or junk folders.
* Ensure the domain contact email is up to date.
**DNS Not Resolving After Transfer**
* Update **nameservers** with your new hosting provider.
* Check DNS propagation status using [WhatsMyDNS](https://www.whatsmydns.net/).
***
#### Important Considerations Before Transferring a Domain
**Potential Downtime**
* If nameservers are not updated quickly, there may be temporary website downtime.
* It’s best to transfer during **low-traffic periods**.
**Email Services May Be Affected**
* If your domain is linked to an email service (e.g., Google Workspace, Microsoft 365), ensure MX records are correctly configured post-transfer.
**Renewal Date Considerations**
* Most registrars add **one additional year** to the domain expiration date upon transfer.
* Ensure your domain doesn’t expire during the transfer process.
***
#### Conclusion
Transferring a domain to another host is a straightforward process if done correctly. By unlocking your domain, obtaining the EPP code, initiating the transfer with your new registrar, and updating DNS settings, you can complete the process with minimal downtime. If you encounter any issues, contact the support teams of both your old and new registrars to resolve them quickly.
# How to Cancel Hosting or Request a Refund
If you no longer need your hosting plan or wish to switch providers, you may need to **cancel your hosting account** and possibly **request a refund**. Many web hosting providers offer cancellation policies, but refund eligibility depends on the host’s terms and conditions. This guide will help you understand the process of canceling a hosting plan and requesting a refund efficiently.
***
#### Understanding Hosting Cancellation & Refund Policies
Before proceeding with cancellation, it’s important to understand your hosting provider’s policies.
**Key Factors to Consider:**
* **Refund Eligibility**: Check if your hosting plan qualifies for a refund.
* **Money-Back Guarantee Period**: Most providers offer a **30-day** refund window.
* **Contract Terms**: Some plans have **monthly or yearly contracts**, which may affect refund eligibility.
* **Cancellation Fees**: Some providers charge a cancellation fee.
* **Refund Exclusions**: Domains, SSL certificates, and add-ons are usually **non-refundable**.
***
#### How to Cancel Your Hosting Account
**Step 1: Backup Your Data**
Before canceling, ensure you save all important data, including:
* **Website Files** (via FTP or File Manager)
* **Databases** (via phpMyAdmin)
* **Emails** (export emails if your hosting includes email services)
**Step 2: Log in to Your Hosting Account**
1. Go to your hosting provider’s **dashboard or client area**.
2. Navigate to **Billing** or **Account Settings**.
3. Look for a **Cancel Hosting** or **Request Cancellation** option.
**Step 3: Submit a Cancellation Request**
* Select the hosting plan you want to cancel.
* Choose the reason for cancellation (optional but may be required by some hosts).
* Confirm the request.
**Step 4: Verify Cancellation Confirmation**
* Most hosts send an **email confirmation** after successful cancellation.
* Check if your hosting plan status is updated to **canceled** in your dashboard.
***
#### How to Request a Refund
If your hosting plan qualifies for a refund, follow these steps:
**Step 1: Check the Refund Policy**
* Look for the **money-back guarantee** terms on the hosting provider’s website.
* Ensure you are within the refund period (usually **30 days**).
* Some hosts do not offer refunds on certain plans (e.g., promotional or discounted pricing).
**Step 2: Contact Customer Support**
1. Log in to your hosting account.
2. Open a **support ticket** or use **live chat**.
3. Clearly state that you want to **cancel and request a refund**.
4. Provide necessary details (e.g., account ID, plan details, reason for cancellation).
**Step 3: Wait for Approval**
* Refund requests usually take **3-10 business days** to process.
* The refund will be issued via the original **payment method** (credit card, PayPal, etc.).
* If denied, check the **terms and conditions** or escalate the request.
***
#### Common Issues & Troubleshooting
**No Refund Given After Cancellation**
* Verify if you canceled **within the refund period**.
* Check if you purchased **non-refundable services** (e.g., domains, SSLs).
* Contact customer support for clarification.
**Refund Delayed**
* Refunds may take up to **10 business days** depending on the payment method.
* If the refund is delayed, ask for a **transaction reference ID** to track the payment.
**Unable to Cancel Hosting Plan**
* Some providers require cancellation via **phone or support ticket**.
* Ensure you do not have **pending invoices** (some hosts prevent cancellation if unpaid balances exist).
***
#### Alternative Options to Consider
If you are canceling due to **performance issues or high costs**, consider:
* **Downgrading Your Plan**: Switch to a lower-tier plan instead of canceling.
* **Transferring to Another Host**: Migrate your website to a different provider.
* **Renewal Discounts**: Some providers offer discounts if you contact support before canceling.
***
#### Conclusion
Canceling a hosting plan and requesting a refund is a straightforward process if you follow the right steps. Always **backup your data**, review **refund policies**, and contact **customer support** if needed. If you are unsure about canceling, consider **downgrading** or **migrating** your hosting instead. Properly handling cancellations ensures you avoid unexpected charges and retain control of your website assets.
# How to Change Your Account Information
Keeping your account information up to date is essential for ensuring smooth communication, security, and service access. Whether you need to update your email, change your password, or modify billing details, this guide will walk you through the process step by step.
***
#### Updating Your Personal Information
**Step 1: Log in to Your Account**
1. Visit your service provider’s website.
2. Click on **Login** or **Sign In**.
3. Enter your username/email and password.
4. Access your **Account Settings** or **Profile** section.
**Step 2: Modify Personal Details**
1. Locate the section for **Personal Information**.
2. Update details such as:
* Full Name
* Contact Number
* Mailing Address
* Time Zone
3. Click **Save Changes** to apply updates.
**Step 3: Verify Your Changes**
* Some changes, such as updating your email or phone number, may require verification via a confirmation email or SMS.
***
#### Changing Your Email Address
**Step 1: Navigate to Account Settings**
1. Log in to your account.
2. Click on **Profile Settings** or **Account Information**.
3. Locate the **Email Address** field.
**Step 2: Enter a New Email**
1. Input your new email address.
2. Click **Save Changes**.
3. A verification email will be sent to the new address.
**Step 3: Confirm the Change**
1. Check your new email inbox for a verification message.
2. Click the confirmation link to finalize the change.
> **Note:** Some services may require you to enter your current password to authorize the update.
***
#### Updating Your Password
**Step 1: Access Password Settings**
1. Log in to your account.
2. Navigate to **Security Settings** or **Change Password**.
**Step 2: Change Your Password**
1. Enter your **current password**.
2. Input a **new password** (ensure it meets security requirements).
3. Confirm the new password.
4. Click **Save Changes**.
**Step 3: Confirm Password Change**
* Some services will send a notification email confirming the update.
* If you didn’t request a password change, contact support immediately.
***
#### Updating Payment & Billing Information
**Step 1: Access Billing Settings**
1. Log in to your account.
2. Go to **Billing & Payments**.
3. Click on **Payment Methods**.
**Step 2: Add or Update Payment Method**
1. Choose **Add New Payment Method** or edit an existing one.
2. Enter credit card, PayPal, or bank details.
3. Click **Save Changes**.
**Step 3: Verify and Confirm**
* Some payment changes may require authorization (e.g., two-factor authentication or email confirmation).
***
#### Changing Security Settings
**Updating Two-Factor Authentication (2FA)**
1. Navigate to **Security Settings**.
2. Select **Enable/Disable 2FA**.
3. Choose authentication method (SMS, Authenticator App, Email).
4. Follow the on-screen instructions to activate or deactivate 2FA.
**Updating Security Questions**
1. Go to **Account Security**.
2. Select **Change Security Questions**.
3. Enter a new question and answer.
4. Click **Save**.
***
#### Troubleshooting Common Issues
**Cannot Change Email Address?**
* Ensure the new email isn’t already in use.
* Check for verification emails in spam or junk folders.
* Some services may have restrictions on email changes.
**Forgot Password?**
1. Click **Forgot Password?** on the login page.
2. Enter your registered email.
3. Follow the link sent to reset your password.
**Billing Update Not Working?**
* Ensure the payment method is valid.
* Check for errors like incorrect card details or expired cards.
* Contact support if issues persist.
***
#### Conclusion
Updating your account information is essential for security, communication, and uninterrupted service access. Regularly reviewing and modifying your personal details, password, email, and payment information ensures smooth account management. If you encounter issues, reach out to customer support for assistance.
# Search Engine Optimization (SEO)
# SEO Basics
# What is SEO? A Beginner’s Guide
Search Engine Optimization (SEO) is the practice of improving a website’s visibility on search engines like Google, Bing, and Yahoo. SEO helps websites rank higher in search results, making it easier for users to find relevant information. Whether you run a blog, an online store, or a business website, understanding SEO can significantly impact your online success.
***
#### Why is SEO Important?
SEO is essential because it helps drive **organic traffic** to your website without paid advertisements. Here are some key benefits:
* **Increased Website Traffic**: Higher rankings mean more visibility and visitors.
* **Better User Experience**: SEO improves website speed, mobile-friendliness, and usability.
* **Higher Credibility & Trust**: Users tend to trust websites that appear on the first page of search results.
* **Cost-Effective Marketing**: Unlike paid ads, organic SEO traffic is free and sustainable.
***
#### How Search Engines Work
Search engines like Google use **bots (crawlers)** to scan web pages and index their content. When a user searches for something, the search engine ranks the most relevant results based on multiple ranking factors.
**Key Components of Search Engines:**
1. **Crawling** – Bots scan websites to discover new content.
2. **Indexing** – The discovered pages are stored in a massive database.
3. **Ranking** – Pages are ranked based on relevance, quality, and SEO factors.
***
#### Key SEO Elements
SEO consists of various elements that work together to improve a site’s ranking. These include **on-page SEO, off-page SEO, and technical SEO**.
**1. On-Page SEO (Optimizing Your Website Content)**
On-page SEO refers to optimizing the content and HTML elements of your website.
* **Keyword Research** – Identifying the words and phrases users search for.
* **Title Tags & Meta Descriptions** – Writing compelling page titles and descriptions.
* **Header Tags (H1, H2, H3, etc.)** – Structuring content for better readability.
* **Image Optimization** – Compressing images and using alt tags.
* **Internal Linking** – Linking to other pages within your website to improve navigation.
**2. Off-Page SEO (Building Authority & Trust)**
Off-page SEO involves activities outside your website that improve its reputation and ranking.
* **Backlinks** – Getting links from other trusted websites.
* **Social Signals** – Engagement on social media platforms.
* **Guest Blogging** – Writing articles for other websites to gain exposure.
* **Online Reviews & Citations** – Encouraging positive reviews on Google and other platforms.
**3. Technical SEO (Enhancing Website Performance)**
Technical SEO ensures that search engines can crawl and index your website effectively.
* **Website Speed Optimization** – Faster-loading sites rank better.
* **Mobile-Friendliness** – Ensuring your website is responsive.
* **Secure Website (SSL Certificate)** – HTTPS encryption for security.
* **XML Sitemaps & Robots.txt** – Helping search engines understand your website structure.
***
#### SEO Best Practices for Beginners
1. **Choose the Right Keywords** – Use tools like Google Keyword Planner or Ahrefs to find keywords.
2. **Optimize for Mobile Users** – Ensure your site is mobile-friendly.
3. **Write High-Quality Content** – Create valuable, original, and well-structured content.
4. **Improve Page Load Speed** – Use caching and optimize images.
5. **Build High-Quality Backlinks** – Focus on getting links from reputable sites.
6. **Monitor Performance** – Use Google Analytics and Google Search Console to track SEO progress.
***
#### Conclusion
SEO is a crucial part of digital marketing that helps websites attract more visitors and improve search rankings. By implementing **on-page, off-page, and technical SEO strategies**, even beginners can start optimizing their websites for better visibility. While SEO takes time, consistency and best practices will lead to long-term success.
# How Search Engines Work
Search engines like **Google, Bing, and Yahoo** help users find relevant information on the internet by crawling, indexing, and ranking web pages. Understanding how search engines work can help website owners and digital marketers optimize their content for better visibility and search rankings.
***
#### What is a Search Engine?
A search engine is an online tool that retrieves and ranks web pages based on a user’s query. When a user enters a search term, the search engine analyzes its database to display the most relevant results. **Google** dominates the search market, but alternatives like **Bing, Yahoo, DuckDuckGo, and Baidu** also serve millions of searches daily.
**Why Search Engines Matter**
* **Help users find information quickly.**
* **Drive organic traffic to websites.**
* **Connect businesses with potential customers.**
* **Influence online visibility and credibility.**
***
#### How Search Engines Work: The Three Main Steps
Search engines operate using a three-step process:
**1. Crawling (Discovering Content)**
Search engines use bots (also called **crawlers** or **spiders**) to browse the web and discover new or updated content.
* Crawlers start by visiting a few known web pages.
* They follow links on these pages to find new content.
* Websites can submit **sitemaps** to help search engines find their pages faster.
**Factors Affecting Crawling:**
* Websites with strong internal linking are crawled more frequently.
* Search engines may ignore duplicate or low-quality content.
* **Robots.txt** files can block crawlers from certain pages.
**2. Indexing (Storing and Organizing Content)**
Once crawlers discover content, the search engine **indexes** it in a massive database.
* Pages are analyzed for keywords, meta tags, and content structure.
* Structured data (schema markup) helps search engines understand page context.
* Indexing ensures a page appears in search results when relevant queries are entered.
**How to Improve Indexing:**
* Use **clear and descriptive titles and headings**.
* Optimize **meta descriptions** to summarize page content.
* Ensure your website structure is clean and easy to navigate.
**3. Ranking (Displaying the Most Relevant Results)**
When a user searches for something, the search engine ranks indexed pages based on relevance and quality.
* The ranking process uses **hundreds of ranking factors**.
* Algorithms determine which pages best match the search query.
* High-ranking pages receive more visibility and clicks.
**Key Ranking Factors:**
* **Relevance**: Does the page content match the user’s query?
* **Authority**: Does the site have high-quality backlinks?
* **User Experience**: Is the page mobile-friendly and fast-loading?
* **Freshness**: Is the content recent and updated?
***
#### How Google and Bing Differ in Search Algorithms
While Google and Bing follow the same basic steps, their ranking algorithms differ slightly.
**Google’s Search Algorithm**
* Uses **machine learning (RankBrain)** to understand search intent.
* Prioritizes **mobile-first indexing** for ranking.
* Prefers high-quality, authoritative backlinks.
* Emphasizes **Core Web Vitals** (page speed, user experience, security).
**Bing’s Search Algorithm**
* Favors **exact match keywords** in page content and metadata.
* Places more emphasis on **social signals** from Facebook and Twitter.
* Uses **Bing Webmaster Tools** to help webmasters optimize their sites.
***
#### How Search Engines Handle Different Search Queries
Search engines categorize searches into different types based on intent:
**1. Navigational Searches**
Users look for a specific website (e.g., "Facebook login").
* Search engines prioritize **brand websites** in results.
**2. Informational Searches**
Users seek knowledge or answers (e.g., "how does SEO work?").
* Search engines show **blog posts, guides, and featured snippets**.
**3. Transactional Searches**
Users intend to make a purchase (e.g., "buy running shoes online").
* Search engines display **product pages, ads, and shopping results**.
***
#### How to Optimize Your Website for Search Engines
To improve search rankings and visibility, follow these SEO best practices:
**1. Use Relevant Keywords**
* Find keywords using tools like **Google Keyword Planner** or **Ahrefs**.
* Use keywords naturally in **titles, meta descriptions, and content**.
**2. Improve Website Speed & Performance**
* Optimize images and enable **browser caching**.
* Use a **Content Delivery Network (CDN)** for faster loading times.
**3. Build High-Quality Backlinks**
* Get links from **authoritative** websites.
* Avoid spammy or low-quality backlinks.
**4. Optimize for Mobile & User Experience**
* Ensure your site is **mobile-friendly**.
* Improve navigation and site structure.
**5. Publish Fresh & High-Quality Content**
* Regularly update your blog and website pages.
* Use **structured data** to help search engines understand content.
***
#### Conclusion
Search engines like **Google and Bing** play a crucial role in organizing and delivering web content. By understanding how they **crawl, index, and rank** pages, website owners can optimize their sites for better search visibility. Using effective **SEO strategies** helps businesses and individuals attract more organic traffic and improve their online presence.
# On-Page SEO vs. Off-Page SEO: What’s the Difference?
Search Engine Optimization (SEO) is a critical strategy for improving a website’s visibility on search engines like Google and Bing. SEO is divided into two main categories: **On-Page SEO** and **Off-Page SEO**. While both play an essential role in search rankings, they focus on different aspects of website optimization. This guide will explain the differences between On-Page and Off-Page SEO and how they work together to enhance a site’s performance.
***
#### What is On-Page SEO?
**On-Page SEO** refers to the optimization strategies applied directly to a website’s pages to improve its search ranking. These factors help search engines understand the content, structure, and relevance of a page.
**Key On-Page SEO Elements**
1. **Keyword Optimization**
* Research and use relevant keywords naturally in **titles, meta descriptions, headings, and content**.
* Avoid **keyword stuffing**, which can negatively impact rankings.
2. **High-Quality Content**
* Create **original, valuable, and informative content**.
* Ensure content is **well-structured** with proper use of H1, H2, and H3 tags.
3. **Title Tags & Meta Descriptions**
* Title tags should be **concise (under 60 characters)** and include primary keywords.
* Meta descriptions should be **engaging (150-160 characters)** and encourage users to click.
4. **URL Structure**
* Use **short, descriptive URLs** with keywords (e.g., `yourdomain.com/on-page-seo-tips`).
* Avoid long, complex URLs with random characters.
5. **Image Optimization**
* Compress images to improve page speed.
* Use **alt text** with relevant keywords for better indexing.
6. **Internal Linking**
* Link to other related pages on your website to improve navigation.
* Helps search engines discover and index content more effectively.
7. **Mobile-Friendliness**
* Ensure your site is **responsive** and works well on mobile devices.
* Use **Google’s Mobile-Friendly Test** to check compatibility.
8. **Page Speed Optimization**
* Compress images and use **browser caching**.
* Minimize CSS, JavaScript, and HTML files.
9. **Schema Markup (Structured Data)**
* Helps search engines **better understand** content.
* Enhances search result appearance with **rich snippets** (e.g., star ratings, FAQs).
***
#### What is Off-Page SEO?
**Off-Page SEO** focuses on activities outside your website that impact its authority and rankings. This includes building backlinks, increasing brand mentions, and leveraging social signals.
**Key Off-Page SEO Elements**
1. **Backlink Building**
* **High-quality backlinks** from authoritative websites improve domain authority.
* Strategies include **guest blogging, outreach, and broken link building**.
2. **Social Media Signals**
* While not a direct ranking factor, engagement on platforms like **Facebook, Twitter, LinkedIn** can drive traffic.
* Sharing content increases **brand awareness and credibility**.
3. **Brand Mentions**
* Google considers unlinked brand mentions as a ranking factor.
* Being featured on trusted sites improves authority.
4. **Influencer Marketing**
* Collaborating with industry influencers **boosts exposure** and credibility.
* Influencer-endorsed content gets more shares and backlinks.
5. **Local SEO & Google My Business**
* Optimize **Google My Business (GMB)** profile for better local rankings.
* Encourage customer reviews and ensure **consistent NAP (Name, Address, Phone Number)** across directories.
6. **Forum & Community Engagement**
* Actively participate in relevant forums (e.g., Quora, Reddit) to build credibility.
* Answering industry-related questions with valuable insights can drive traffic.
7. **Press Releases & PR Campaigns**
* Publishing newsworthy content on authoritative sites increases brand trust.
* Being featured on industry-leading blogs or news websites adds credibility.
***
#### On-Page SEO vs. Off-Page SEO: Key Differences
| Feature | On-Page SEO | Off-Page SEO |
| -------------- | ------------------------------------------- | --------------------------------------- |
| **Focus** | Content & website structure | External factors & backlinks |
| **Control** | Fully controlled by website owner | Influenced by external sites & audience |
| **Techniques** | Keyword optimization, meta tags, page speed | Backlink building, social media, PR |
| **Main Goal** | Improve content relevancy & user experience | Boost domain authority & credibility |
***
#### How On-Page & Off-Page SEO Work Together
For a website to rank well, both On-Page and Off-Page SEO need to be implemented effectively. Here’s how they complement each other:
* **Strong content (On-Page SEO) attracts backlinks (Off-Page SEO).**
* **Faster-loading pages (On-Page SEO) improve user experience, encouraging social shares (Off-Page SEO).**
* **Internal linking (On-Page SEO) makes it easier for search engines to crawl pages linked by external sources (Off-Page SEO).**
***
#### Best Practices for a Balanced SEO Strategy
1. **Start with On-Page SEO** – Optimize content, meta tags, and site structure first.
2. **Build High-Quality Backlinks** – Focus on earning links from **authoritative** and **relevant** websites.
3. **Leverage Social Media & PR** – Promote your content to attract organic shares and mentions.
4. **Monitor SEO Performance** – Use tools like **Google Analytics**, **Ahrefs**, and **SEMrush** to track progress.
5. **Regularly Update Content** – Refresh old blog posts and pages to maintain relevance.
***
#### Conclusion
Both **On-Page SEO** and **Off-Page SEO** are crucial for improving search engine rankings and driving organic traffic. **On-Page SEO** ensures your website is optimized for search engines and users, while **Off-Page SEO** builds credibility and authority through external signals. A well-rounded SEO strategy incorporates both elements to achieve long-term success in search rankings.
# White Hat vs. Black Hat SEO: What You Need to Know
Search Engine Optimization (SEO) is a crucial strategy for improving website rankings on search engines like Google. However, not all SEO techniques are created equal. SEO strategies are generally classified into two categories: **White Hat SEO** and **Black Hat SEO**. Understanding the differences between these approaches will help you make informed decisions about optimizing your website while avoiding potential penalties.
***
#### What is White Hat SEO?
**White Hat SEO** refers to ethical and search-engine-approved techniques used to improve website rankings while following search engine guidelines.
**Key White Hat SEO Strategies**
1. **Quality Content Creation**
* Publishing valuable, original, and well-researched content.
* Using relevant keywords naturally without stuffing.
2. **Proper Keyword Research & Usage**
* Using keywords strategically in titles, meta descriptions, and headings.
* Leveraging long-tail keywords for better targeting.
3. **Optimized Website Structure**
* Creating clear navigation and site architecture.
* Using descriptive URLs and proper heading structures.
4. **User Experience Optimization**
* Enhancing website speed and mobile responsiveness.
* Ensuring secure browsing with an SSL certificate.
5. **Building High-Quality Backlinks**
* Earning links from authoritative and relevant websites.
* Engaging in ethical outreach and guest blogging.
6. **Technical SEO Best Practices**
* Implementing structured data and schema markup.
* Submitting XML sitemaps and optimizing robots.txt files.
**Advantages of White Hat SEO**
* **Long-Term Rankings**: White Hat SEO ensures sustainable ranking improvements.
* **No Risk of Penalties**: Since it follows Google’s guidelines, websites are less likely to face penalties.
* **Improved User Experience**: Enhances site usability and visitor satisfaction.
***
#### What is Black Hat SEO?
**Black Hat SEO** refers to unethical and manipulative tactics used to improve search rankings by violating search engine guidelines. While these tactics may provide quick results, they can lead to penalties and site bans.
**Common Black Hat SEO Techniques**
1. **Keyword Stuffing**
* Overloading content with excessive keywords to manipulate rankings.
* Example: "Best running shoes, buy running shoes, cheap running shoes, top running shoes..."
2. **Cloaking**
* Showing different content to search engines and users to manipulate rankings.
* Example: A page filled with spammy keywords shown to Google, but displaying normal content to users.
3. **Buying Links (Link Farms & PBNs)**
* Acquiring backlinks from **low-quality, spammy** websites.
* Creating **Private Blog Networks (PBNs)** to artificially boost link-building efforts.
4. **Hidden Text & Links**
* Placing invisible text or links to manipulate rankings.
* Example: White text on a white background containing hidden keywords.
5. **Clickbait & Misleading Redirects**
* Using deceptive meta tags or redirects to unrelated pages.
* Example: Clicking on an article titled "Healthy Diet Tips" but being redirected to a gambling site.
**Risks of Black Hat SEO**
* **Google Penalties**: Your website can be deindexed or severely penalized.
* **Loss of Trust**: Users may stop trusting your site if they encounter deceptive content.
* **Short-Term Results**: Any ranking improvements achieved through Black Hat SEO are usually temporary.
***
#### White Hat vs. Black Hat SEO: Key Differences
| Feature | White Hat SEO | Black Hat SEO |
| ------------------- | -------------------------------- | --------------------------------------- |
| **Compliance** | Follows search engine guidelines | Violates search engine rules |
| **Ranking Speed** | Takes time to build rankings | May show quick results but is risky |
| **Sustainability** | Long-term, stable rankings | Short-lived with high risk of penalties |
| **User Experience** | Enhances website usability | Often ignores user experience |
| **Risk Level** | Low risk | High risk of penalties or bans |
***
#### Grey Hat SEO: The Middle Ground
Apart from White Hat and Black Hat SEO, there is also **Grey Hat SEO**, which consists of tactics that are not explicitly forbidden by search engines but may still carry risks.
**Examples of Grey Hat SEO Techniques**
* **Clickbait Titles**: Writing exaggerated or misleading headlines.
* **Expired Domain Redirects**: Redirecting expired domains with existing backlinks to boost rankings.
* **Automated Link Building**: Using bots to generate backlinks quickly.
While Grey Hat SEO is **less risky than Black Hat SEO**, search engines may still penalize websites that rely heavily on these techniques.
***
#### Best Practices for Ethical SEO
To achieve **sustainable rankings** and avoid penalties, follow these ethical SEO practices:
1. **Focus on Quality Content** – Write informative and engaging content that provides value to users.
2. **Earn Organic Backlinks** – Build relationships with authoritative sites for natural link-building.
3. **Optimize for Mobile & Speed** – Ensure your site is mobile-friendly and loads quickly.
4. **Use Ethical Link-Building Strategies** – Avoid paid or spammy links.
5. **Follow Google’s Guidelines** – Regularly check for updates to ensure compliance.
####
# Understanding Search Engine Algorithms
Search engine algorithms are complex systems used to retrieve and rank web pages based on relevance to user queries. These algorithms help search engines like **Google, Bing, and Yahoo** analyze billions of web pages and provide users with the most relevant results. Understanding how search engine algorithms work is essential for website owners and digital marketers to improve their rankings and visibility online.
***
#### What Are Search Engine Algorithms?
A **search engine algorithm** is a set of rules and calculations used to determine the order of search results based on multiple ranking factors. These algorithms scan, analyze, and rank content to provide users with the most relevant web pages when they perform a search.
**How Search Engine Algorithms Work**
1. **Crawling** – Search engine bots (or spiders) browse the web and discover new content.
2. **Indexing** – The discovered content is stored in a massive database for retrieval.
3. **Ranking** – The indexed content is analyzed and ranked based on hundreds of ranking signals.
***
#### Key Components of Search Engine Algorithms
Search engines evaluate web pages based on various factors to determine their ranking position. The most important ranking signals include:
**1. Relevance**
* The algorithm determines how well a page matches a user’s search query.
* Keywords in **titles, meta descriptions, headings, and body content** influence relevance.
**2. Quality of Content**
* Search engines prioritize **high-quality, original, and valuable content**.
* Content should provide in-depth answers, be free of duplicate content, and be structured well.
**3. Backlinks & Authority**
* Websites with **high-quality backlinks** from authoritative sources rank higher.
* Google’s **PageRank algorithm** measures a website’s authority based on link-building efforts.
**4. User Experience (UX)**
* Factors like **page speed, mobile-friendliness, and site usability** impact rankings.
* Websites that provide a smooth experience rank higher in search results.
**5. Freshness & Updates**
* Google’s **Freshness Algorithm** prioritizes recently updated and trending content.
* News articles, event-related content, and frequently updated blogs benefit from this ranking factor.
**6. Mobile-Friendliness**
* Google uses **mobile-first indexing**, meaning mobile-optimized sites get priority in rankings.
* Websites that are not mobile-friendly may rank lower in search results.
**7. Secure & Accessible Website**
* HTTPS (SSL encryption) is a ranking signal that enhances security.
* Proper indexing setup (robots.txt and sitemaps) ensures search engines can crawl the website.
***
#### Major Search Engine Algorithm Updates
Search engines continuously refine their algorithms to improve search results. Some of the most notable updates include:
**1. Google Panda (2011)**
* Penalized low-quality, thin, and duplicate content.
* Rewarded sites with high-quality, original content.
**2. Google Penguin (2012)**
* Targeted spammy backlinks and keyword stuffing.
* Focused on rewarding natural, high-quality link-building efforts.
**3. Google Hummingbird (2013)**
* Improved search results by understanding search intent.
* Prioritized **conversational queries** and **semantic search**.
**4. Google RankBrain (2015)**
* Introduced **AI-based machine learning** for search rankings.
* Improved interpretation of search intent and query relevance.
**5. Google BERT (2019)**
* Improved **natural language processing (NLP)** to understand search queries better.
* Helped search engines understand the context of words in searches.
**6. Google Core Web Vitals (2021)**
* Focused on **page experience, loading speed, interactivity, and stability**.
* Websites with poor user experience saw ranking declines.
***
#### How to Optimize for Search Engine Algorithms
To improve website rankings, follow these **SEO best practices**:
**1. Focus on High-Quality Content**
* Write **in-depth, informative, and original** content.
* Avoid duplicate content and **update old content** regularly.
**2. Optimize for Search Intent**
* Use tools like **Google Keyword Planner** or **Ahrefs** to find **relevant keywords**.
* Structure content to answer user queries clearly and concisely.
**3. Improve Page Speed & Mobile-Friendliness**
* Compress images, enable caching, and use **fast-loading web hosting**.
* Ensure your website is fully responsive for mobile devices.
**4. Build High-Quality Backlinks**
* Earn links from **authoritative and relevant** websites.
* Avoid **spammy link-building tactics** to prevent penalties.
**5. Enhance User Experience (UX)**
* Use clear navigation, **internal linking**, and a **well-structured layout**.
* Reduce pop-ups and intrusive interstitials that disrupt users.
**6. Use Structured Data (Schema Markup)**
* Implement **schema markup** to help search engines understand your content better.
* This improves your chances of appearing in **rich snippets** (star ratings, FAQs, etc.).
***
Search engine algorithms determine how websites rank in search results by analyzing content relevance, backlinks, user experience, and other factors. **Google, Bing, and other search engines** frequently update their algorithms to provide better search experiences.
# Keyword Research & Strategy
# How to Do Keyword Research for SEO
Keyword research is the foundation of any successful **Search Engine Optimization (SEO)** strategy. It helps website owners and digital marketers understand what their target audience is searching for and how to optimize content accordingly. This guide will walk you through the **step-by-step process of conducting keyword research** to improve your website’s search rankings and attract relevant traffic.
***
#### What is Keyword Research?
Keyword research is the process of identifying and analyzing search terms that people use in search engines like **Google, Bing, and Yahoo**. By understanding the right keywords, businesses can **create content that aligns with user intent, drive organic traffic, and improve conversion rates**.
**Why Keyword Research is Important for SEO**
* Helps **understand audience needs** and search behavior.
* Improves **content relevance** and ranking potential.
* Increases **organic traffic** without paid ads.
* Enhances **competitive analysis** by identifying valuable opportunities.
***
#### Step-by-Step Guide to Keyword Research for SEO
**Step 1: Define Your Goals**
Before conducting keyword research, determine:
* What type of content you are creating (blog post, product page, landing page, etc.).
* Who your target audience is.
* Whether you want to increase **traffic, conversions, or brand awareness**.
**Step 2: Generate Keyword Ideas**
Use different methods to come up with potential keywords:
**1. Brainstorm Seed Keywords**
Seed keywords are basic terms related to your industry, product, or service. For example, if you run a fitness blog, your seed keywords could be:
* **Weight loss tips**
* **Workout routines**
* **Healthy eating**
**2. Use Google Autocomplete**
Type a keyword into Google’s search bar and note **suggested phrases** that appear. This can reveal popular **long-tail keywords** (e.g., "best workout routines for beginners").
**3. Analyze Competitors**
Find out what keywords your competitors are ranking for using tools like:
* **Ahrefs** (Competitor Keyword Analysis)
* **SEMrush** (Organic Research)
* **Ubersuggest** (Keyword Ideas)
**4. Explore Related Searches**
Scroll to the bottom of **Google’s search results page** to find related keyword suggestions.
**5. Use Keyword Research Tools**
There are several keyword research tools that provide valuable insights:
* **Google Keyword Planner** – Best for discovering search volume and competition.
* **Ahrefs Keywords Explorer** – Provides difficulty scores and related keyword ideas.
* **SEMrush Keyword Magic Tool** – Helps find keyword variations and search intent.
* **Google Trends** – Shows keyword popularity over time.
***
#### Step 3: Analyze Keyword Metrics
Once you have a list of potential keywords, evaluate them based on:
**1. Search Volume**
* Indicates how many people search for a keyword each month.
* **High search volume** means more traffic potential but also more competition.
* **Low search volume** may have less competition but could be too niche.
**2. Keyword Difficulty (SEO Difficulty Score)**
* Measures how hard it is to rank for a keyword.
* **High-difficulty keywords** are competitive and require strong backlinks and content.
* **Low-difficulty keywords** are easier to rank for, making them ideal for new websites.
**3. Cost-Per-Click (CPC)**
* Shows how much advertisers pay for that keyword in **Google Ads**.
* **Higher CPC keywords** indicate strong commercial intent and buying potential.
**4. Search Intent**
Understanding search intent ensures that you target keywords aligned with user needs:
* **Informational**: "How to lose weight fast"
* **Navigational**: "Nike official website"
* **Transactional**: "Buy protein powder online"
* **Commercial Investigation**: "Best running shoes for beginners"
***
#### Step 4: Choose the Right Keywords
Prioritize keywords based on:
* **Relevance** – Does the keyword match your content and business goals?
* **Search Volume vs. Competition** – Is it worth targeting based on ranking difficulty?
* **Intent** – Does the keyword align with what your audience is looking for?
* **Long-Tail vs. Short-Tail Keywords**:
* **Short-Tail:** High traffic, more competition (e.g., "SEO tips").
* **Long-Tail:** Lower traffic, less competition, higher conversion rates (e.g., "Best SEO tips for small businesses").
***
#### Step 5: Optimize Your Content with Keywords
**1. Use Keywords in Strategic Places**
* **Title Tag** – Include the primary keyword in the page title.
* **Meta Description** – Write an engaging meta description with your target keyword.
* **Headings (H1, H2, H3, etc.)** – Use keywords naturally in subheadings.
* **URL Structure** – Keep it clean and keyword-rich (e.g., `yourdomain.com/keyword-research-guide`).
* **Content Body** – Use keywords naturally without keyword stuffing.
* **Image Alt Text** – Describe images with relevant keywords.
**2. Create High-Quality, Engaging Content**
* Provide **valuable, in-depth information**.
* Include **FAQs and structured data** to enhance visibility in rich snippets.
* Use **internal linking** to improve navigation and boost SEO.
**3. Optimize for Voice Search**
* Use **conversational, question-based keywords** (e.g., "What is the best SEO tool?").
* Structure content with **FAQ sections**.
***
#### Step 6: Track & Update Keywords Regularly
Keyword rankings change over time due to competition and search engine updates. To maintain SEO success:
* **Monitor Rankings** using Google Search Console, Ahrefs, or SEMrush.
* **Update Old Content** with new keywords and relevant information.
* **Experiment with New Keywords** to capture additional traffic opportunities.
***
#### Common Keyword Research Mistakes to Avoid
1. **Ignoring Search Intent** – Choosing keywords without considering whether they match user intent.
2. **Focusing Only on High-Volume Keywords** – Overlooking long-tail keywords that are easier to rank for.
3. **Keyword Stuffing** – Overloading content with keywords, which can result in penalties.
4. **Not Tracking Performance** – Failing to monitor keyword rankings and traffic.
5. **Neglecting Competitor Analysis** – Missing out on opportunities by not analyzing competitor keywords.
# Short-Tail vs. Long-Tail Keywords: Which is Better?
Choosing the right keywords is a critical part of **Search Engine Optimization (SEO)**. Keywords determine how your website ranks in search engine results and how much traffic it attracts. One common debate in SEO is whether **short-tail keywords** or **long-tail keywords** are better. This guide explores the differences, advantages, and when to use each for the best SEO strategy.
***
#### What Are Short-Tail Keywords?
Short-tail keywords, also known as **broad keywords**, are general search terms that usually consist of **one to three words**.
**Examples of Short-Tail Keywords:**
* "Shoes"
* "Digital marketing"
* "SEO tips"
* "Fitness workouts"
**Characteristics of Short-Tail Keywords:**
* **High Search Volume** – These keywords are searched frequently.
* **Broad Search Intent** – Users searching for these terms may have different intentions.
* **High Competition** – Many businesses target these keywords, making ranking difficult.
* **Lower Conversion Rate** – Since intent is unclear, visitors may not take action immediately.
**When to Use Short-Tail Keywords:**
* If you have a **high-authority website** that can compete with top-ranking pages.
* When trying to **increase brand awareness** rather than immediate conversions.
* For **general informational content** that serves a broad audience.
***
#### What Are Long-Tail Keywords?
Long-tail keywords are **more specific search phrases** that usually contain **four or more words**.
**Examples of Long-Tail Keywords:**
* "Best running shoes for flat feet"
* "SEO tips for small businesses in 2024"
* "How to create a digital marketing strategy"
* "Home workouts for beginners without equipment"
**Characteristics of Long-Tail Keywords:**
* **Lower Search Volume** – Fewer people search for these terms, but they are highly targeted.
* **More Specific Search Intent** – Users searching for these terms are looking for specific answers.
* **Lower Competition** – Easier to rank for since fewer websites compete for them.
* **Higher Conversion Rate** – Visitors are more likely to take action, such as making a purchase or signing up for a service.
**When to Use Long-Tail Keywords:**
* When **targeting a niche audience** with specific needs.
* If your website is **new or has low domain authority**, making it difficult to rank for competitive terms.
* When focusing on **conversion-driven content**, such as product pages, tutorials, and how-to guides.
***
#### Short-Tail vs. Long-Tail Keywords: Key Differences
| Feature | Short-Tail Keywords | Long-Tail Keywords |
| ---------------------- | ---------------------- | ------------------------------------- |
| **Word Length** | 1-3 words | 4+ words |
| **Search Volume** | High | Low to Medium |
| **Competition** | High | Low |
| **User Intent** | Broad | Specific |
| **Conversion Rate** | Lower | Higher |
| **Ranking Difficulty** | Harder to rank | Easier to rank |
| **SEO Benefit** | Drives brand awareness | Drives targeted traffic & conversions |
***
#### Which is Better: Short-Tail or Long-Tail Keywords?
The best choice depends on **your goals, competition level, and audience**.
**Use Short-Tail Keywords If:**
You have a **high-authority website** with strong backlink support.
You aim to **build brand awareness** and attract a broad audience.
Your website already ranks well and can compete in **high-volume searches**.
**Use Long-Tail Keywords If:**
You want to **rank faster** and face less competition.
You need to attract **highly targeted traffic** ready to take action.
Your business focuses on **niche markets** where detailed queries matter.
You are a **new website** looking to gain traction in search rankings.
***
#### Best SEO Strategy: Use Both!
A balanced SEO strategy **incorporates both short-tail and long-tail keywords**:
1. **Use short-tail keywords** for broader topics and pillar content.
2. **Optimize for long-tail keywords** to capture niche audiences and improve conversions.
3. **Include long-tail variations** in blog posts, product pages, and FAQ sections.
4. **Analyze performance** using tools like **Google Search Console, Ahrefs, or SEMrush** to refine your keyword approach.
# How to Find Low-Competition Keywords
Finding low-competition keywords is essential for ranking higher in search results, especially if you have a **new website** or are competing against well-established brands. Low-competition keywords have **less competition**, making it easier to rank and attract organic traffic. This guide will show you **step-by-step strategies** to find and target low-competition keywords for SEO success.
***
#### What Are Low-Competition Keywords?
Low-competition keywords are **search terms with relatively few websites competing for top rankings**. These keywords are typically:
* **Long-tail keywords** (4+ words, specific search intent).
* **Less popular but highly targeted** for a niche audience.
* **Easier to rank for**, even for newer or smaller websites.
**Benefits of Targeting Low-Competition Keywords**
**Higher Ranking Potential** – Less competition means easier rankings.
**More Targeted Traffic** – Visitors are looking for specific information, making them more likely to convert.
**Faster SEO Results** – You can see results quicker than targeting high-competition keywords.
**Great for New Websites** – If you have a low domain authority, ranking for competitive keywords is difficult, but low-competition ones give you a chance to rank.
***
#### Step-by-Step Guide to Finding Low-Competition Keywords
**1. Use Google Autocomplete & Related Searches**
Google’s search bar suggests **low-competition long-tail keywords** based on real user queries.
**How to Use It:**
1. Type a broad keyword into Google (e.g., "best running shoes for").
2. Note the autocomplete suggestions (e.g., "best running shoes for flat feet").
3. Scroll down to **“Related Searches”** at the bottom of the search results page.
4. Look for **long-tail variations** that are less competitive.
**2. Use Google’s “People Also Ask” Feature**
* Google’s "People Also Ask" (PAA) box provides **question-based keywords** with low competition.
* Click on a question to reveal **more related queries**.
**Example:** Searching for "SEO tips" might reveal "How can I improve my SEO ranking?" – a great long-tail keyword to target.
**3. Use Free Keyword Research Tools**
Several **free tools** can help you find low-competition keywords:
* **Google Keyword Planner** – Find low-competition keywords under "Competition" (Low/Medium/High).
* **Ubersuggest** – Check SEO difficulty scores; aim for scores under **30**.
* **AnswerThePublic** – Find common **question-based** search terms.
* **Keyword Sheeter** – Generates **thousands of keyword ideas**.
**4. Analyze Competitor Keywords with SEO Tools**
Find **low-competition opportunities** by researching your competitors.
**Best Tools for Competitor Research:**
* **Ahrefs** – Use "Keyword Explorer" to find keywords with a **Keyword Difficulty (KD) below 30**.
* **SEMrush** – Find keywords that competitors rank for but have **low difficulty scores**.
* **Moz Keyword Explorer** – Shows the "Priority Score," which factors in competition and search volume.
**Tip:** Look for competitor keywords ranking on **page 2 or 3 of Google**—these are easier to outrank!
**5. Find Question-Based Keywords**
Question-based keywords often have **low competition** because fewer websites target them directly.
**Best Resources for Finding Questions:**
* **Quora** – Look for common user questions in your industry.
* **Reddit** – Search subreddit discussions for niche topics.
* **AnswerThePublic** – Generates hundreds of real-world user questions.
**6. Check Keyword Difficulty & Search Volume**
To find the best low-competition keywords, balance **search volume** and **keyword difficulty**.
**What to Look For:**
* **Keyword Difficulty (KD) under 30** → Easier to rank.
* **Search Volume between 100-5,000 per month** → Enough traffic potential.
* **Long-Tail Keywords (4+ words)** → Lower competition.
**Example:**
* "Best hiking boots" (KD: 75, Search Volume: 50K) Too Competitive
* "Best waterproof hiking boots under $100" (KD: 25, Search Volume: 1.5K) Low Competition & Targeted
**7. Use Local & Niche Keywords**
If you run a local business or serve a niche audience, **geo-targeted** or **specific industry** keywords often have less competition.
**Examples:**
* "Best coffee shop in Seattle"
* "Affordable wedding photographer in Miami"
* "Beginner yoga classes in NYC"
**Tip:** Use **Google My Business** keywords if targeting local SEO.
***
#### How to Use Low-Competition Keywords for SEO Success
Once you find low-competition keywords, **optimize your content strategically**.
**1. Use Keywords in Strategic Locations**
**Title Tag & Meta Description** – Include the keyword naturally. **URL Structure** – Example: `yourwebsite.com/best-budget-laptops-2024`
**Headings (H1, H2, H3, etc.)** – Use keywords in headings and subheadings.
**Content Body** – Use keywords naturally without stuffing.
**Alt Text for Images** – Helps with SEO and accessibility.
**2. Create High-Quality Content Around the Keyword**
* Write **in-depth articles** (1,500+ words) targeting low-competition keywords.
* Answer common **questions** users search for.
* Use **lists, tables, and bullet points** for better readability.
**3. Build Internal & External Links**
* Link to **related blog posts** within your website.
* Earn **backlinks from high-authority sites** by creating valuable content.
**4. Optimize for Featured Snippets & Voice Search**
* Use **question-based keywords** to rank in Google’s "People Also Ask" box.
* Format content in **Q\&A or list format** for better visibility.
**5. Monitor Performance & Adjust**
* Track keyword rankings with **Google Search Console**.
* Update content regularly to maintain rankings.
* Add **new related keywords** based on search trends.
# How to Use Google Keyword Planner for SEO
Google Keyword Planner is a powerful tool designed to help businesses and marketers find relevant keywords for their SEO and advertising campaigns. While it’s primarily built for Google Ads, it also provides valuable insights for **organic search optimization**. This guide will walk you through how to use **Google Keyword Planner (GKP)** effectively for SEO.
***
#### What is Google Keyword Planner?
Google Keyword Planner is a **free keyword research tool** offered by Google that helps you:
* Discover **new keyword ideas** based on your niche.
* Check **search volume** to understand keyword popularity.
* Analyze **competition levels** to find low-competition keywords.
* See **Cost-Per-Click (CPC) data** for PPC advertising.
* Generate keyword lists for **content and SEO strategy**.
**Why Use Google Keyword Planner for SEO?**
Free and easy to use.
Provides **accurate search volume data** directly from Google.
Helps **identify keyword opportunities** to rank higher.
Useful for **local and global SEO strategies**.
Finds **long-tail keywords** with lower competition.
***
#### How to Access Google Keyword Planner
To use Google Keyword Planner, follow these steps:
1. **Sign in to Google Ads**
* Go to [Google Ads](https://ads.google.com/).
* Sign in with your **Google account**.
* If you don’t have an account, create one.
2. **Access the Keyword Planner**
* Click on **Tools & Settings** (wrench icon in the top menu).
* Under **Planning**, select **Keyword Planner**.
3. **Choose a Research Option**
* **Discover New Keywords** – Find new keyword ideas.
* **Get Search Volume and Forecasts** – Analyze search data for specific keywords.
***
#### How to Find Keywords Using Google Keyword Planner
**Option 1: Discover New Keywords**
This option helps you generate **keyword ideas** based on a topic, website, or industry.
**Steps:**
1. Click **Discover New Keywords**.
2. Enter a **keyword, phrase, or website URL**.
3. Select a **target location** (Global, Country, or Local Search).
4. Click **Get Results**.
**What You’ll See:**
* **Keyword Ideas** – A list of suggested keywords.
* **Average Monthly Searches** – The estimated number of searches per month.
* **Competition Level** – Shows if a keyword is Low, Medium, or High in competition.
* **CPC (Cost-Per-Click)** – Useful for PPC but also hints at keyword commercial intent.
**Tip:** Use filters to find **low-competition, high-search-volume** keywords.
**Option 2: Get Search Volume and Forecasts**
This option allows you to check the **search volume** of specific keywords.
**Steps:**
1. Click **Get Search Volume and Forecasts**.
2. Enter a **list of keywords** (separated by commas).
3. Click **Get Started**.
**What You’ll See:**
* **Estimated impressions & clicks** based on Google Ads campaigns.
* **Historical trends** for keyword performance.
* **Predicted keyword growth** over time.**Pro Tip:** Use this option to validate existing keyword ideas before targeting them.
***
#### How to Find Low-Competition Keywords with Google Keyword Planner
1. **Filter by Competition**
* Click on the **Competition column**.
* Select **Low or Medium competition** keywords.
* These are easier to rank for in organic search.
2. **Look for Long-Tail Keywords**
* Find keywords with **four or more words**.
* Example: Instead of "fitness tips," target "best fitness tips for beginners".
3. **Analyze Keyword Trends**
* Check **seasonal search patterns**.
* Choose keywords that show consistent search demand.
4. **Compare Keyword Search Volume vs. Competition**
* High **search volume + low competition** = best SEO keywords.
* Avoid **high-competition keywords** unless you have strong domain authority.
***
#### How to Use Google Keyword Planner Data for SEO Strategy
**1. Optimize Blog Content with Keywords**
* Use **high-volume, relevant keywords** in your blog titles and meta descriptions.
* Add long-tail keywords **naturally** in headings and content.
**2. Create Keyword Clusters**
Group **related keywords** together.
Example:
* **Main Keyword:** "Best digital marketing tools"
* **Related Keywords:** "Free digital marketing tools," "Best marketing software for startups"
**3. Improve Existing Content**
* Use GKP to find **related keywords** and update old blog posts.
* Add **new keywords** that are trending in your niche.
**4. Optimize for Local SEO**
* Use **location-based keywords** (e.g., "best coffee shop in Chicago").
* Check search volume for specific regions.
**5. Track Keyword Performance**
* Use **Google Search Console** to see how well you rank for chosen keywords.
* Adjust strategy based on ranking improvements or drops.
***
#### Common Mistakes to Avoid When Using Google Keyword Planner
**Ignoring Search Intent** – Choose keywords that match user intent (informational, navigational, or transactional).
**Targeting High-Competition Keywords** – Avoid keywords dominated by **high-authority sites**.
**Neglecting Long-Tail Keywords** – These have less competition and higher conversion potential.
**Not Checking Trends** – Some keywords decline over time; always analyze historical trends.
**Focusing Only on Search Volume** – Consider **competition and relevance**, not just search volume.
# How to Analyze Keyword Difficulty & Search Intent
Understanding **keyword difficulty** and **search intent** is crucial for **SEO success**. Choosing the right keywords ensures that your content ranks well on search engines and attracts the right audience. This guide will show you how to analyze keyword difficulty and search intent effectively.
***
#### What is Keyword Difficulty?
**Keyword difficulty (KD)** is a metric that estimates how challenging it is to rank for a keyword in search engine results. It is based on factors such as **competition, backlinks, and domain authority**.
**Why Keyword Difficulty Matters**
Helps determine whether a keyword is **worth targeting**.
Ensures you focus on **realistic ranking opportunities**.
Prevents wasted effort on **overly competitive** terms.
***
#### How to Analyze Keyword Difficulty
**1. Check Keyword Competition Level**
* **High Competition** – Harder to rank, dominated by high-authority websites.
* **Medium Competition** – Some competition, but ranking is achievable with good SEO.
* **Low Competition** – Easier to rank, great for new websites.
**Tip:** Target **low-to-medium difficulty** keywords if your website is new.
**2. Use Keyword Research Tools**
Several SEO tools provide **Keyword Difficulty (KD) scores**:
* **Ahrefs** – Shows KD from 0 to 100. (Below 30 = easier to rank)
* **SEMrush** – Measures difficulty based on backlinks and search volume.
* **Moz Keyword Explorer** – Uses "Difficulty Score" to assess ranking potential.
* **Ubersuggest** – Free tool that estimates competition levels.
**Example:**
* "Best laptops" (KD: 85, High) Too Competitive
* "Best laptops under $500" (KD: 35, Medium) Easier to Rank
* "Best budget laptops for students" (KD: 20, Low) Ideal for SEO
**3. Analyze Domain & Page Authority of Top Results**
* Check **Domain Authority (DA)** of ranking websites using **Moz**.
* Look at **Page Authority (PA)** to see if newer pages can rank.
**Tip:** If the top-ranking pages have a **DA under 50**, you have a better chance of ranking.
**4. Evaluate Backlink Profiles**
* Use **Ahrefs or SEMrush** to check how many backlinks top-ranking pages have.
* Fewer backlinks = **lower keyword difficulty**.
**Tip:** Target keywords where the **top results have fewer than 20 backlinks**.
***
#### What is Search Intent?
**Search intent** refers to the reason behind a user's search query. Search engines prioritize pages that best match user intent.
**Types of Search Intent**
1. **Informational (Know)** – Users want to learn something.
* Example: "How to do keyword research"
* Content Type: Blog posts, guides, FAQs
2. **Navigational (Go)** – Users want to visit a specific website.
* Example: "Facebook login"
* Content Type: Homepage, official brand pages
3. **Transactional (Buy)** – Users intend to make a purchase.
* Example: "Buy running shoes online"
* Content Type: Product pages, eCommerce sites
4. **Commercial Investigation (Consider)** – Users compare options before purchasing.
* Example: "Best SEO tools for beginners"
* Content Type: Reviews, comparison articles
**Tip:** Align your content with the **correct search intent** for higher rankings.
***
#### How to Analyze Search Intent
**1. Examine the Top Search Results**
* Search the keyword on **Google** and analyze the top-ranking pages.
* Identify whether they are **blog posts, product pages, or reviews**.
**Example:**
* "Best smartphones 2024" → Comparison articles = **Commercial intent**.
* "How to lose weight fast" → Step-by-step guides = **Informational intent**.
**2. Use Google’s "People Also Ask" & Related Searches**
* "People Also Ask" (PAA) questions reveal **common search intent**.
* Related searches show **additional intent-based queries**.
**3. Check SERP Features (Rich Results, Videos, etc.)**
* If Google shows **videos**, the intent favors video content.
* If **Google Shopping ads** appear, the keyword has **transactional intent**.
***
#### Combining Keyword Difficulty & Search Intent for SEO Success
1. **Choose Keywords with Achievable Difficulty**
* Look for **low-to-medium competition** terms.
* Target keywords where top-ranking pages have **low DA and few backlinks**.
2. **Match Search Intent with the Right Content Type**
* **Informational intent** → Blog posts, tutorials
* **Transactional intent** → Product pages, sales pages
3. **Optimize Content for SEO**
* Use the target keyword in **titles, meta descriptions, and headers**.
* Provide a **better answer than competitors** to outrank them.
4. **Track Performance & Adjust Strategy**
* Monitor keyword rankings using **Google Search Console**.
* Update content regularly to match evolving search intent.
***
####
# On-Page SEO Optimization
#### How to Use Internal Linking for Better SEO
**Internal linking** is a powerful yet often overlooked SEO strategy that improves **website structure, user experience, and search engine rankings**. When done correctly, internal links help **Google understand content relationships, distribute page authority, and boost user engagement**.
This guide will walk you through **best practices for internal linking** to maximize SEO benefits.
***
#### What is Internal Linking?
Internal linking refers to **links that connect pages within the same website**. Unlike external links (which point to other websites), internal links guide users and search engines to **related pages** on your site.
**Types of Internal Links:**
* **Navigational Links** – Found in menus, sidebars, and footers for website navigation.
* **Contextual Links** – Placed within content to guide users to related topics.
* **Breadcrumb Links** – Show the user’s location within the site hierarchy.
* **Footer Links** – Include important pages like Privacy Policy and About Us.
✅ **Example of an Internal Link:**
```html
Read our complete SEO Guide
```
***
#### Why Internal Linking is Important for SEO
✅ **Improves Website Structure** – Helps Google understand page relationships. ✅ **Boosts Page Authority** – Distributes **link equity** (ranking power) across pages. ✅ **Enhances User Experience** – Guides users to **relevant content**, reducing bounce rates. ✅ **Increases Page Indexing** – Helps Google discover and index new pages faster. ✅ **Encourages Longer Visits** – More internal links = higher **session duration** and engagement.
***
#### Best Practices for Internal Linking
**1. Use Descriptive Anchor Text**
* **Anchor text** is the clickable text in a hyperlink.
* Use **relevant keywords** in anchor text for SEO.
* Keep it **natural** (avoid generic links like "click here").
✅ **Example:**
```html
Learn more about content marketing strategies
```
❌ **Bad Example:**
```html
Click here
```
***
**2. Link to Relevant Pages**
* Internal links should be **topically related** to the content.
* Avoid linking just for SEO; focus on **providing value** to users.
✅ **Example:** "For a detailed guide, check out our [**SEO keyword research guide**](https://example.com/keyword-research)."
❌ **Bad Example:** "We also have a [**random blog post**](https://example.com/unrelated-page) you might like."
***
**3. Use a Logical Linking Structure**
* Link **important pages more often** to boost their authority.
* Maintain a **hierarchical structure**, linking from broad to detailed pages.
✅ **Best Practice:**
* **Homepage** → Category Pages → **Subcategory Pages** → Blog Posts
***
**4. Keep Links to a Reasonable Number**
* Google recommends **keeping links per page reasonable** (\~100 links max, including navigation links).
* Avoid **overstuffing** internal links in a single post.
✅ **Best Practice:**
* **Blog posts:** 3-5 internal links per 1,000 words.
* **Landing pages:** Only link where relevant.
***
**5. Update Old Content with New Internal Links**
* Revisit older articles and **add links to new relevant content**.
* Helps keep older pages **fresh and relevant**.
✅ **Pro Tip:** Use **Google Search Console** to find pages with low internal links.
***
**6. Use Breadcrumbs for Better Navigation**
* Breadcrumbs show the **hierarchical structure** of a website.
* Improve **user experience and site organization**.
✅ **Example:**
```html
Home > Blog > Current Post
```
***
**7. Use Internal Links to Pass Link Equity (PageRank)**
* Linking from **high-authority pages** helps transfer SEO value.
* Link to important pages like cornerstone content or high-converting pages.
✅ **Example:**
* **High-traffic page → New blog post** to boost rankings.
***
**8. Avoid Orphan Pages**
* **Orphan pages** have no internal links pointing to them, making them hard to discover.
* Ensure **every page has at least one internal link**.
✅ **Pro Tip:** Use **Ahrefs or Screaming Frog** to find orphan pages.
***
#### Tools for Internal Link Optimization
* **Google Search Console** – Check for internal link structure.
* **Ahrefs Site Audit** – Identify pages with weak internal linking.
* **Screaming Frog** – Find orphan pages and broken links.
* **Yoast SEO (WordPress)** – Suggests relevant internal links.
***
#### Common Internal Linking Mistakes to Avoid
❌ **Using Generic Anchor Text** – "Click here" offers no SEO value. ❌ **Overloading with Internal Links** – Too many links reduce effectiveness. ❌ **Not Updating Older Posts** – Missing new content opportunities. ❌ **Linking to Irrelevant Pages** – Confuses both users and search engines. ❌ **Ignoring Orphan Pages** – Every page should be linked from somewhere.
***
#### Conclusion
**Internal linking** is one of the **easiest and most effective SEO strategies** to improve **site structure, user experience, and rankings**. By using **descriptive anchor text, linking relevant pages, and updating old content**, you can significantly **boost your website’s SEO performance**.
Start implementing **better internal linking** today for higher rankings and improved user engagement!
# How to Optimize Title Tags & Meta Descriptions
Title tags and meta descriptions play a crucial role in **Search Engine Optimization (SEO)**. They help search engines understand your content and influence **click-through rates (CTR)** by enticing users to visit your website. This guide will show you how to **optimize title tags and meta descriptions** to improve rankings and attract more visitors.
***
#### What Are Title Tags & Meta Descriptions?
**Title Tag**
A **title tag** is an HTML element that defines the title of a web page. It appears in:
* Search engine results pages (SERPs)
* Browser tabs
* Social media previews
**Example of a Title Tag:**
```html
Best SEO Tips for 2024 - Improve Your Rankings
```
**Meta Description**
A **meta description** is a brief summary of a webpage’s content that appears below the title in search results. While not a direct ranking factor, a well-written meta description can **increase CTR**.
**Example of a Meta Description:**
```html
```
***
#### Why Are Title Tags & Meta Descriptions Important?
**Boosts Click-Through Rates (CTR)** – A compelling title and description encourage users to click. **Improves SEO Rankings** – Search engines consider **relevant, keyword-optimized titles** for rankings. **Enhances User Experience** – Helps users understand what your page is about before clicking. **Increases Social Media Engagement** – When shared, these elements serve as a preview of your content.
***
#### How to Optimize Title Tags
**1. Keep Titles Within the Optimal Length**
* **Recommended Length:** **50-60 characters** (including spaces)
* Titles longer than 60 characters may be **truncated in search results**.
**2. Use Primary Keywords Naturally**
* Place your **main keyword** near the beginning.
* Avoid **keyword stuffing** (unnatural overuse of keywords).
**Example:**
**Optimized:** "Best SEO Strategies for 2024 | Expert Guide"
**Overstuffed:** "SEO Strategies, SEO Tips, SEO Guide for SEO in 2024"
**3. Make Titles Engaging & Click-Worthy**
* Use **power words**: "Ultimate, Best, Guide, Proven, Expert"
* Add **numbers**: "10 Best SEO Strategies for 2024"
* Use **questions**: "How Can You Improve SEO in 2024?"
**4. Include Your Brand Name (If Relevant)**
* Helps with **branding** and recognition.
* Example: "SEO Best Practices | \[Your Brand]"
**5. Avoid Duplicate Titles**
* Ensure **each page has a unique title** to avoid **SEO cannibalization**.
***
#### How to Optimize Meta Descriptions
**1. Keep Meta Descriptions Concise**
* **Recommended Length:** **150-160 characters**
* Longer descriptions get **cut off in search results**.
**2. Use Keywords Naturally**
* Google **bolds keywords** in search results, making them more noticeable.
* Example: "Learn **SEO tips** to improve your website’s ranking and boost **organic traffic**."
**3. Create a Clear Call-to-Action (CTA)**
* Encourage users to **click, read, or learn more**.
* Example: "Discover expert SEO techniques. **Read more now!**"
**4. Write in an Engaging, Persuasive Tone**
* Make it **compelling** while accurately describing the content.
**Good Example:** "Looking for the best SEO tips? Learn expert strategies to improve rankings and drive more traffic!"
**Bad Example:** "SEO is important. Click here to read more about SEO strategies."
**5. Avoid Duplicate Meta Descriptions**
* Each page should have **a unique meta description** that reflects its content.
***
#### Common Mistakes to Avoid
**Too Long or Too Short Titles & Descriptions** – Stay within character limits.
**Keyword Stuffing** – Don’t overload with keywords.
**Misleading Content** – Ensure the title and description accurately represent the page.
**Lack of CTAs** – Encourage users to click.
***
#### Tools to Help Optimize Title Tags & Meta Descriptions
* **Google Search Console** – Analyze CTR and optimize accordingly.
* **Yoast SEO (for WordPress users)** – Helps preview and optimize meta tags.
* **Moz Title Tag Preview Tool** – Check if your title gets truncated.
* **SERPsim** – Simulates how your page appears in search results.
####
# How to Use Header Tags Properly
Header tags (**H1, H2, H3, H4, H5, H6**) are essential for structuring web content, improving readability, and boosting **Search Engine Optimization (SEO)**. Proper use of header tags helps search engines understand the hierarchy of your content while enhancing the user experience.
***
#### What Are Header Tags?
Header tags are **HTML elements** that define headings on a webpage. They help organize content and improve accessibility for both users and search engines.
**Common Header Tags and Their Purpose:**
* **H1 (Main Heading):** The title of the page, used once.
* **H2 (Subheadings):** Major sections within the content.
* **H3 (Sub-subheadings):** Further break down H2 sections.
* **H4, H5, H6:** Used for additional subcategories if needed.
**Example Structure:**
```html
Main Topic (Page Title)
Subheading 1
Sub-topic under Subheading 1
Subheading 2
Sub-topic under Subheading 2
```
***
#### Why Are Header Tags Important?
**SEO Benefits** – Helps search engines understand page hierarchy.
**Improves Readability** – Makes content easier to scan.
**Enhances Accessibility** – Assists screen readers in navigating content.
**Boosts User Engagement** – Organizes content for a better reading experience.
***
#### How to Use Header Tags Properly
**1. Use Only One H1 Tag Per Page**
* The **H1 tag is the most important heading** and should only be used once.
* It should clearly describe the main topic of the page.
**Good Example:**
```html
Best SEO Tips for 2024
```
**Bad Example:** (Multiple H1 tags)
```html
SEO Strategies
Keyword Research Techniques
```
**2. Use H2 Tags for Main Sections**
* H2 tags divide the content into **main topics**.
* Think of them as **chapter titles** within your content.
**Example:**
```html
How to Improve SEO Rankings
1. Optimize Your Website for Speed
2. Use the Right Keywords
3. Build High-Quality Backlinks
```
**3. Use H3 Tags for Subtopics**
* H3 tags further break down H2 sections.
* Think of them as **subsections within a chapter**.
**Example:**
```html
1. Optimize Your Website for Speed
Why Page Speed Matters
How to Check Your Page Speed
```
**4. Use Lower-Level Headings (H4-H6) Sparingly**
* Use **H4-H6** for even deeper sections if needed.
* Overuse of these headings may clutter the page.
**Example:**
```html
How to Check Your Page Speed
Using Google PageSpeed Insights
Optimizing Images for Speed
```
***
#### Best Practices for Using Header Tags
**1. Use Keywords Naturally in Headers**
* Place relevant keywords in **H1 and H2 tags** for SEO.
* Avoid keyword stuffing.
**Example:** "Best SEO Strategies for Small Businesses"
**2. Keep Headings Concise and Clear**
* Avoid long and confusing headings.
* Aim for **5-10 words** per heading.
**3. Maintain a Logical Heading Structure**
* Headings should **follow a logical order** (H1 > H2 > H3).
* Do not skip levels (e.g., H1 → H3 without an H2).
**Bad Example:**
```html
SEO Guide
Keyword Research
```
**Good Example:**
```html
SEO Guide
Keyword Research
How to Find Keywords
```
**4. Use Headers to Improve Readability**
* Break up long text with **well-structured headings**.
* Helps users quickly find important sections.
**5. Don’t Use Headers for Styling**
* Headers should **structure content**, not just for text styling.
* Use CSS for styling text instead of heading tags.
**Bad Example:**
```html
Click Here for More Info
Good Example:
```
```html
Click Here for More Info
```
***
#### Common Mistakes to Avoid
**Using Multiple H1 Tags on One Page**
**Skipping Heading Levels (H1 > H3 instead of H1 > H2 > H3)**
**Overusing H4-H6 Tags** (Unnecessary complexity)
**Using Headings for Styling Instead of Structure**
# Best Practices for Writing SEO-Friendly Content
Creating **SEO-friendly content** is essential for improving search engine rankings, driving organic traffic, and enhancing user engagement. Well-optimized content helps search engines understand your page’s relevance while providing value to readers. This guide covers the **best practices for writing SEO-friendly content** that ranks higher and attracts more visitors.
***
#### What is SEO-Friendly Content?
SEO-friendly content is **written and structured** to rank well on search engines like **Google, Bing, and Yahoo**. It balances **high-quality writing** with **SEO optimization techniques** to improve visibility.
**Why is SEO-Friendly Content Important?**
**Increases Organic Traffic** – Helps search engines rank your content higher.
**Improves User Engagement** – Well-structured content enhances readability.
**Boosts Conversions** – Relevant and optimized content attracts the right audience.
**Enhances Content Discoverability** – More chances to appear in featured snippets and rich results.
***
#### Best Practices for Writing SEO-Friendly Content
**1. Perform Keyword Research Before Writing**
* Identify **target keywords** using tools like **Google Keyword Planner, Ahrefs, or SEMrush**.
* Focus on **long-tail keywords** for specific search intent.
* Check **search volume and competition** to find rankable keywords.
**Example:** Instead of targeting “SEO,” use **“best SEO tips for beginners”**.
**2. Use Keywords Naturally**
* Place your **primary keyword** in:
* Title tag (H1)
* First 100 words
* Meta description
* URL
* Headings (H2, H3, etc.)
* Avoid **keyword stuffing** (unnatural overuse of keywords).
**Good Example:** "Learn the best SEO strategies to **improve your rankings** and **boost website traffic**."
**Bad Example:** "SEO tips, SEO strategies, SEO content writing, SEO tools—SEO everywhere!"
**3. Write a Compelling Title & Meta Description**
* **Title:** Keep it under **60 characters** with a primary keyword.
* **Meta Description:** Keep it under **160 characters** with a clear CTA.
**Example:** **Title:** "10 Proven SEO Strategies to Boost Your Google Rankings" **Meta Description:** "Learn 10 expert SEO strategies to improve rankings and drive organic traffic. Read now!"
**4. Use Header Tags (H1, H2, H3) for Structure**
* **H1:** Main title (used only once).
* **H2:** Subheadings for major sections.
* **H3-H6:** Subsections for clarity.
**Example:**
```html
Best SEO Strategies for 2024
1. Optimize Your Website Speed
2. Focus on Mobile SEO
Why Mobile Optimization Matters
```
**5. Create High-Quality, Engaging Content**
* Write **original and valuable** content.
* Use a **conversational tone** to engage readers.
* Add **examples, case studies, and statistics** for credibility.
**Pro Tip:** Aim for **1,500+ words** for in-depth articles.
**6. Optimize URL Structure**
* Keep URLs **short, readable, and keyword-rich**.
* Avoid **random numbers or symbols**.
**Good URL:** `yourwebsite.com/seo-friendly-content-guide` ❌ **Bad URL:** `yourwebsite.com/12345/?p=9876`
**7. Use Internal & External Links**
* **Internal Links:** Link to related pages on your website.
* **External Links:** Link to **authoritative sources**.
**8. Optimize Images for SEO**
* Use **descriptive file names** (`seo-content-guide.jpg`).
* Add **alt text** with relevant keywords.
* Compress images to improve page speed.
**Example:**
```html
```
**9. Focus on Readability & User Experience**
* Use **short paragraphs (2-3 sentences)**.
* Add **bullet points and numbered lists**.
* Use **bold and italics** for emphasis.
**Pro Tip:** Use tools like **Hemingway Editor or Grammarly** to improve readability.
**10. Optimize for Featured Snippets**
* Use **question-based headings** (e.g., "What is SEO?").
* Provide **concise answers** (40-60 words) below headings.
* Format content using **lists, tables, and bullet points**.
**Example:**
```html
What is SEO?
SEO (Search Engine Optimization) is the process of improving a website's visibility in search engines like Google.
```
**11. Ensure Mobile-Friendliness**
* Use a **responsive design** for all screen sizes.
* Test using **Google's Mobile-Friendly Test**.
**Pro Tip:** **60%+ of web traffic** comes from mobile users—optimize accordingly!
**12. Improve Page Speed**
* Compress images with **TinyPNG**.
* Use **browser caching**.
* Minify CSS & JavaScript
* **Check speed:** Use **Google PageSpeed Insights**.
**13. Add Schema Markup for Rich Snippets**
* Use **FAQ Schema, Review Schema, and How-To Schema** to enhance SERP results.
* Helps with **voice search optimization**.
**Example:**
```html
```
**14. Promote Content on Social Media**
* Share on **Twitter, LinkedIn, Facebook**.
* Encourage **social sharing** by adding buttons.
* Engage in **forums and communities**.
**Pro Tip:** Content with **social engagement** performs better in search rankings.
**15. Regularly Update Old Content**
* Refresh outdated **statistics, links, and keywords**.
* Update every **6-12 months** to maintain rankings.
**Example:** "Updated: The **latest SEO trends for 2024** to keep your strategy effective."
***
#### Common SEO Content Mistakes to Avoid
**Ignoring search intent** – Content must match what users are looking for.
**Keyword stuffing** – Overloading content with keywords.
**Duplicate content** – Always create **original content**.
**Neglecting mobile users** – Ensure **responsive design**.
**No internal linking** – Helps with **SEO and navigation**.
####
# How to Optimize Images for SEO
Optimizing images for **Search Engine Optimization (SEO)** is essential for improving page speed, enhancing user experience, and increasing visibility on search engines like Google. Properly optimized images help websites load faster and rank better in search results, especially in Google Image Search.
This guide will walk you through **best practices for optimizing images for SEO** to boost your website’s performance and rankings.
***
#### Why Image Optimization is Important for SEO
**Improves Page Load Speed** – Faster pages enhance user experience and reduce bounce rates.
**Boosts Google Image Search Rankings** – Optimized images can appear in image search results. **Enhances User Experience** – Clear, well-optimized images improve website aesthetics.
**Reduces Server Load** – Compressed images use less bandwidth, improving performance.
**Increases Accessibility** – Alt text helps visually impaired users and improves SEO rankings.
***
#### Best Practices for Image Optimization
**1. Choose the Right Image Format**
Selecting the correct file format affects image quality and file size. Use:
* **JPEG (JPG)** – Best for photographs and complex images; small file sizes with good quality.
* **PNG** – Best for transparent backgrounds and high-quality graphics.
* **WebP** – Modern format with superior compression and quality (recommended for SEO).
* **SVG** – Best for logos and vector graphics.
**Pro Tip:** Use **WebP** over JPEG or PNG for better compression without losing quality.
**2. Compress Images to Reduce File Size**
Large images slow down websites, affecting **page speed and SEO rankings**.
**Tools to Compress Images:**
* **TinyPNG** – Compress PNG and JPEG images.
* **ImageOptim** – Lossless compression for Mac users.
* **ShortPixel** – Great for WordPress users.
* **Squoosh** – Online tool by Google for quick image compression.
**Ideal File Size:** Keep images **under 100KB** where possible for faster loading.
**3. Use Descriptive File Names**
Search engines use file names to understand image content. Rename images before uploading.
**Bad Example:** `IMG_12345.jpg`
**Good Example:** `blue-running-shoes-for-men.jpg`
**Best Practice:**
* Use **hyphens (-) instead of underscores (\_) or spaces**.
* Include **keywords naturally** in the file name.
**4. Add SEO-Friendly Alt Text (Alternative Text)**
Alt text helps search engines understand the image **while improving accessibility** for visually impaired users.
**Best Practices for Alt Text:**
* Describe the image **accurately and clearly**.
* Include **relevant keywords** naturally.
* Avoid keyword stuffing.
**Example:**
```html
```
**Pro Tip:** Alt text **improves rankings in Google Image Search** and provides a better user experience.
**5. Use Responsive Images (Mobile Optimization)**
Ensure images **adjust properly** on all screen sizes by using **CSS media queries** and responsive image attributes.
**Best Practice:** Use the `srcset` attribute to serve different image sizes based on screen resolution.
```html
```
**Pro Tip:** Test mobile-friendliness with **Google Mobile-Friendly Test**.
**6. Implement Lazy Loading for Faster Performance**
Lazy loading **delays image loading** until the user scrolls down to them, improving initial page speed.
**How to Enable Lazy Loading:**
```html
https://example.com/sample-page/https://example.com/images/seo-optimization.jpg
```
**Submit image sitemaps** via **Google Search Console**.
**9. Optimize Open Graph (OG) & Twitter Card Images for Social Sharing**
Ensure images appear correctly when shared on **Facebook, Twitter, LinkedIn, etc.** by adding Open Graph metadata.
**Example:**
```html
```
**Pro Tip:** Use a **1200 x 630 px image** for optimal social sharing.
**10. Track Image Performance with Google Search Console**
* Check how images perform in **Google Image Search**.
* Identify **broken image links**.
* Monitor **click-through rates (CTR) from image search**.
**Pro Tip:** Use **Google Analytics** to track user interactions with images.
***
#### Common Image Optimization Mistakes to Avoid
**Uploading Large Images** – Always compress images before uploading.
**Missing Alt Text** – Every image should have a **descriptive alt attribute**.
**Using Non-Descriptive File Names** – Rename images with relevant keywords.
**Ignoring Mobile Optimization** – Ensure images load properly on all devices.
**Forgetting Lazy Loading** – Helps **improve page speed and user experience**.
# How to Use Internal Linking for Better SEO
**Internal linking** is a powerful yet often overlooked SEO strategy that improves **website structure, user experience, and search engine rankings**. When done correctly, internal links help **Google understand content relationships, distribute page authority, and boost user engagement**.
This guide will walk you through **best practices for internal linking** to maximize SEO benefits.
***
#### What is Internal Linking?
Internal linking refers to **links that connect pages within the same website**. Unlike external links (which point to other websites), internal links guide users and search engines to **related pages** on your site.
**Types of Internal Links:**
* **Navigational Links** – Found in menus, sidebars, and footers for website navigation.
* **Contextual Links** – Placed within content to guide users to related topics.
* **Breadcrumb Links** – Show the user’s location within the site hierarchy.
* **Footer Links** – Include important pages like Privacy Policy and About Us.
**Example of an Internal Link:**
```html
Read our complete SEO Guide
```
***
#### Why Internal Linking is Important for SEO
**Improves Website Structure** – Helps Google understand page relationships.
**Boosts Page Authority** – Distributes **link equity** (ranking power) across pages.
**Enhances User Experience** – Guides users to **relevant content**, reducing bounce rates.
**Increases Page Indexing** – Helps Google discover and index new pages faster.
**Encourages Longer Visits** – More internal links = higher **session duration** and engagement.
***
#### Best Practices for Internal Linking
**1. Use Descriptive Anchor Text**
* **Anchor text** is the clickable text in a hyperlink.
* Use **relevant keywords** in anchor text for SEO.
* Keep it **natural** (avoid generic links like "click here").
**Example:**
```html
Learn more about content marketing strategies
```
**Bad Example:**
```html
Click here
```
***
**2. Link to Relevant Pages**
* Internal links should be **topically related** to the content.
* Avoid linking just for SEO; focus on **providing value** to users.
**Example:** "For a detailed guide, check out our [**SEO keyword research guide**](https://example.com/keyword-research)."
**Bad Example:** "We also have a [**random blog post**](https://example.com/unrelated-page) you might like."
***
**3. Use a Logical Linking Structure**
* Link **important pages more often** to boost their authority.
* Maintain a **hierarchical structure**, linking from broad to detailed pages.
**Best Practice:**
* **Homepage** → Category Pages → **Subcategory Pages** → Blog Posts
***
**4. Keep Links to a Reasonable Number**
* Google recommends **keeping links per page reasonable** (\~100 links max, including navigation links).
* Avoid **overstuffing** internal links in a single post.
**Best Practice:**
* **Blog posts:** 3-5 internal links per 1,000 words.
* **Landing pages:** Only link where relevant.
***
**5. Update Old Content with New Internal Links**
* Revisit older articles and **add links to new relevant content**.
* Helps keep older pages **fresh and relevant**.
**Pro Tip:** Use **Google Search Console** to find pages with low internal links.
***
**6. Use Breadcrumbs for Better Navigation**
* Breadcrumbs show the **hierarchical structure** of a website.
* Improve **user experience and site organization**
**Example:**
```html
Home > Blog > Current Post
```
***
**7. Use Internal Links to Pass Link Equity (PageRank)**
* Linking from **high-authority pages** helps transfer SEO value.
* Link to important pages like cornerstone content or high-converting pages.
**Example:**
* **High-traffic page → New blog post** to boost rankings.
***
**8. Avoid Orphan Pages**
* **Orphan pages** have no internal links pointing to them, making them hard to discover.
* Ensure **every page has at least one internal link**.
**Pro Tip:** Use **Ahrefs or Screaming Frog** to find orphan pages.
***
#### Tools for Internal Link Optimization
* **Google Search Console** – Check for internal link structure.
* **Ahrefs Site Audit** – Identify pages with weak internal linking.
* **Screaming Frog** – Find orphan pages and broken links.
* **Yoast SEO (WordPress)** – Suggests relevant internal links.
***
#### Common Internal Linking Mistakes to Avoid
**Using Generic Anchor Text** – "Click here" offers no SEO value.
**Overloading with Internal Links** – Too many links reduce effectiveness.
**Not Updating Older Posts** – Missing new content opportunities.
**Linking to Irrelevant Pages** – Confuses both users and search engines.
**Ignoring Orphan Pages** – Every page should be linked from somewhere.
# Technical SEO
# What is Technical SEO? A Complete Guide
Technical SEO is the foundation of a well-optimized website. It focuses on improving **website performance, crawlability, and indexing**, ensuring that search engines can easily access and understand your content. Without a strong technical SEO structure, even the best content may struggle to rank well in search results.
This guide will cover the essential **aspects of technical SEO**, why it matters, and how to implement best practices for higher search rankings.
***
#### Why is Technical SEO Important?
**Enhances Website Crawlability** – Ensures search engines can easily navigate your site.
**Improves Indexing** – Helps search engines understand and store web pages properly.
**Boosts Page Speed** – Faster websites improve rankings and user experience.
**Enhances Mobile-Friendliness** – Optimizes the site for mobile users.
**Improves Site Security** – Secure websites (HTTPS) rank higher.
Without technical SEO, your content and backlinks may not be enough to **achieve high rankings** in search results.
***
#### Key Elements of Technical SEO
**1. Website Crawlability & Indexability**
For your site to rank, **Google must first crawl and index it**. Properly setting up your website ensures search engines can easily find and store your pages.
**How to Optimize Crawlability:**
* Use a **robots.txt file** to control what search engines can crawl.
* Avoid **disallowing important pages** that should be indexed.
* Submit a **XML sitemap** to Google Search Console.
* Fix **broken links** and avoid unnecessary redirects.
**Check your site’s crawlability with:**
* **Google Search Console (Coverage Report)**
* **Screaming Frog SEO Spider**
***
**2. Website Speed & Performance**
Google considers **page speed** a ranking factor. Slow websites frustrate users and increase bounce rates.
**How to Improve Page Speed:**
* Compress images using **TinyPNG** or **ShortPixel**.
* Enable **browser caching**.
* Use a **Content Delivery Network (CDN)**.
* Minify CSS, JavaScript, and HTML files.
* Implement **lazy loading** for images and videos.
**Test your website speed with:**
* **Google PageSpeed Insights**
* **GTmetrix**
* **Lighthouse (Chrome DevTools)**
***
**3. Mobile-Friendliness & Responsive Design**
Google uses **mobile-first indexing**, meaning it primarily evaluates your site’s **mobile version** for ranking.
**Best Practices for Mobile Optimization:**
* Use a **responsive design** that adapts to all screen sizes.
* Ensure **touch elements** are easy to use.
* Optimize images for **faster mobile loading**.
* Avoid **intrusive pop-ups** that block content.
**Test your site’s mobile-friendliness with:**
* **Google’s Mobile-Friendly Test**
***
**4. Secure Website (HTTPS & SSL Certificates)**
Google prioritizes **secure websites** with **HTTPS encryption**. An **SSL certificate** protects user data and improves trustworthiness.
**How to Implement HTTPS:**
* Purchase and install an **SSL certificate** from a trusted provider.
* Redirect **HTTP pages to HTTPS** to avoid duplicate content issues.
* Update all internal links to **HTTPS**.
**Check HTTPS status with:**
* **SSL Labs SSL Test**
***
**5. Structured Data & Schema Markup**
Structured data **helps search engines understand content better** and enables **rich snippets** in search results.
**Common Schema Types:**
* **Article Schema** – For blog posts and news articles.
* **FAQ Schema** – Helps FAQs appear in search results.
* **Review Schema** – Displays star ratings in Google.
* **Product Schema** – Enhances eCommerce product pages.
**Test structured data with:**
* **Google’s Rich Results Test**
* **Schema Markup Validator**
***
**6. Canonicalization & Duplicate Content Prevention**
Duplicate content confuses search engines and can harm rankings. A **canonical tag** helps specify the preferred version of a page.
**How to Fix Duplicate Content Issues:**
* Use **canonical tags (`rel=canonical`)** on duplicate pages.
* Redirect duplicate URLs to the main page (301 redirects).
* Avoid **thin or auto-generated content**.
**Check duplicate content issues with:**
* **Siteliner**
* **Google Search Console (Coverage Report)**
***
**7. Internal Linking & Site Architecture**
A **strong internal linking structure** improves crawlability, user experience, and SEO rankings.
**Best Practices for Internal Linking:**
* Link to **important pages** from within your content.
* Use **descriptive anchor text** (avoid “click here”).
* Avoid creating **orphan pages** (pages with no internal links).
**Tools to analyze internal links:**
* **Ahrefs Site Audit**
* **Screaming Frog SEO Spider**
***
**8. Fixing 404 Errors & Broken Links**
Broken links and **404 errors** negatively impact user experience and SEO.
**How to Fix 404 Errors:**
* Redirect broken URLs using **301 redirects**.
* Remove or update outdated links.
* Use **Google Search Console** to find 404 errors.
**Check broken links with:**
* **Google Search Console (Coverage Report)**
* **Dead Link Checker**
***
#### How to Audit Your Technical SEO
Regularly auditing your site’s technical SEO helps maintain strong performance.
**SEO Audit Checklist:**
Check **crawl errors** in **Google Search Console**.
Analyze **page speed** using **Google PageSpeed Insights**.
Ensure **mobile optimization** using **Google Mobile-Friendly Test**.
Fix **broken links** and **redirect errors**.
Implement **schema markup** for rich snippets.
**Use SEO audit tools like:**
* **SEMrush Site Audit**
* **Ahrefs Site Audit**
* **Screaming Frog SEO Spider**
# How to Improve Website Speed for SEO
Website speed is a **critical ranking factor** for search engines and plays a major role in user experience. A **fast-loading website** improves engagement, reduces bounce rates, and helps improve SEO rankings. Google has emphasized page speed as part of its **Core Web Vitals**, making it essential for website owners to optimize their site’s performance.
This guide will cover **why website speed matters, how to test your speed, and best practices** for improving load times to boost your SEO rankings.
***
#### Why Website Speed Matters for SEO
**Improves Search Rankings** – Google favors faster websites, improving their visibility.
**Enhances User Experience** – Visitors stay longer and engage more with faster pages.
**Reduces Bounce Rates** – Slow-loading pages lead to high abandonment rates.
**Increases Conversions** – Faster sites encourage more purchases and sign-ups.
**Essential for Mobile Optimization** – Mobile users expect quick load times.
Google’s **recommended page load time** is **under 3 seconds**. Sites that take longer to load may lose traffic and rankings.
***
#### How to Test Website Speed
Before making improvements, measure your website’s speed using **free performance testing tools**:
**1. Google PageSpeed Insights**
* Analyzes website speed and provides optimization recommendations.
* Scores website performance for **mobile and desktop**.
* Measures **Core Web Vitals** (LCP, FID, CLS).
* [Check here](https://pagespeed.web.dev/)
**2. GTmetrix**
* Provides detailed page speed reports, including waterfall analysis.
* Grades performance based on **speed, structure, and page requests**.
* [Test your site](https://gtmetrix.com/)
**3. Lighthouse (Google DevTools)**
* Chrome browser tool for measuring page speed and accessibility.
* Includes **performance audits** to detect slow elements.
* Access via **Chrome DevTools > Lighthouse**.
**Tip:** Run multiple tests to get an average **loading time and performance score**.
***
#### Best Practices to Improve Website Speed
**1. Optimize Images**
Large images slow down websites. Compress and resize them to improve loading speed.
**How to Optimize Images:**
* Use **WebP format** instead of PNG/JPEG for better compression.
* Resize images to **fit display dimensions** (avoid large images scaled down).
* Compress images using:
* **TinyPNG** ([tinypng.com](https://tinypng.com/))
* **ShortPixel** (WordPress plugin)
* **ImageOptim** (Mac)
**Ideal Image File Size:** Keep images **under 100KB** when possible.
***
**2. Enable Browser Caching**
Caching stores static files (images, CSS, JavaScript) so returning visitors experience **faster page loads**.
**How to Enable Caching:**Use **.htaccess rules** to set caching expiration times.
Install caching plugins:
* **WP Rocket** (WordPress)
* **W3 Total Cache** (WordPress)
**Best Practice:** Set caching expiration for images, CSS, and JavaScript to **1 year**.
***
**3. Minify CSS, JavaScript, and HTML**
Minification removes **unnecessary spaces, comments, and characters** from code files, reducing their size and improving load speed.
**Tools for Minification:**
**Minify Code Online:** [Minifier.org](https://www.minifier.org/)
**WordPress Plugins:**
* **Autoptimize**
* **WP Super Minify**
**Tip:** Combine CSS & JavaScript files to reduce HTTP requests.
***
**4. Use a Content Delivery Network (CDN)**
A **CDN speeds up website loading** by serving cached content from servers worldwide.
**Best CDN Services:**
* **Cloudflare** (Free & Paid options)
* **Amazon CloudFront**
* **Akamai**
**Tip:** Use a CDN to **serve images, CSS, and JavaScript faster**.
***
**5. Reduce Server Response Time**
Your server’s performance affects page speed. Optimize it for faster responses.
**How to Reduce Server Load:**
* Choose **a fast web host** (e.g., **SiteGround, Kinsta, WP Engine**).
* Enable **Gzip compression** to reduce file sizes.
* Optimize **database queries** by removing unused plugins and scripts.
**Tip:** Aim for a **server response time under 200ms**.
***
**6. Implement Lazy Loading for Images & Videos**
Lazy loading defers loading off-screen images/videos until they are needed, reducing initial load time.
**How to Enable Lazy Loading:**
* Add `loading="lazy"` to images manually:
```html
```
* Use lazy loading plugins:
* **WP Rocket** (WordPress)
* **a3 Lazy Load** (WordPress)
**Tip:** Lazy load YouTube videos using the **Lite YouTube Embed** plugin.
***
**7. Optimize Fonts and Reduce External Scripts**
Web fonts and third-party scripts **increase page load time**. Optimize them for better speed.
**Best Practices:**
* Use **system fonts** instead of custom web fonts.
* Load fonts asynchronously (`font-display: swap;`).
* Limit the use of **third-party widgets** (e.g., social media feeds, chatbots). **Tip:** Remove unused **Google Fonts and FontAwesome icons** to reduce requests.
***
#### Common Website Speed Mistakes to Avoid
**Uploading Uncompressed Images** – Always resize and compress images.
**Not Using a CDN** – A CDN dramatically improves speed for global users.
**Too Many HTTP Requests** – Reduce requests by combining CSS/JS files.
**Neglecting Mobile Optimization** – Ensure mobile speed is **as fast as desktop**.
**Using Slow Web Hosting** – A slow host kills performance—choose a **fast, reliable provider**.
***
#### How to Monitor Website Speed Regularly
Track performance consistently to maintain **fast load times**.
**Tools for Monitoring Speed:**
* **Google PageSpeed Insights** ([pagespeed.web.dev](https://pagespeed.web.dev/))
* **GTmetrix** ([gtmetrix.com](https://gtmetrix.com/))
* **Pingdom Tools** ([tools.pingdom.com](https://tools.pingdom.com/))
**Tip:** Run tests monthly to ensure **consistent speed performance**.
# How to Create & Optimize an XML Sitemap
An **XML sitemap** is a crucial element of **technical SEO**, helping search engines like Google and Bing efficiently **crawl and index** your website. A well-structured sitemap improves search engine visibility, ensuring all important pages are discovered and ranked.
This guide will walk you through **what an XML sitemap is, how to create one, and best practices for optimization**.
***
#### What is an XML Sitemap?
An **XML sitemap** is a file that lists all important URLs of a website, helping search engines understand its structure and prioritize indexing.
**Why XML Sitemaps Are Important for SEO**
**Improves Indexing** – Helps search engines find and index pages faster.
**Enhances Crawlability** – Ensures search bots can navigate complex site structures.
**Prioritizes Important Pages** – Assigns priority levels to critical content.
**Assists with Large Sites** – Vital for websites with thousands of pages. **Helps Identify Issues** – Google Search Console reports sitemap errors.
***
#### How to Create an XML Sitemap
**1. Use an Online Sitemap Generator**
If you have a small website (under 500 pages), you can use **free online tools** to generate a sitemap.
**Popular Free Sitemap Generators:**
* [XML-Sitemaps.com](https://www.xml-sitemaps.com/)
* [Screaming Frog SEO Spider](https://www.screamingfrog.co.uk/seo-spider/)
**Best For:** Static websites with few pages.
***
**2. Generate a Sitemap Using a CMS Plugin**
For WordPress, Joomla, or Shopify, use a plugin to create and update sitemaps automatically.
**Best Sitemap Plugins:**
* **WordPress** – [Yoast SEO](https://yoast.com/wordpress/plugins/seo/), [Rank Math](https://rankmath.com/)
* **Joomla** – [JSitemap](https://storejextensions.org/extensions/jsitemap.html)
* **Shopify** – Built-in XML sitemap (auto-generated at `/sitemap.xml`)
**Best For:** Websites that frequently update content.
***
**3. Manually Create an XML Sitemap**
For custom-built websites, you can manually create an XML file using a text editor.
**Basic XML Sitemap Format:**
```xml
https://example.com/2024-03-04weekly1.0https://example.com/blog/2024-03-02daily0.8
```
**Best For:** Developers managing large or custom-coded websites.
***
#### How to Optimize an XML Sitemap
**1. Include Only Important URLs**
* Avoid **duplicate, low-quality, or thin-content pages**.
* Do not include **admin pages, login pages, or thank-you pages**.
**Best Practice:** List only **indexable pages** that provide value.
***
**2. Use Proper Sitemap Segmentation for Large Websites**
If your website has **more than 50,000 URLs**, break it into multiple sitemaps.
**How to Create Multiple Sitemaps:**
1. **Divide URLs** into categories (e.g., blog posts, product pages, videos).
2. **Create a separate XML file for each category**.
3. **Use a Sitemap Index File** to link all sitemaps.
**Example of a Sitemap Index File:**
```xml
https://example.com/sitemap-posts.xmlhttps://example.com/sitemap-products.xml
```
**Best For:** E-commerce or large websites with thousands of URLs.
***
**3. Optimize URL Structure**
* Ensure all URLs are **clean, descriptive, and SEO-friendly**.
* Use **HTTPS URLs** (secure pages rank higher).
**Example of an SEO-Friendly URL:**
```
https://example.com/best-seo-tips
```
**Avoid URLs Like:**
```
https://example.com/index.php?id=456&session=123
```
***
**4. Update Sitemap Regularly**
* Set **update frequencies** (`changefreq`) based on content updates.
* Use `lastmod` to indicate the last modification date of each page.
**Recommended Change Frequencies:**
| Page Type | Changefreq |
| -------------- | ---------- |
| Homepage | Daily |
| Blog Posts | Weekly |
| Product Pages | Weekly |
| Contact Page | Monthly |
| Category Pages | Monthly |
**Best Practice:** **Automate sitemap updates** using a plugin or script.
***
#### How to Submit an XML Sitemap to Google
Once your sitemap is ready, submit it to **Google Search Console** to help search engines crawl your site faster.
**Steps to Submit a Sitemap in Google Search Console:**
1. **Go to** [Google Search Console](https://search.google.com/search-console/).
2. Select your website.
3. Click **“Sitemaps”** in the left menu.
4. Enter your sitemap URL (e.g., `https://example.com/sitemap.xml`).
5. Click **Submit**.
**Tip:** Use **Bing Webmaster Tools** to submit your sitemap to Bing as well.
***
#### Common XML Sitemap Mistakes to Avoid
#### **Including Noindex Pages** – Only include indexable content.
#### **Broken Links in Sitemap** – Use tools like Screaming Frog to validate links.
#### **Using Non-Canonical URLs** – Ensure the correct version of URLs is listed.
#### **Forgetting to Update Sitemaps** – Keep sitemaps up to date with content changes.
#### **Not Submitting to Google Search Console** – Google may not find your sitemap without submission.
***
#### Tools to Generate & Manage Sitemaps
* **Google Search Console** – Monitor sitemap indexing status.
* **Screaming Frog SEO Spider** – Crawl websites and generate sitemaps.
* **Yoast SEO Plugin** – Auto-generates sitemaps for WordPress.
* **XML-Sitemaps.com** – Free sitemap generator for small sites.
# What is Robots.txt & How to Use It?
The **robots.txt** file is a crucial part of **technical SEO**, helping website owners control how search engines **crawl and index** their content. Properly configuring a robots.txt file ensures that search engines **prioritize important pages while preventing them from accessing unnecessary or sensitive sections** of your site.
This guide will explain **what robots.txt is, how it works, and best practices for its usage** to improve SEO performance and website management.
***
#### What is Robots.txt?
The **robots.txt** file is a simple text file placed in a website’s root directory that provides **instructions for web crawlers** on which pages or sections of a site they should or shouldn’t access.
**Why is Robots.txt Important for SEO?**
**Controls Search Engine Crawling** – Directs bots on which pages to crawl or avoid.
**Prevents Indexing of Unwanted Pages** – Stops search engines from indexing duplicate, private, or low-value pages.
**Saves Crawl Budget** – Helps large websites prevent unnecessary crawling of non-important pages.
**Protects Sensitive Data** – Restricts access to admin areas, login pages, or private directories.
***
#### How Does Robots.txt Work?
When a search engine bot (e.g., Googlebot) visits a website, it first checks for a **robots.txt** file. If the file is present, the bot follows the instructions within it.
**Example of a Basic Robots.txt File:**
```txt
User-agent: *
Disallow: /private/
Disallow: /wp-admin/
Allow: /public/
```
**Explanation:**
* `User-agent: *` → Applies to all search engine bots.
* `Disallow: /private/` → Prevents bots from crawling the `/private/` directory.
* `Disallow: /wp-admin/` → Blocks WordPress admin area from being indexed.
* `Allow: /public/` → Ensures `/public/` content is accessible to bots.
**Tip:** Robots.txt only **controls crawling**, not **indexing**. To prevent indexing, use the `noindex` meta tag within the page’s HTML.
***
#### How to Create a Robots.txt File
**1. Manually Create a Robots.txt File**
1. Open **Notepad** (Windows) or **TextEdit** (Mac).
2. Type your **robots.txt rules** (see examples below).
3. Save the file as `robots.txt`.
4. Upload it to your website’s **root directory** (`https://example.com/robots.txt`).
**Best For:** Custom websites and manual control over crawl settings.
***
**2. Generate Robots.txt Using a CMS Plugin**
For WordPress, Joomla, or Shopify, use a plugin to manage the robots.txt file easily.
**Best Plugins:**
* **WordPress** – [Yoast SEO](https://yoast.com/wordpress/plugins/seo/), [Rank Math](https://rankmath.com/)
* **Joomla** – JSitemap Pro
* **Shopify** – Built-in robots.txt file (editable with Liquid templates)
**Best For:** Websites using CMS platforms.
***
#### How to Optimize Robots.txt for SEO
**1. Block Unnecessary Pages**
Prevent search engines from crawling low-value or duplicate pages.
**Best Practices:**
```txt
User-agent: *
Disallow: /cart/
Disallow: /checkout/
Disallow: /thank-you/
Disallow: /search-results/
```
**Why?** These pages do not need to be indexed as they are dynamic or user-specific.
***
**2. Allow Crawling of Important Pages**
Ensure that search engines can access key content and product pages.
**Example:**
```txt
User-agent: *
Allow: /blog/
Allow: /products/
```
**Why?** These pages contain valuable content that should be indexed.
***
**3. Avoid Blocking CSS & JavaScript Files**
Search engines need **CSS and JavaScript** to render pages correctly. Avoid blocking them.
**Bad Example:**
```txt
User-agent: *
Disallow: /wp-content/
```
**Good Example:**
```txt
User-agent: *
Allow: /wp-content/themes/
Allow: /wp-content/plugins/
```
**Why?** Blocking resources can **affect mobile usability** and **page rendering**.
***
**4. Use Wildcards & Dollar Signs for Better Control**
* `*` (Wildcard) – Matches any characters.
* `$` (End of URL) – Ensures exact URL matching.
**Example:**
```txt
User-agent: *
Disallow: /*?ref=*
Disallow: /downloads/*.zip$
```
**Why?** Prevents search engines from indexing **tracking parameters** and **ZIP file downloads**.
***
#### How to Submit Robots.txt to Google
Once your robots.txt file is ready, submit it to **Google Search Console**.
**Steps to Submit Robots.txt in Google Search Console:**
1. **Go to** [Google Search Console](https://search.google.com/search-console/).
2. Select your website.
3. Click **“Settings”** → **“Crawl Stats”**.
4. Locate and test your **robots.txt** file.
5. Click **Submit** to ensure Google follows your directives.
**Pro Tip:** Use **Google’s Robots.txt Tester** to validate your rules.
***
#### Common Robots.txt Mistakes to Avoid
**Blocking Important Pages** – Ensure blog posts and product pages are crawlable.
**Disallowing All Search Bots** – Avoid blocking `User-agent: *` entirely.
**Blocking CSS & JavaScript** – Prevents proper rendering of your site.
**Forgetting to Update Robots.txt** – Keep it aligned with site changes.
**Using Robots.txt to Block Indexing** – Instead, use `noindex` meta tags.
***
#### Tools to Test and Validate Robots.txt
* **Google Search Console Robots.txt Tester** – Checks for errors.
* **Screaming Frog SEO Spider** – Crawls websites and detects issues.
* **Yoast SEO Plugin** – Edits robots.txt within WordPress.
**Tip:** Regularly check your **robots.txt file** to ensure no accidental blocking of essential content.
# How to Fix Crawl Errors in Google Search Console
Crawl errors in **Google Search Console (GSC)** can prevent search engines from properly indexing your website, leading to **lower rankings and reduced organic traffic**. Identifying and fixing crawl errors is essential for **technical SEO** and ensuring that your content is fully accessible to Googlebot.
This guide will explain **what crawl errors are, how to identify them in Google Search Console, and how to fix them** for optimal website performance.
***
#### What Are Crawl Errors?
A **crawl error** occurs when **Googlebot** tries to access a webpage but encounters an issue, preventing successful indexing. Crawl errors fall into two main categories:
**1. Site Errors (Affecting Entire Website)**
* **DNS Errors** – Googlebot can’t communicate with your website’s server.
* **Server Errors (5xx Errors)** – The server is overloaded or unavailable.
* **Robots.txt Issues** – Googlebot is blocked from crawling your site.
**2. URL Errors (Affecting Specific Pages)**
* **404 Errors (Not Found)** – The requested page is missing or deleted.
* **Redirect Errors** – Broken or incorrect redirects (e.g., infinite loops, chains).
* **Blocked URLs** – URLs disallowed by robots.txt.
* **Soft 404s** – Pages that return a 200 OK status but contain “Page Not Found” content.
**Fixing crawl errors helps improve search rankings, indexing, and user experience.**
***
#### How to Identify Crawl Errors in Google Search Console
Follow these steps to find crawl errors in **Google Search Console (GSC):**
**1. Access the Crawl Error Reports**
1. Go to [Google Search Console](https://search.google.com/search-console/).
2. Select your website.
3. Navigate to **Indexing → Pages**.
4. Review errors under **“Why pages aren’t indexed”**.
**2. Types of Crawl Errors You Might See**
* **Not Found (404)** – Googlebot can’t find the page.
* **Server Errors (5xx)** – Server failed to respond.
* **Redirect Errors** – Invalid or excessive redirects.
* **Blocked by robots.txt** – Page restricted from crawling.
* **Duplicate Content Without Canonical** – Confusion about the preferred version of a page.
**Tip:** Use the **URL Inspection Tool** in GSC to test if a page is properly indexed.
***
#### How to Fix Common Crawl Errors
**1. Fix 404 Errors (Page Not Found)**
**Cause:** Deleted or moved pages with no redirect.
**How to Fix:**
* Redirect missing pages using a **301 redirect**.
* Reinstate deleted content if needed.
* Update internal and external links pointing to 404 pages.
* Remove broken URLs from sitemaps.
**Example Redirect (in .htaccess file):**
```apache
Redirect 301 /old-page.html https://example.com/new-page.html
```
**Tools to Find Broken Links:**
* **Screaming Frog SEO Spider**
* **Ahrefs Site Audit**
* **Google Search Console → Indexing → Pages**
***
**2. Fix Server Errors (5xx Errors)**
**Cause:** Server issues, high traffic load, or configuration problems.
**How to Fix:**
* Check server logs for **error messages**.
* Upgrade **hosting plan** if the server is frequently overloaded.
* Reduce heavy scripts or use **caching and CDNs**.
* Restart the server if necessary.
**Test Server Response:**
* Use **Google Search Console → Pages** to find affected URLs.
* Check site status with **Google PageSpeed Insights**.
***
**3. Fix Redirect Errors**
**Cause:** Broken, looping, or excessive redirect chains.
**How to Fix:**
* Ensure redirects **point to the final destination**, not through multiple hops.
* Replace **302 (temporary redirects)** with **301 (permanent redirects)** if the change is permanent.
* Fix **redirect loops** in .htaccess, Nginx, or CMS settings.
**Example of Proper 301 Redirect (in .htaccess):**
```apache
Redirect 301 /old-page https://example.com/new-page
```
**Tools to Check Redirects:**
* **Redirect Checker (HTTP Status Code Tool)**
* **Screaming Frog (Redirect Chains Report)**
***
**4. Fix Blocked URLs in Robots.txt**
**Cause:** Important pages are accidentally blocked by `robots.txt`.
**How to Fix:**
* Open **robots.txt** (`https://example.com/robots.txt`).
* Remove blocking rules for important pages.
* Use **Google Search Console Robots.txt Tester** to verify.
**Bad Example (Blocking Entire Site):**
```txt
User-agent: *
Disallow: /
```
**Good Example (Allowing Indexing):**
```txt
User-agent: *
Allow: /
```
***
**5. Fix Soft 404 Errors**
**Cause:** Pages return a **200 OK** response but display a “Page Not Found” message.
**How to Fix:**
* Configure the server to return a **proper 404 status code**.
* Redirect users to relevant content with a **301 redirect**.
* Ensure pages with useful content **aren’t mistakenly labeled as soft 404s**.
**Test with Google Search Console → URL Inspection Tool**.
***
#### How to Prevent Future Crawl Errors
**1. Regularly Monitor Google Search Console**
* Check **Crawl Stats** and **Index Coverage Reports** weekly.
* Fix issues as they appear to avoid long-term damage.
**2. Use a Clean URL Structure**
* Avoid **deeply nested URLs**.
* Use **SEO-friendly, human-readable URLs**.
**3. Keep XML Sitemaps Updated**
* Ensure your **sitemap.xml** only includes valid URLs.
* Submit updates to **Google Search Console → Sitemaps**.
**4. Optimize Internal Links**
* Remove **broken or outdated links**.
* Link to **related, valuable pages** to help Google crawl efficiently.
**Use Internal Link Checkers:**
* **Ahrefs Site Audit**
* **Google Search Console**
# How to Implement Canonical Tags Correctly
Canonical tags (**rel="canonical"**) are essential for **SEO** as they help prevent duplicate content issues, consolidate ranking signals, and guide search engines to the preferred version of a webpage. Implementing canonical tags correctly ensures that search engines index the right pages, improving overall site performance.
This guide explains **what canonical tags are, why they matter, and how to implement them correctly** to improve your website’s SEO.
***
#### What is a Canonical Tag?
A **canonical tag** is an HTML element (`rel="canonical"`) that tells search engines which version of a webpage is the **primary (preferred) version**. It helps prevent **duplicate content issues** when multiple URLs display the same or similar content.
**Example of a Canonical Tag:**
```html
```
**How It Works:**
* Search engines recognize **canonicalized URLs** and consolidate ranking signals.
* Only the **preferred version** is indexed, reducing duplicate content penalties.
* Prevents confusion when the same page is accessible via multiple URLs.
**Tip:** Use canonical tags on **every page**, even when duplicate content isn’t obvious.
***
#### Why Are Canonical Tags Important for SEO?
**Prevents Duplicate Content Issues** – Consolidates duplicate URLs into one primary version.
**Improves Search Rankings** – Avoids keyword dilution across multiple versions of the same content.
**Consolidates Link Equity** – Directs backlinks and ranking power to the preferred page.
**Enhances User Experience** – Prevents search engines from displaying redundant content.
**Essential for Large Websites** – Useful for eCommerce, blogs, and dynamically generated URLs.
Without canonical tags, search engines may **split ranking power** among similar pages, reducing your SEO potential.
***
#### When to Use Canonical Tags
**1. Duplicate Pages with Different URLs**
If the same page exists under multiple URLs, use a canonical tag to specify the preferred version.
**Example:**
```
https://example.com/product-page/
https://example.com/product-page/?ref=123
```
**Solution:** Add this tag to both versions:
```html
```
**2. WWW vs. Non-WWW Versions**
If your site is accessible at both `www.example.com` and `example.com`, use a canonical tag to prevent duplication.
**Example:**
```html
```
**3. HTTP vs. HTTPS Versions**
If your site has both **HTTP and HTTPS** versions, ensure that **HTTPS** is canonicalized.
**Example:**
```html
```
**4. Similar Content Pages**
For blog posts or category pages with **similar content**, use canonical tags to avoid duplicate content penalties.
**Example:**
* **Post 1:** "Best SEO Strategies for 2024"
* **Post 2:** "Top SEO Techniques for 2024" (very similar content)
Canonicalize the stronger-performing page:
```html
```
**5. Pagination & Category Pages**
For paginated URLs (`page=2`, `page=3`), canonicalize the **first page** in the series.
**Example:**
```html
```
***
#### How to Implement Canonical Tags Correctly
**1. Add the Canonical Tag in the `` Section**
Place the canonical tag within the `` section of each duplicate page.
**Correct Implementation:**
```html
```
**Wrong Implementation:** (Placed inside ``)
```html
```
***
**2. Self-Referencing Canonical Tags**
Every **indexable page** should contain a **self-referencing canonical tag** to prevent accidental duplication.
**Example:**
```html
```
**Why?** It helps avoid **accidental duplicate URLs** (e.g., adding tracking parameters like `?utm_source=google`).
***
**3. Use Canonical Tags Instead of 301 Redirects (When Needed)**
* **Use a 301 redirect** when you want to **permanently remove duplicate pages**.
* **Use a canonical tag** when duplicate versions **must remain accessible**.
**Example:**
* A **printer-friendly page (`?print=1`)** should use a canonical tag to the main page.
* A **moved page** should use a **301 redirect**, not a canonical tag.
***
**4. Avoid Conflicting Canonical Tags & Redirects**
If a page has both a **canonical tag and a 301 redirect** pointing to different URLs, search engines may get confused.
**Best Practice:** Ensure **canonical tags and redirects point to the same URL**.
***
**5. Canonicalize Cross-Domain Duplicate Content**
If the same content appears on **multiple domains**, use cross-domain canonical tags.
**Example:**
```html
```
**When to Use It?**
* **Syndicated content** (e.g., guest posts published on multiple sites).
* **E-commerce product listings on multiple domains**.
***
#### How to Check if Canonical Tags Are Working
Use these tools to verify if canonical tags are implemented correctly:
**Google Search Console** – Inspect URLs to see which version Google considers canonical.
**Screaming Frog SEO Spider** – Crawl pages and check canonical tags.
**Ahrefs Site Audit** – Detect duplicate content and missing canonical tags. **Google’s URL Inspection Tool** – Shows **Google-selected canonical**.
***
#### Common Canonical Tag Mistakes to Avoid
**Pointing Canonical Tags to Non-Related Pages** – Keep URLs relevant.
**Using Multiple Canonical Tags on One Page** – Only **one canonical tag per page**.
**Canonicalizing the Wrong URL** – Ensure the **preferred version is correct**.
**Blocking Canonical Pages in Robots.txt** – Google won’t crawl them if blocked.
**Using Canonical Tags with `noindex` Tags** – Causes conflicting signals.
# Understanding Structured Data & Schema Markup
Structured data and **Schema Markup** are essential components of **technical SEO**, enabling search engines to understand your content better and display **rich results** in search engine results pages (SERPs). Implementing structured data correctly can improve your **click-through rates (CTR), search visibility, and rankings**.
This guide explains **what structured data is, why it’s important, and how to implement Schema Markup** for SEO benefits.
***
#### What is Structured Data?
**Structured data** is a standardized format used to provide **additional information** about web pages to search engines. It helps search engines **better interpret content** and display it in **enhanced search results** (e.g., rich snippets, knowledge panels, and carousels).
**Example of Structured Data in JSON-LD Format:**
```json
{
"@context": "https://schema.org",
"@type": "Article",
"headline": "Understanding Structured Data & Schema Markup",
"author": {
"@type": "Person",
"name": "John Doe"
},
"publisher": {
"@type": "Organization",
"name": "SEO Experts",
"logo": {
"@type": "ImageObject",
"url": "https://example.com/logo.png"
}
},
"datePublished": "2024-03-04",
"dateModified": "2024-03-04"
}
```
**Tip:** JSON-LD is the preferred structured data format by **Google**.
***
#### Why is Structured Data Important for SEO?
**Enhances Search Results** – Enables rich snippets, increasing CTR.
**Improves Content Understanding** – Helps search engines categorize content more accurately.
**Boosts Voice Search Performance** – Voice assistants rely on structured data for answers. **Increases Click-Through Rates (CTR)** – Rich results attract more user attention.
**Supports E-Commerce, Recipes, FAQs & More** – Structured data improves visibility for product pages, recipes, events, and reviews.
Without structured data, search engines **may not fully understand** the context of your content, leading to **missed ranking opportunities**.
***
#### Types of Schema Markup for SEO
**Schema Markup** is a type of structured data vocabulary that helps search engines categorize content.
**1. Article Schema (For Blogs & News Sites)**
* Helps articles appear in **Google News and Top Stories**.
* Improves visibility for blog posts.
**Example:**
```json
{
"@context": "https://schema.org",
"@type": "NewsArticle",
"headline": "SEO Trends in 2024",
"author": "Jane Smith",
"datePublished": "2024-03-04"
}
```
***
**2. Breadcrumb Schema**
* Displays **breadcrumb navigation** in SERPs.
* Helps users understand website structure.
**Example:**
```json
{
"@context": "https://schema.org",
"@type": "BreadcrumbList",
"itemListElement": [
{
"@type": "ListItem",
"position": 1,
"name": "Home",
"item": "https://example.com/"
},
{
"@type": "ListItem",
"position": 2,
"name": "SEO Blog",
"item": "https://example.com/seo-blog/"
}
]
}
```
***
**3. FAQ Schema (For Frequently Asked Questions)**
* Enables FAQ **rich results** in SERPs.
* Helps websites **gain more real estate** in search results.
**Example:**
```json
{
"@context": "https://schema.org",
"@type": "FAQPage",
"mainEntity": [
{
"@type": "Question",
"name": "What is Structured Data?",
"acceptedAnswer": {
"@type": "Answer",
"text": "Structured data is a standardized format for providing search engines with additional information about a webpage."
}
}
]
}
```
***
**4. Product Schema (For E-Commerce Sites)**
* Helps products display **price, availability, and reviews** directly in search results.
**Example:**
```json
{
"@context": "https://schema.org/",
"@type": "Product",
"name": "Wireless Bluetooth Headphones",
"image": "https://example.com/product.jpg",
"description": "High-quality Bluetooth headphones with noise cancellation.",
"brand": "TechSound",
"offers": {
"@type": "Offer",
"price": "99.99",
"priceCurrency": "USD",
"availability": "https://schema.org/InStock"
}
}
```
***
#### How to Implement Structured Data
**1. Add JSON-LD to the `` Section of Your Page**
Place structured data **inside `
```
***
**2. Use Google Tag Manager (GTM) for Schema Implementation**
* Add JSON-LD **without modifying code**.
* Create a **custom HTML tag** and paste structured data.
* Fire the tag on relevant pages.
* **Best For:** Large websites and dynamic content management.
***
**3. Test Structured Data Implementation**
Use Google’s testing tools to verify your structured data:
**Google Rich Results Test:**
**Schema Markup Validator:**
**Google Search Console (Enhancements Report)** – Checks for structured data issues.
***
#### Common Schema Markup Mistakes to Avoid
**Using Incorrect Schema Types** – Match schema type to content (e.g., Product Schema for eCommerce, FAQ Schema for FAQs).
**Forgetting to Update Structured Data** – Keep dates, prices, and availability **up to date**.
**Implementing Schema Markup That Doesn't Match Visible Content** – Ensure structured data reflects **what users see on the page**.
**Ignoring Google’s Structured Data Guidelines** – Follow **Google’s documentation** to avoid penaltie
# Off-Page SEO & Link Building
# What is Off-Page SEO? A Complete Guide
**Off-page SEO** refers to all optimization activities that occur **outside your website** to improve its search engine rankings. It includes **link building, social media marketing, brand mentions, influencer outreach, and other external signals** that help search engines determine a website’s authority, relevance, and credibility.
A strong **off-page SEO strategy** is essential for improving **domain authority, search rankings, and organic traffic**. This guide explains **what off-page SEO is, why it matters, and the best practices to implement it effectively**.
***
#### Why is Off-Page SEO Important?
**Improves Search Engine Rankings** – External signals help search engines assess a website’s authority. **Builds Website Authority & Trust** – High-quality backlinks increase credibility.
**Drives Referral Traffic** – Links from external websites bring direct visitors.
**Enhances Brand Recognition** – Off-page SEO strengthens brand presence online.
**Complements On-Page SEO** – While on-page SEO optimizes content, off-page SEO promotes it.
Without a solid off-page SEO strategy, even well-optimized content may struggle to rank against **more authoritative competitors**.
***
#### Key Off-Page SEO Strategies
**1. Link Building (Backlinks)**
Backlinks are the most important **off-page SEO ranking factor**. They signal to search engines that **other websites trust your content**.
**Types of Backlinks:**
* **DoFollow Links** – Pass SEO value (link equity) and improve rankings.
* **NoFollow Links** – Do not pass SEO value but can drive traffic.
* **High-Authority Links** – Links from trusted sites (e.g., news sites, government websites).
* **Contextual Links** – Links placed naturally within content.
**Best Link-Building Strategies:**
**Guest Blogging** – Write high-quality articles for authoritative websites.
**Broken Link Building** – Find broken links and suggest your content as a replacement.
**Skyscraper Technique** – Improve existing popular content and reach out for backlinks.
**Resource Page Links** – Get listed on industry-specific resource pages.
**HARO (Help A Reporter Out)** – Provide expert insights to journalists in exchange for backlinks.
**Example of a DoFollow Backlink:**
```html
Example Website
```
***
**2. Social Media Signals & Engagement**
While social media links do not directly impact SEO, they influence rankings **indirectly** by increasing content visibility, engagement, and referral traffic.
**Best Social Media SEO Practices:**
**Share Content on Social Platforms** – Facebook, Twitter, LinkedIn, Pinterest.
**Engage with Your Audience** – Respond to comments, questions, and mentions.
**Encourage Social Shares** – Use compelling CTAs in posts.
**Leverage Influencers** – Collaborate with industry experts to expand reach.
**Optimize Social Profiles** – Include keywords in bio descriptions and links to your website.
**Example of a Social Shareable Content:**
```html
```
***
**3. Brand Mentions (Unlinked & Linked)**
Google recognizes **brand mentions** as a ranking signal, even if they don’t include a direct link.
**How to Earn Brand Mentions:**
**PR & Media Coverage** – Get featured in news articles and industry blogs.
**Podcast Interviews & Webinars** – Expand brand recognition.
**Online Reviews & Testimonials** – Gain credibility and visibility.
**Community Engagement** – Participate in forums like Reddit & Quora.
**Example of a Brand Mention Without a Link:**
> "\[Company Name] has one of the best SEO tools in the market."
**Tip:** Use **Google Alerts** or **Brand Mention Tools** (e.g., Ahrefs, BuzzSumo) to track brand mentions.
***
**4. Influencer Marketing & Blogger Outreach**
Influencer collaborations help increase brand exposure and build authority through their audience.
**Best Practices for Influencer SEO:**
**Identify Relevant Influencers** – Look for influencers in your niche with engaged audiences.
**Offer Value** – Provide unique insights, products, or incentives.
**Encourage Natural Mentions** – Aim for organic recommendations rather than paid promotions.
**Monitor Performance** – Track referral traffic and mentions using analytics tools.
**Example of Influencer Outreach Email:**
```plaintext
Subject: Collaboration Opportunity with [Your Brand]
Hi [Influencer Name],
I love your content on [specific topic] and thought you’d be interested in our latest [product/resource]. Would you be open to a collaboration?
Looking forward to hearing your thoughts!
Best,
[Your Name]
```
***
**5. Local SEO & Citations**
For businesses with a **physical presence**, **local SEO** is a crucial part of off-page optimization.
**Best Local SEO Practices:**
**Claim Your Google My Business Listing** – Optimize your business profile.
**Get Listed in Local Directories** – Yelp, Yellow Pages, Foursquare.
**Encourage Customer Reviews** – Positive reviews improve local rankings.
**Optimize for "Near Me" Searches** – Use location-based keywords.
**Example of a Local Citation:**
```html
ABC Digital Marketing123 SEO Street, New York, NY
```
**Tip:** Ensure **NAP Consistency** (Name, Address, Phone Number) across all listings.
***
#### Tools to Improve Off-Page SEO
**Backlink Analysis:**
* Ahrefs
* Moz Link Explorer
* SEMrush Backlink Audit
**Brand Mentions & PR Monitoring:**
* Google Alerts
* BuzzSumo
* Brand24
**Social Media & Influencer Outreach:**
* Hootsuite
* Buffer
* BuzzStream
**Local SEO & Citations:**
* Google My Business
* Whitespark
* BrightLocal
**Tip:** Regularly audit backlinks to **remove toxic links** using **Google’s Disavow Tool**.
***
#### Common Off-Page SEO Mistakes to Avoid
**Buying Low-Quality Backlinks** – Avoid spammy link-building tactics.
**Ignoring Brand Mentions** – Track unlinked mentions and request backlinks.
**Not Engaging on Social Media** – Interaction improves brand trust.
**Lack of Local SEO Efforts** – Businesses need **Google My Business optimization**.
**Relying Only on On-Page SEO** – External signals are **essential for ranking**.
# How to Build High-Quality Backlinks
Backlinks remain one of the most **important ranking factors** for SEO. A **high-quality backlink** is a link from an authoritative, relevant website that improves **domain authority, organic rankings, and referral traffic**. However, not all backlinks are created equal. **Spammy or low-quality links** can harm your rankings, while high-quality backlinks boost your credibility.
This guide covers **best practices for building high-quality backlinks** that strengthen your website’s SEO performance.
***
#### Why Are High-Quality Backlinks Important for SEO?
**Improve Search Rankings** – Backlinks act as votes of confidence for search engines.
**Increase Website Authority** – More backlinks from reputable sites improve domain authority.
**Drive Referral Traffic** – Links from high-traffic websites send visitors to your site.
**Boost Indexing Speed** – Search engines crawl linked pages faster.
**Enhance Brand Trust & Recognition** – Being linked by authoritative sites improves credibility.
Without high-quality backlinks, it’s difficult to rank against **competitors with stronger link profiles**.
***
#### Key Strategies for Building High-Quality Backlinks
**1. Guest Blogging on Authoritative Sites**
Guest blogging is one of the most **effective link-building strategies** when done correctly. By contributing **high-quality content** to authoritative blogs, you can earn a relevant backlink and position yourself as an industry expert.
**Best Practices for Guest Posting:**
Identify **authoritative websites** in your niche using Ahrefs or Moz.
Pitch **unique, valuable content ideas**.
Ensure the site **allows DoFollow backlinks** in author bios or articles.
Write **high-quality, non-promotional** content.
Build long-term relationships for future collaborations.
**Example Guest Post Link:**
```html
SEO Strategies for 2024
```
**Tip:** Avoid spammy guest blogging sites that publish **low-quality content**.
***
**2. Broken Link Building**
This method involves **finding broken (404) links** on authoritative websites and suggesting your content as a replacement.
**How to Find & Fix Broken Links:**
1. Use **Ahrefs, Screaming Frog, or Check My Links (Chrome Extension)** to identify broken links.
2. Contact the website owner, informing them about the broken link.
3. Suggest your relevant content as a **replacement**.
**Example Outreach Email:**
```plaintext
Subject: Found a Broken Link on Your Website
Hi [Site Owner],
I came across a broken link on your page [URL] while browsing. I recently wrote an article that would be a perfect replacement. Would you consider updating the link?
Looking forward to your thoughts!
Best,
[Your Name]
```
**Tip:** Success rates are higher when you **build relationships** before pitching.
***
**3. The Skyscraper Technique**
Developed by Brian Dean, the **Skyscraper Technique** involves improving **existing high-ranking content** and reaching out to sites linking to it.
**Steps to Execute the Skyscraper Technique:**
1. Find **popular content** with many backlinks in your niche.
2. Create **an even better, more detailed** version.
3. Reach out to websites linking to the original content and suggest linking to your improved version.
**Best Tools for Finding High-Performing Content:**
* **Ahrefs Content Explorer**
* **BuzzSumo**
* **Google Search (Using “Top SEO Strategies” + Year)**
**Tip:** Focus on adding **original research, better visuals, and updated data**.
***
**4. HARO (Help A Reporter Out) Backlinks**
**HARO (helpareporter.com)** is a platform where journalists request **expert insights** for articles. If your response is selected, you earn a backlink from **news sites, blogs, and industry publications**.
**How to Use HARO for Backlinks:**
1. Sign up for HARO and select relevant industries.
2. Respond **quickly** to journalist requests.
3. Provide **valuable, unique insights**.
4. Follow up politely for confirmation.
**Tip:** Prioritize **high-authority publications** like Forbes, Entrepreneur, and Business Insider.
***
**5. Resource Page Link Building**
Many websites have **resource pages** that list valuable content related to their industry. Getting your content listed on these pages can earn **high-quality, contextually relevant backlinks**.
**How to Get Listed on Resource Pages:**
1. Search for resource pages in your niche using Google.
* Example search query:
```
"Best SEO resources" OR "SEO tools and guides" site:.edu
```
2. Reach out to the website owner and suggest your resource.
**Tip:** Ensure your content is **high-value and well-researched** before outreach.
***
**6. Leverage Unlinked Brand Mentions**
Sometimes, websites mention your **brand name** but don’t link back. These are **easy backlink opportunities** if you reach out and request a link.
**How to Find & Convert Unlinked Mentions:**
1. Use **Google Alerts** or **Ahrefs Content Explorer** to track brand mentions.
2. Identify mentions that **don’t include a backlink**.
3. Contact the website and request a link to your homepage or relevant content.
**Tip:** Personalize your email and emphasize the **value of adding a link**.
***
**7. Participate in Industry Forums & Communities**
Engaging in **relevant online communities** can help you build authority and earn backlinks.
**Best Platforms for Niche Engagement:**
**Quora & Reddit** – Provide valuable answers with relevant links.
**Niche-Specific Forums** – Join industry-specific communities and contribute.
**LinkedIn & Facebook Groups** – Share insights and articles naturally.
**Example of Forum Backlink:**
```html
Check out this SEO guide
```
**Tip:** Focus on providing **genuine value** before dropping links.
***
#### Tools to Help Build High-Quality Backlinks
**Backlink Analysis & Outreach:**
* **Ahrefs** – Find backlinks & analyze competitors.
* **Moz Link Explorer** – Check domain authority of linking sites.
* **BuzzStream** – Manage outreach campaigns.
**Content Research & Tracking:**
* **BuzzSumo** – Find trending content.
* **Google Alerts** – Track brand mentions.
* **HARO** – Earn backlinks from journalists.
**Tip:** Monitor backlinks using **Google Search Console**.
***
#### Common Link-Building Mistakes to Avoid
**Buying Low-Quality Backlinks** – Avoid spammy backlinks from **link farms**.
**Overusing Exact Match Anchor Text** – Vary anchor text for a **natural link profile**.
**Ignoring NoFollow Links** – Even NoFollow links drive **referral traffic & credibility**.
**Focusing Only on Quantity** – **Quality matters more** than a high number of backlinks.
**Not Auditing Your Backlink Profile** – Remove toxic links using **Google’s Disavow Tool**.
# What is Domain Authority & How to Improve It?
**Domain Authority (DA)** is a metric developed by **Moz** to predict how well a website will rank on search engine results pages (**SERPs**). It is scored on a **scale from 1 to 100**, with higher scores indicating **greater ranking potential**.
Improving **Domain Authority** can enhance your website’s credibility, visibility, and ability to rank for competitive keywords. This guide explains **what DA is, how it works, and the best strategies to increase it**.
***
#### What is Domain Authority?
**Domain Authority (DA)** is a predictive ranking score that **evaluates the overall strength of a website’s backlink profile**. The score is based on multiple factors, including:
**Backlink Quality & Quantity** – The number and strength of links pointing to your site.
**Domain Age & Trust** – Older, well-established domains tend to have higher DA.
**Content Quality & Relevance** – High-quality, authoritative content improves DA.
**Technical SEO & Site Structure** – A well-optimized website enhances credibility.
***
#### How is Domain Authority Calculated?
Moz calculates DA based on over **40 ranking signals**, including:
1. **Linking Root Domains** – The number of unique websites linking to your site.
2. **Total Backlinks** – The total number of inbound links pointing to your domain.
3. **Spam Score** – A lower spam score improves DA.
4. **Search Engine Friendliness** – Proper indexing and crawlability.
**Important Note:** DA **is not a Google ranking factor** but is a useful indicator of **SEO performance**.
**Check Your DA Score:** Use **Moz’s DA Checker**:
***
#### What is a Good Domain Authority Score?
* **1-20** – Low authority (new or small websites).
* **21-40** – Moderate authority (growing SEO presence).
* **41-60** – Strong authority (competitive rankings).
* **61-80** – High authority (well-established sites).
* **81-100** – Very high authority (leading industry sites like Wikipedia, Forbes, etc.).
**Tip:** Focus on improving **SEO fundamentals** rather than just increasing DA.
***
#### How to Improve Domain Authority
**1. Build High-Quality Backlinks**
Backlinks from authoritative sites are the **strongest DA-boosting factor**.
**Best Link-Building Strategies:**
**Guest Blogging** – Contribute valuable content to high-DA sites.
**Broken Link Building** – Replace broken links with your relevant content.
**The Skyscraper Technique** – Improve existing popular content and earn links.
**HARO (Help A Reporter Out)** – Get quoted by journalists for backlinks.
**Tip:** Use **Ahrefs, Moz, or SEMrush** to track backlinks.
***
**2. Create High-Quality, Linkable Content**
The best way to **earn natural backlinks** is by publishing **valuable, shareable content**.
**Best Types of Linkable Content:**
**Ultimate Guides & How-To Articles** – In-depth, evergreen content.
**Original Research & Case Studies** – Unique data-driven insights.
**Infographics & Visual Content** – Shareable and embeddable content.
**Industry Roundups & Expert Interviews** – Collaboration builds authority.
**Tip:** Promote your content using **email outreach and social media** to attract links.
***
**3. Improve Internal Linking Structure**
Internal linking **helps distribute link equity** across your website, improving DA.
**Best Internal Linking Practices:**
Use **descriptive anchor text** (avoid “click here”).
Link to **relevant high-authority pages** on your site.
Avoid excessive links—**3-5 internal links per 1,000 words** is ideal.
**Tip:** Use **Google Search Console** to find **orphan pages** and link them internally.
***
**4. Optimize Technical SEO**
A technically sound website improves **searchability and credibility**.
**Key Technical SEO Factors:**
**Mobile-Friendliness** – Ensure a **responsive design**.
**Page Speed Optimization** – Improve load times with **Google PageSpeed Insights**.
**Secure Website (HTTPS)** – Use an SSL certificate.
**Fix Broken Links & Redirects** – Improve crawlability.
**Tip:** Run an SEO audit with **Screaming Frog or SEMrush**.
***
**5. Reduce Spam Score & Disavow Toxic Links**
A high **spam score** can negatively impact DA and **SEO rankings**.
**How to Reduce Spam Score:**
**Disavow Toxic Backlinks** – Use **Google’s Disavow Tool**.
**Avoid Link Farms & PBNs** – Low-quality, paid links hurt rankings.
**Maintain a Natural Link Profile** – Focus on **organic link-building**.
**Tip:** Monitor spammy links using **Moz Spam Score or Ahrefs Toxic Score**.
***
**6. Increase Social Signals & Brand Mentions**
While social media doesn’t directly impact DA, it helps **boost brand authority** and link acquisition.
**Best Practices:**
**Share Content on Social Platforms** – Encourage **shares & engagement**.
**Engage with Your Audience** – Respond to comments and mentions.
**Leverage Influencers** – Get **brand mentions** from trusted sources.
**Tip:** Set up **Google Alerts** to track **brand mentions**.
***
**7. Get Listed in High-Authority Directories**
Earning backlinks from trusted directories improves DA and **local SEO**.
**Best High-Quality Directories:**
**Google My Business** – Essential for local businesses.
**Yelp & TrustPilot** – Boost credibility and reviews.
**Industry-Specific Directories** – Niche authority sites.
**Tip:** Avoid **low-quality, spammy directories** that can harm SEO.
***
#### Tools to Check & Improve Domain Authority
**Check Domain Authority:**
* **Moz Link Explorer** ()
* **Ahrefs Site Explorer**
* **SEMrush Backlink Audit**
**Backlink Analysis & Disavow:**
* **Google Search Console**
* **Ahrefs Backlink Checker**
* **Moz Spam Score Tool**
**Tip:** Regularly audit backlinks to **remove toxic links** and build high-quality ones.
***
#### Common Domain Authority Mistakes to Avoid
**Buying Low-Quality Backlinks** – Avoid spammy links that can harm rankings.
**Ignoring Technical SEO Issues** – Poor site health lowers credibility.
**Focusing Only on DA** – DA is just a **predictive metric**, not a direct ranking factor.
**Not Promoting Content** – High-quality content needs **strategic promotion** to earn links.
**Tip:** Instead of obsessing over DA, focus on **building a strong, well-optimized website**.
# How to Do Competitor Backlink Analysis
Competitor backlink analysis is a powerful SEO strategy that helps you **identify high-quality backlink opportunities, improve link-building strategies, and boost search rankings**. By analyzing your competitors' backlinks, you can uncover **authoritative websites that may also link to your site**.
This guide explains **how to analyze competitor backlinks step by step and leverage them to strengthen your SEO strategy**.
***
#### What is Competitor Backlink Analysis?
**Competitor backlink analysis** involves examining the backlink profiles of top-ranking competitors to understand **where they get their backlinks from** and how you can replicate or improve upon their strategies.
**Why is Competitor Backlink Analysis Important?**
**Find High-Authority Link Opportunities** – Identify reputable websites that may link to your content. **Understand Competitor Strategies** – Learn how competitors acquire backlinks.
**Improve Your Link-Building Efforts** – Gain insights to refine your outreach strategy.
**Boost SEO Rankings** – More high-quality backlinks improve domain authority and rankings.
Without analyzing competitors’ backlinks, you may miss valuable linking opportunities that can help your site outrank them in **Google SERPs**.
***
#### Step-by-Step Guide to Competitor Backlink Analysis
**1. Identify Your Top SEO Competitors**
Before analyzing backlinks, determine **who your real SEO competitors are**.
**How to Find SEO Competitors:**
**Google Search** – Search for your target keywords and note the top-ranking websites.
**Ahrefs/Semrush Competitor Analysis** – Use SEO tools to discover sites with overlapping keywords. **Moz Link Explorer** – Compare domain authority (DA) and backlink profiles.
**Example Search Query:**
```
Top SEO agencies in New York
```
**Tip:** Focus on competitors with **higher domain authority and strong backlink profiles**.
***
**2. Use SEO Tools to Analyze Competitor Backlinks**
To analyze a competitor’s backlinks, use **SEO tools that provide detailed backlink insights**.
**Best SEO Tools for Backlink Analysis:**
* **Ahrefs Site Explorer** ([https://ahrefs.com](https://ahrefs.com/))
* **SEMrush Backlink Analytics** ([https://semrush.com](https://semrush.com/))
* **Moz Link Explorer** ()
* **Majestic SEO** ([https://majestic.com](https://majestic.com/))
* **Google Search Console** (For your own backlink profile)
**Steps to Analyze Competitor Backlinks in Ahrefs:**
1. Enter the competitor’s domain in **Ahrefs Site Explorer**.
2. Navigate to **Backlinks Report**.
3. Filter for **DoFollow links** and **high-authority sites**.
4. Identify **relevant linking domains** and their linking pages.
**Tip:** Focus on backlinks from **high-authority, relevant domains** with a **DoFollow attribute**.
***
**3. Identify High-Quality Backlinks**
Not all backlinks are valuable. Focus on **high-quality links** that can improve your **domain authority**.
**What Makes a Backlink High-Quality?**
**Comes from an Authoritative Domain** – Websites with **high DA/DR (Domain Authority/Domain Rating)**.
**Relevant to Your Industry/Niche** – Links from **related websites** are more valuable.
**Has DoFollow Attributes** – DoFollow links **pass SEO value**.
**Placed Contextually** – Links within **body content** are stronger than sidebar/footer links.
**Has Organic Traffic** – Websites with **real traffic** provide better value.
**Tip:** Use **Ahrefs or Moz** to filter backlinks by **Domain Rating (DR) or Domain Authority (DA)**.
***
**4. Find Common Backlink Sources**
By identifying **shared backlink sources** across multiple competitors, you can find **high-potential link-building opportunities**.
**How to Find Common Backlinks:**
**Use Ahrefs Link Intersect Tool**
* Enter **your domain** and **competitor domains**.
* The tool shows **websites that link to your competitors but not you**.
**Use SEMrush Backlink Gap Tool**
* Compare **backlink profiles of 3-5 competitors**.
* Find **common referring domains** you haven’t acquired yet.
**Tip:** Reach out to these websites and offer **valuable content or collaborations**.
***
**5. Analyze Competitor Link-Building Strategies**
Once you have competitor backlinks, **analyze their patterns** to find ways to replicate or improve them.
**Questions to Ask:**
**What type of content attracts backlinks?** – Blog posts, infographics, case studies?
**What link-building tactics do they use?** – Guest posts, resource pages, sponsorships?
**Which pages get the most backlinks?** – Identify **high-performing content**.
**Are they featured on directories or industry lists?** – Apply for the same.
**Tip:** If a competitor earns **links from guest posts**, pitch to the same websites.
***
**6. Replicate & Improve Their Best Backlinks**
After identifying **strong competitor backlinks**, develop an outreach strategy to earn similar or better links.
**Best Ways to Acquire Competitor Backlinks:**
**Guest Posting** – Write for the same websites your competitors contribute to.
**Broken Link Building** – Find competitor backlinks that point to **dead pages** and suggest your content as a replacement.
**Skyscraper Technique** – Improve their most-linked content and promote it.
**Resource Pages & Directories** – Get listed on **industry directories** where competitors are featured.
**HARO & PR Outreach** – Get mentions from **news sites and blog**
**Tip:** Personalize **outreach emails** for better success rates.
***
#### Example Competitor Backlink Outreach Email
```plaintext
Subject: Quick Suggestion for Your [Website Name]
Hi [Website Owner],
I came across your resource page on [Topic] and noticed you linked to [Competitor's Article]. I recently published a comprehensive guide on [Your Topic], which provides additional insights and updated information.
Would you consider including it as a reference?
Looking forward to your thoughts!
Best,
[Your Name]
[Your Website]
```
**Tip:** Keep emails **short, personalized, and value-driven**.
***
#### Tools to Track Competitor Backlinks
**Backlink Analysis Tools:**
* **Ahrefs Backlink Checker** – Comprehensive backlink reports.
* **Moz Link Explorer** – DA and backlink comparison.
* **SEMrush Backlink Analytics** – Competitor backlink monitoring.
**Link-Building & Outreach:**
* **BuzzStream** – Outreach management tool.
* **Hunter.io** – Find email addresses for outreach.
* **Google Alerts** – Track new mentions of competitor brands.
**Tip:** Regularly track **new backlinks competitors earn** and target those opportunities.
***
#### Common Competitor Backlink Analysis Mistakes to Avoid
**Focusing Only on Quantity** – Prioritize **quality over the number of backlinks**.
**Ignoring NoFollow Links** – They can still drive referral traffic.
**Not Checking Spam Score** – Avoid **low-quality, spammy backlinks**.
**Skipping Outreach Follow-Ups** – Many backlinks require **multiple follow-ups**.
**Neglecting Internal Links** – Strong internal linking improves **SEO alongside backlinks**.
# What is Guest Blogging & How Can It Help SEO?
**Guest blogging**, also known as **guest posting**, is a content marketing and SEO strategy where individuals write and publish articles on **third-party websites**. It helps businesses and individuals **build brand awareness, acquire high-quality backlinks, and drive targeted traffic**.
When done correctly, guest blogging can significantly enhance a website’s **domain authority, search rankings, and credibility**. This guide explains **what guest blogging is, its SEO benefits, and how to implement it effectively**.
***
#### What is Guest Blogging?
Guest blogging is the process of writing **articles or blog posts** for external websites in exchange for a backlink to your own site. It is a win-win strategy where **the guest blogger gets exposure and backlinks**, while **the host website receives valuable content**.
**How Guest Blogging Works:**
1. You **write a high-quality article** related to your niche.
2. You **submit it to a reputable website** as a guest post.
3. If accepted, the website **publishes your content** and includes a **backlink to your site**.
4. Your site gains **referral traffic, backlinks, and SEO authority**.
**Tip:** Always guest blog on **relevant, high-authority websites** to maximize SEO benefits.
***
#### How Guest Blogging Helps SEO
**1. Builds High-Quality Backlinks**
Backlinks from **authoritative websites** are one of the strongest **ranking factors in Google’s algorithm**.
**Why Backlinks Matter:**
**Improve Domain Authority (DA)** – Increases your site’s credibility.
**Boost SERP Rankings** – Helps your pages rank higher in Google search.
**Passes Link Equity** – Transfers SEO value from one site to another.
**Increases Referral Traffic** – Brings visitors from external sources.
**Example Guest Post Link:**
```html
SEO Strategies for 2024
```
**Tip:** Focus on earning **DoFollow backlinks** from **relevant, high-authority websites**.
***
**2. Increases Website Traffic & Brand Awareness**
Guest blogging exposes your content to **a new audience**, driving **qualified traffic** to your site.
**Best Practices for Traffic Growth:**
**Target Industry-Specific Blogs** – Publish on **niche-relevant** sites.
**Include a Clear CTA** – Encourage readers to **visit your website**.
**Write Authoritative, Engaging Content** – High-value posts generate **organic shares & referrals**.
**Tip:** Leverage **social media sharing** to amplify guest post reach.
***
**3. Establishes Authority & Thought Leadership**
Guest posting on **reputable websites** positions you as an **industry expert**.
**How to Build Authority with Guest Blogging:**
**Write Data-Driven Content** – Include statistics and case studies.
**Get Featured on Industry-Leading Sites** – Authority sites enhance credibility.
**Consistently Publish Valuable Content** – Become a trusted voice in your field.
**Tip:** Aim to contribute to **respected industry blogs** like Moz, HubSpot, or Forbes.
***
**4. Expands Your Network & Builds Relationships**
Guest blogging fosters **relationships with industry influencers, bloggers, and businesses**.
**Networking Benefits:**
**Increases Collaboration Opportunities** – Guest blogging can lead to **future partnerships**.
**Enhances Social Proof** – Being published on **top sites boosts credibility**.
**Provides Future Content Opportunities** – Sites may invite you for **repeat contributions**.
**Tip:** Engage with **blog editors & industry experts** to expand your reach.
***
#### How to Find High-Quality Guest Blogging Opportunities
**1. Use Google Search Operators**
Find guest posting opportunities by searching Google with **specific queries**:
```plaintext
"Write for us" + [Your Industry]
"Guest post guidelines" + [Your Niche]
"Submit a guest post" + [Topic]
```
**Example Search:**
```
"Write for us" + SEO Blog
```
**Tip:** Prioritize sites with **high DA (Domain Authority) and organic traffic**.
***
**2. Analyze Competitor Guest Posts**
Find where **your competitors are guest posting** and contribute to the same sites.
**Best Tools for Competitor Backlink Analysis:**
* **Ahrefs Backlink Checker**
* **SEMrush Backlink Analytics**
* **Moz Link Explorer**
**Tip:** Use **Ahrefs Link Intersect Tool** to identify competitor guest post backlinks.
***
**3. Check Industry Blogs & Directories**
Many websites **list guest blogging opportunities** for specific industries.
**Best Guest Blogging Directories:**
* AllTop ([https://alltop.com](https://alltop.com/))
* BlogDash ([https://blogdash.com](https://blogdash.com/))
* My Blog Guest ([https://myblogguest.com](https://myblogguest.com/))
**Tip:** Join guest blogging **Facebook groups and LinkedIn communities** to find opportunities.
***
#### How to Write an Effective Guest Post
**1. Follow the Blog’s Guest Posting Guidelines**
Most websites have **submission guidelines** outlining:
**Topic Requirements** – Choose relevant subjects.
**Word Count Limits** – Usually **800-2,000 words**.
**Linking Policies** – Number of allowed backlinks.
**Formatting Rules** – Use **H2, H3 headings, bullet points, etc.**
**Tip:** **Read past guest posts** to match the blog’s style and quality.
***
**2. Write High-Quality, Valuable Content**
Google prioritizes **high-value, well-researched** content. Make your guest post **better than competitors’ posts**.
**Best Practices for High-Quality Guest Posts:**
**Use Data & Case Studies** – Support claims with facts.
**Include Engaging Visuals** – Images, infographics, and videos improve readability.
**Avoid Over-Promotion** – Focus on **value, not self-promotion**.
**Tip:** Use **compelling storytelling** to engage readers.
***
**3. Optimize the Author Bio for SEO**
Your **author bio** is where you include a backlink to your site.
**Example Author Bio:**
```plaintext
John Doe is an SEO expert at [YourWebsite.com], helping businesses improve search rankings. Read his latest guide on [SEO Strategies for 2024].
```
**Tip:** Link to **your homepage and a relevant blog post**.
***
#### Common Guest Blogging Mistakes to Avoid
**Publishing on Low-Quality or Spammy Websites** – Low-authority sites offer **little SEO value**.
**Focusing Only on Quantity, Not Quality** – Prioritize **valuable, well-researched posts**.
**Not Engaging with Readers** – **Respond to comments** to build credibility.
**Ignoring Blog Guidelines** – Follow site-specific guest posting rules.
**Overusing Exact Match Anchor Text** – Use **natural variations** of keywords in backlinks.
**Tip:** Track **guest post backlinks using Google Search Console or Ahrefs**.
# How Social Media Affects SEO
Social media and **SEO (Search Engine Optimization)** are closely linked, even though **social signals (likes, shares, and followers) are not direct ranking factors** in Google’s algorithm. However, social media **indirectly impacts SEO** by increasing content visibility, driving traffic, and enhancing brand authority.
This guide explores **how social media influences SEO and how to leverage it for better rankings**.
***
#### Does Social Media Directly Impact SEO Rankings?
Google has **confirmed** that social signals like **shares, likes, and followers** are not direct ranking factors. However, social media does affect SEO in several **indirect ways** that improve search performance.
**Boosts Content Visibility & Engagement** – Increases exposure to a wider audience.
**Drives Referral Traffic** – Social media links bring visitors to your website.
**Enhances Brand Awareness & Authority** – Stronger brand presence improves trust.
**Encourages Content Indexing** – Search engines crawl social media links.
**Generates High-Quality Backlinks** – Viral content attracts natural backlinks.
***
#### 1. Social Media Increases Content Visibility & Engagement
**The more people share your content on social media, the more visibility it gets.**
**How It Helps SEO:**
**More exposure** means **higher chances of earning backlinks**.
**Increased engagement (likes, shares, comments)** signals content relevance.
**Greater brand awareness** leads to **higher branded search volume**.
**Best Practices for Maximizing Visibility:**
Post content on **multiple social platforms** (Facebook, Twitter, LinkedIn, Instagram, Pinterest).
Optimize posts with **relevant keywords & hashtags**.
Engage with followers through **comments and shares**.
**Tip:** Use **Google Trends** and **BuzzSumo** to find trending topics for social content.
***
#### 2. Social Media Drives Referral Traffic
Social media helps **diversify your traffic sources**, reducing reliance on Google search alone.
**Why Social Media Traffic Matters for SEO:**
Directs **qualified visitors** to your site.
Improves **dwell time and engagement**, which may influence rankings.
**Encourages repeat visitors**, boosting authority.
**How to Drive More Traffic from Social Media:**
Share **high-value blog posts, videos, and infographics**.
Add **social sharing buttons** to your website.
Optimize **social media bios** with website links.
**Tip:** Track **social traffic performance** in **Google Analytics (Acquisition → Social Reports).**
***
#### 3. Social Media Helps Content Get Indexed Faster
Google crawls social media links, which helps **new content get indexed more quickly**.
**How Social Media Helps Indexing:**
Google crawls **Twitter, LinkedIn, Facebook, and Reddit links**.
New content gains **exposure to search engines faster**.
Higher engagement increases **indexing priority**.
**How to Speed Up Indexing with Social Media:**
**Share new blog posts immediately** on social platforms.
**Encourage reshares** to increase content reach.
Use **Twitter cards and Open Graph meta tags** to optimize sharing.
**Tip:** Google prioritizes **highly active social media accounts**, so post consistently.
***
#### 4. Social Media Helps Earn High-Quality Backlinks
Social media exposure increases the chances of **natural backlinks** from authoritative websites.
**How Social Media Supports Link Building:**
**Viral content** attracts **journalists, bloggers, and influencers** who may link to your site.
Increased visibility **leads to more mentions** and citations.
Shares on platforms like **Reddit, Quora, and Twitter** can result in organic backlinks.
**Best Ways to Use Social Media for Backlinks:**
Create **shareable, research-based content** (e.g., infographics, case studies).
Engage with **bloggers and journalists** to increase shares.
Promote content in **relevant LinkedIn & Facebook groups**.
**Tip:** Use **BuzzSumo** to find influencers who share industry-related content.
***
#### 5. Social Media Strengthens Brand Authority & Trust
A strong social presence builds **brand trust and authority**, making search engines **favor your content**.
**How Brand Authority Helps SEO:**
**Branded searches** increase (Google sees this as a trust signal).
**More people link** to well-known brands.
Google prioritizes **trusted websites** in search rankings.
**How to Build Brand Authority on Social Media:**
**Be active & engage with your audience**.
**Share valuable industry insights** (thought leadership content).
**Leverage influencer marketing** to increase credibility.
**Tip:** Set up **Google Alerts** to track brand mentions across the web.
***
#### 6. Social Media & Local SEO
For **local businesses**, social media plays a key role in **Local SEO** rankings.
**How Social Media Helps Local SEO:**
**Google My Business (GMB) posts** increase local search visibility.
**Facebook & Yelp reviews** boost local trust signals.
**Local hashtags & geotags** help attract regional customers.
**Best Local SEO Social Media Strategies:**
Optimize **Google My Business profile**.
Encourage customers to **leave reviews on Facebook & Yelp**.
Use **local hashtags (#YourCity, #LocalBusiness)** in posts.
**Tip:** Post **location-specific content** on social platforms to boost **local engagement**.
***
#### Best Social Media Platforms for SEO
**Facebook** – Best for brand awareness, community engagement, and sharing content.
**Twitter** – Great for quick content distribution and industry engagement.
**LinkedIn** – Ideal for B2B marketing, professional networking, and thought leadership.
**Pinterest** – Strong for image-based SEO and long-term traffic.
**Instagram** – Useful for branding and driving referral traffic.
**YouTube** – A powerful video-based search engine owned by Google.
**Tip:** Focus on **platforms where your target audience is most active**.
***
#### Tools to Track Social Media’s Impact on SEO
**Google Analytics** – Tracks **social traffic & engagement**.
**Ahrefs & Moz** – Analyzes backlinks earned from social media.
**BuzzSumo** – Finds trending content & influencer shares.
**Hootsuite & Buffer** – Social media scheduling & performance tracking.
**Tip:** Use **UTM parameters** to track which social posts drive the most traffic.
***
#### Common Social Media SEO Mistakes to Avoid
**Ignoring Engagement** – Simply posting links won’t drive traffic. **Engage with users**.
**Not Optimizing Social Profiles** – Use **SEO-friendly usernames & keywords**.
**Focusing Only on Follower Count** – Prioritize **quality engagement over numbers**.
**Sharing Only Your Own Content** – Promote **user-generated content & industry news**.
**Not Encouraging Social Shares** – Add **share buttons on your website**.
**Tip:** Encourage **content collaboration & social mentions** to increase engagement.
# Local SEO
# What is Local SEO & Why Does It Matter?
**Local SEO (Search Engine Optimization)** is the process of optimizing a website to improve its visibility in **local search results**. It helps businesses attract nearby customers searching for products or services in their area.
For businesses that rely on **foot traffic, local clients, or regional services**, local SEO is essential for increasing visibility on **Google Search, Google Maps, and other local search platforms**.
This guide explains **what local SEO is, why it’s important, and how to optimize your business for local search success**.
***
#### Why Does Local SEO Matter?
**Increases Visibility in Local Searches** – Helps businesses appear in "near me" searches.
**Drives High-Intent Traffic** – Attracts users actively looking for services in their area.
**Boosts Google My Business Rankings** – Improves placement in Google Maps and Local Pack.
**Enhances Brand Trust & Credibility** – Positive reviews and citations increase reliability.
**Improves Mobile Search Performance** – Essential for users searching on mobile devices.
Without local SEO, businesses **miss out on potential customers** searching for services in their area.
***
#### How Does Local SEO Work?
Local SEO focuses on improving a business’s online presence for searches **with local intent**.
**Example of a Local Search Query:**
```
Best coffee shops near me
```
**Google’s Local Ranking Factors:**
**Proximity** – How close the business is to the searcher.
**Relevance** – How well the business matches the search intent.
**Prominence** – The business’s authority, reviews, and online presence.
**Tip:** Google favors **well-optimized businesses** with strong local signals.
***
#### Key Strategies to Improve Local SEO
**1. Optimize Your Google My Business (GMB) Profile**
**Google My Business (GMB)** is the most important factor for ranking in **Google’s Local Pack and Google Maps**.
**Steps to Optimize GMB:**
**Claim & Verify Your Listing** – Sign up at [Google My Business](https://www.google.com/business/).
**Use Accurate Business Information (NAP)** – Name, Address, Phone Number.
**Select the Right Business Category** – Helps Google match your business with relevant searches.
**Add High-Quality Photos & Videos** – Businesses with images get **42% more requests for directions**.
**Encourage Customer Reviews** – More positive reviews improve local rankings.
**Tip:** Respond to **all reviews (positive & negative)** to engage with customers.
***
**2. Optimize Your Website for Local SEO**
Your website should include **local keywords, structured data, and location-based content**.
**On-Page SEO for Local Optimization:**
**Include Location-Specific Keywords** – Example: "Best plumber in New York."
**Create Location Pages** – Separate pages for each service area.
**Use Schema Markup (Local Business Structured Data)** – Helps search engines understand your business.
**Embed Google Maps** – Display your business location on your website.
**Tip:** Use Google’s **PageSpeed Insights** to ensure your site loads quickly on mobile devices.
***
**3. Get Listed in Online Directories & Citations**
Local citations are online mentions of **your business name, address, and phone number (NAP)** across directories.
**Best Business Directories for Local SEO:**
**Google My Business** – Essential for Google rankings.
**Yelp** – Important for customer reviews.
**Bing Places for Business** – Alternative to Google.
**Facebook Business Page** – Social proof and engagement.
**Industry-Specific Directories** – Example: TripAdvisor for travel, Houzz for home improvement.
**Tip:** Ensure **NAP consistency** across all listings to improve search rankings.
***
**4. Encourage Customer Reviews & Testimonials**
Customer reviews play a significant role in **local search rankings and trust-building**.
**Best Review Platforms for Local SEO:**
**Google Reviews** – The most impactful reviews for local rankings.
**Yelp & Trustpilot** – Great for building credibility.
**Facebook Reviews** – Helps local engagement.
**How to Get More Reviews:**
Ask satisfied customers to leave reviews.
Offer incentives (discounts, promotions) for honest feedback.
Respond to reviews to engage with customers.
**Tip:** A business with **50+ positive reviews** ranks higher than competitors with fewer reviews.
***
**5. Optimize for Local Voice Search**
**Voice search** is growing, with people using **Alexa, Siri, and Google Assistant** for local queries.
**How to Optimize for Voice Search:**
Use **conversational long-tail keywords** (e.g., "Where is the best pizza place near me?").
Answer **FAQs on your website** – Include commonly asked questions.
Improve **mobile site speed and responsiveness**.
**Tip:** Most **voice searches are question-based**, so optimize for **“who, what, where, when, why”** queries.
***
#### 6. Build Local Backlinks
Backlinks from local sources increase local authority and search rankings.
* **Best Ways to Earn Local Backlinks:**
* Partner with Local Businesses & News Sites – Guest posts & collaborations.
* Sponsor Local Events – Gain backlinks from event websites.
* Get Listed on Chamber of Commerce Websites – Local credibility boost.
* **Pro Tip:** Use Ahrefs or SEMrush to analyze competitors' local backlinks.
***
#### 7. Use Localized Content Marketing
Publishing local content improves engagement and helps your site rank for location-based searches.
**Best Local Content Ideas:**
* City Guides & Local Events – Write about happenings in your area.
* Case Studies & Customer Stories – Feature local success stories.
* Community Involvement Articles – Showcase your involvement in local projects.
**Tip:** Share local content on Google My Business posts for extra visibility.
***
#### Tools to Track & Improve Local SEO
* Google My Business Insights – Tracks local search performance.
* Google Analytics – Measures local traffic & engagement.
* Moz Local – Manages local listings and citations.
* BrightLocal – Monitors local rankings and competitor analysis.
* SEMrush Local SEO Toolkit – Tracks rankings & local search visibility.
**Tip:** Set up Google Search Console to monitor local search queries and performance.
***
#### Common Local SEO Mistakes to Avoid
* **Inconsistent NAP Information** – Mismatched details across directories hurt rankings.
* **Ignoring Google My Business Updates** – Keeping your listing updated is crucial.
* **Not Encouraging Customer Reviews** – Lack of reviews affects credibility.
* **Skipping Local Link Building** – Local backlinks boost relevance & rankings.
* **Not Optimizing for Mobile** – Most local searches come from mobile devices.
**Tip:** Regularly audit your local SEO strategy to stay ahead of competitors.
####
# How to Optimize Google My Business (GMB) for SEO
***
#### Google My Business (GMB) Optimization for SEO
Google My Business (GMB) is a free tool that helps businesses manage their online presence on Google Search and Google Maps. Optimizing your GMB profile improves local search visibility, increases traffic, and enhances credibility. A well-optimized GMB listing can drive more customers, increase engagement, and improve your local SEO rankings. This guide explains how to optimize your Google My Business profile for maximum SEO benefits.
***
#### Why Google My Business is Important for SEO
* **Boosts Local Search Rankings** – Helps businesses appear in the Google Local Pack & Google Maps.
* **Increases Visibility for "Near Me" Searches** – 46% of Google searches have local intent.
* **Enhances Trust & Credibility** – Verified businesses appear more trustworthy.
* **Drives More Traffic & Leads** – Potential customers find essential business details instantly.
* **Allows Direct Customer Engagement** – Enables reviews, Q\&A, and messaging.
Without an optimized GMB profile, businesses miss out on local search traffic and customers.
***
#### Step-by-Step Guide to Optimize Google My Business for SEO
**1. Claim & Verify Your Google My Business Listing**
Before optimizing, ensure that you claim and verify your GMB listing:
**How to Claim Your GMB Listing:**
* Go to Google My Business.
* Sign in with a Google account.
* Search for your business name to check if it’s listed.
* If available, click “Claim this Business” and follow verification steps**Verification Methods:**
* **Postcard (Standard Method)** – Google mails a code to your business address.
* **Phone or Email Verification** – Available for certain businesses.
* **Instant Verification** – For businesses with verified websites in Google Search Console.
* **Tip:** Verification improves GMB ranking and trustworthiness.
***
**2. Optimize Business Information (NAP Consistency)**
Ensure all business details are accurate, consistent, and optimized**Key Business Information to Optimize:**
* **Business Name** – Use the official, brand-recognized name.
* **Address** – Must be consistent across all online listings.
* **Phone Number** – Use a local number instead of a toll-free one.
* **Website URL** – Link to your homepage or a local landing page.
* **Business Category** – Choose the most relevant category (Primary & Secondary).
* **Business Hours** – Keep hours updated, including holiday hour
**Tip:** Use the same NAP (Name, Address, Phone Number) information across your website and directories.
***
**3. Select the Right Business Categories**
Choosing the correct primary and secondary categories helps Google understand what your business offers.
**Best Practices for GMB Categories:**
* Select one primary category that best represents your business.
* Add relevant secondary categories for additional services.
* Check competitor categories using tools like PlePer GMB Category Finder.
**Tip:** Categories influence local search rankings and visibility.
***
**4. Write a Compelling Business Description**
Your GMB description should clearly explain who you are, what you do, and why customers should choose you.
**GMB Description Guidelines:**
* Keep it under 750 characters (first 250 characters are most important).
* Include primary keywords naturally.
* Highlight unique selling points (USPs).
* Avoid promotional language or special offers.
**Example of an Optimized GMB Description:**
* ABC Plumbing is a trusted local company providing 24/7 emergency plumbing services in New York. We specialize in leak detection, drain cleaning, and water heater repair. Call us today for fast, reliable service
**Tip:** Avoid keyword stuffing and focus on clear, engaging messaging.
***
**5. Upload High-Quality Photos & Videos**
Businesses with photos get 42% more requests for directions and 35% more click-throughs to websites
**Recommended GMB Images:**
* **Cover Photo** (Best Image of Your Business) – 1024 x 576 pixels.
* **Logo** (Consistent Branding) – 250 x 250 pixels.
* **Interior & Exterior Photos** – Show customers what to expect.
* **Team & Product Photos** – Build trust with behind-the-scenes images.
* **Videos** – Showcase your services in action (30 seconds, max 75 MB).
**Tip:** Add geo-tagged images to improve local ranking signals.
***
**6. Encourage & Respond to Customer Reviews**
Reviews influence local search rankings and customer trust.**How to Get More Reviews:**
* Ask satisfied customers to leave reviews.
* Include a GMB review link in emails & website.
* Offer great service to encourage positive feedback.
**How to Respond to Reviews:**
* Thank customers for positive reviews.
* Address negative reviews professionally.
* Use keywords naturally in responses to reinforce relevance.
**Tip:** Responding to all reviews improves GMB ranking.
***
**7. Post Regular Updates & Promotions on GMB**
GMB posts keep your listing active and engaging, signaling Google that your business is relevant.
**Best Types of GMB Posts:**
* **Announcements** – Company updates, new services.
* **Offers & Promotions** – Special discounts, seasonal sales.
* **Event Updates** – Webinars, community events.
* **New Blog Posts** – Share website content to drive traffic.
**Tip:** Post at least once a week to keep your GMB profile fresh.
***
**8. Optimize for Google Maps & Local Pack Rankings**
Google prioritizes businesses with strong local signals.
**How to Rank Higher in Google Maps & Local Pack:**
* Ensure NAP consistency across all online platforms.
* Get local backlinks from industry-specific directories.
* Encourage customer engagement (reviews, Q\&A, posts).
* Optimize for "near me" keywords in descriptions & posts.**Tip:** Run a local SEO audit using Moz Local or BrightLocal.
***
**9. Use Google My Business Insights to Track Performance**
Google provides detailed analytics on how customers find and interact with your business.
**Key GMB Insights Metrics:**
* **Search Queries** – Keywords people use to find you.
* **Customer Actions** – Calls, website visits, direction requests.
* **Photo & Post Engagement** – Interaction with uploaded media.
* **Review Performance** – Trends in customer feedback.
**Tip:** Use Google Analytics UTM parameters to track website traffic from GMB.
***
#### Common GMB Mistakes to Avoid
* **Incomplete Business Profile** – Fill in all details for better rankings.
* **Inconsistent NAP Information** – Always match business details across the web.
* **Ignoring Negative Reviews** – Respond professionally to build trust.
* **Not Posting Regularly** – Keep GMB fresh with weekly updates.
* **Using Spammy Tactics** – Avoid keyword stuffing and fake locations.
**Tip:** Keep your GMB profile updated to maintain rankings.
---
[Next Page](/llms-full.txt/1)
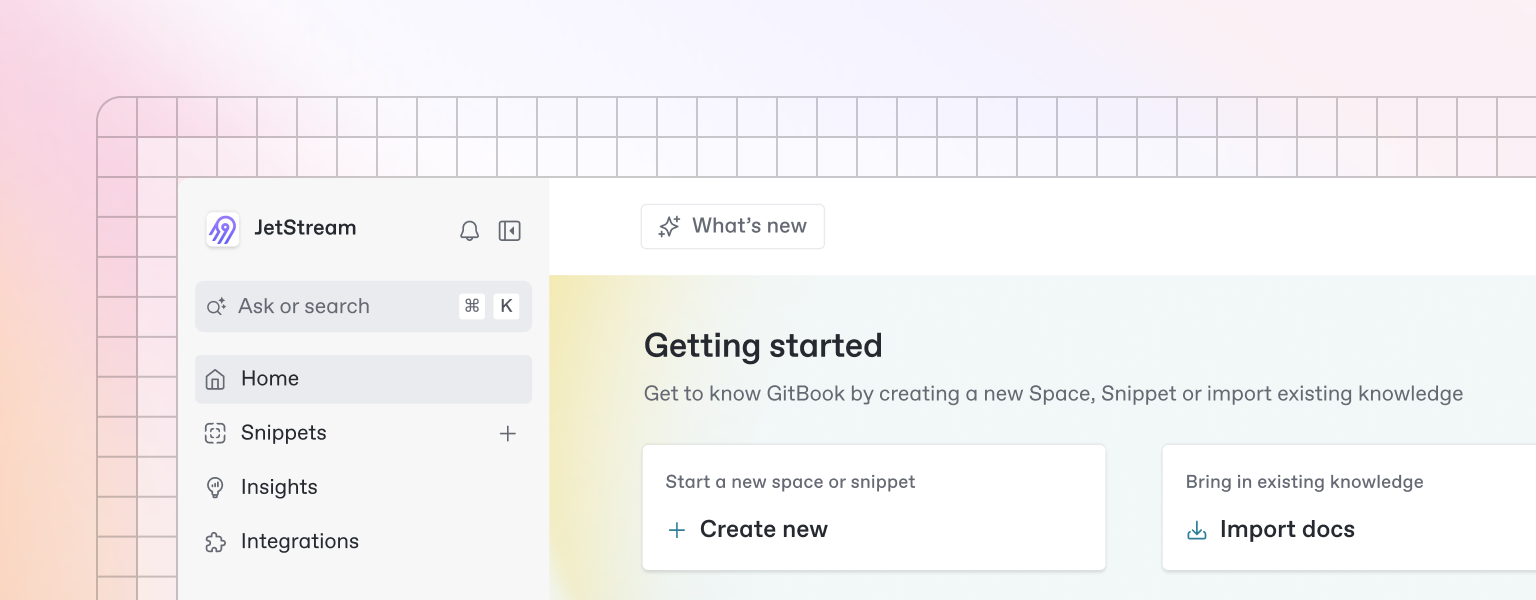
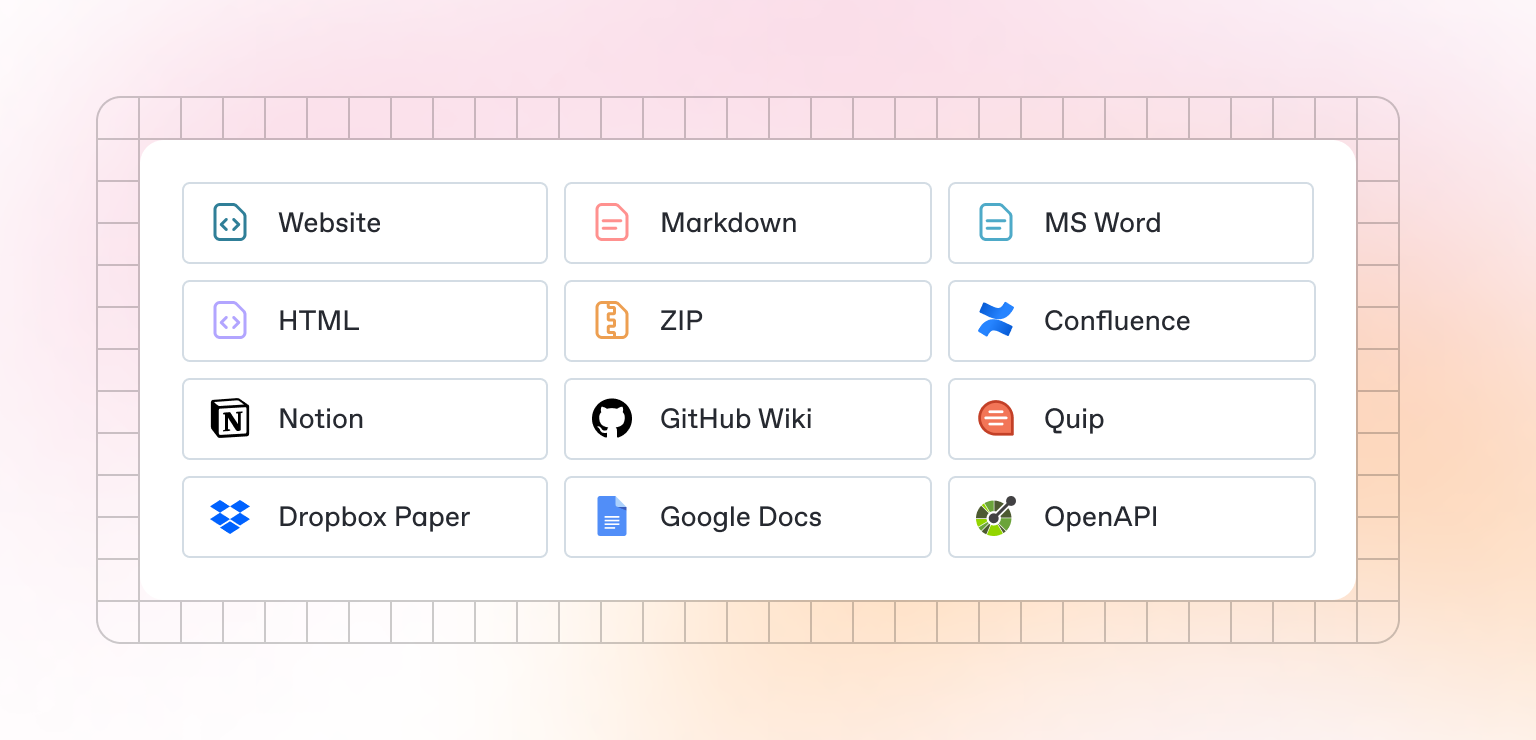
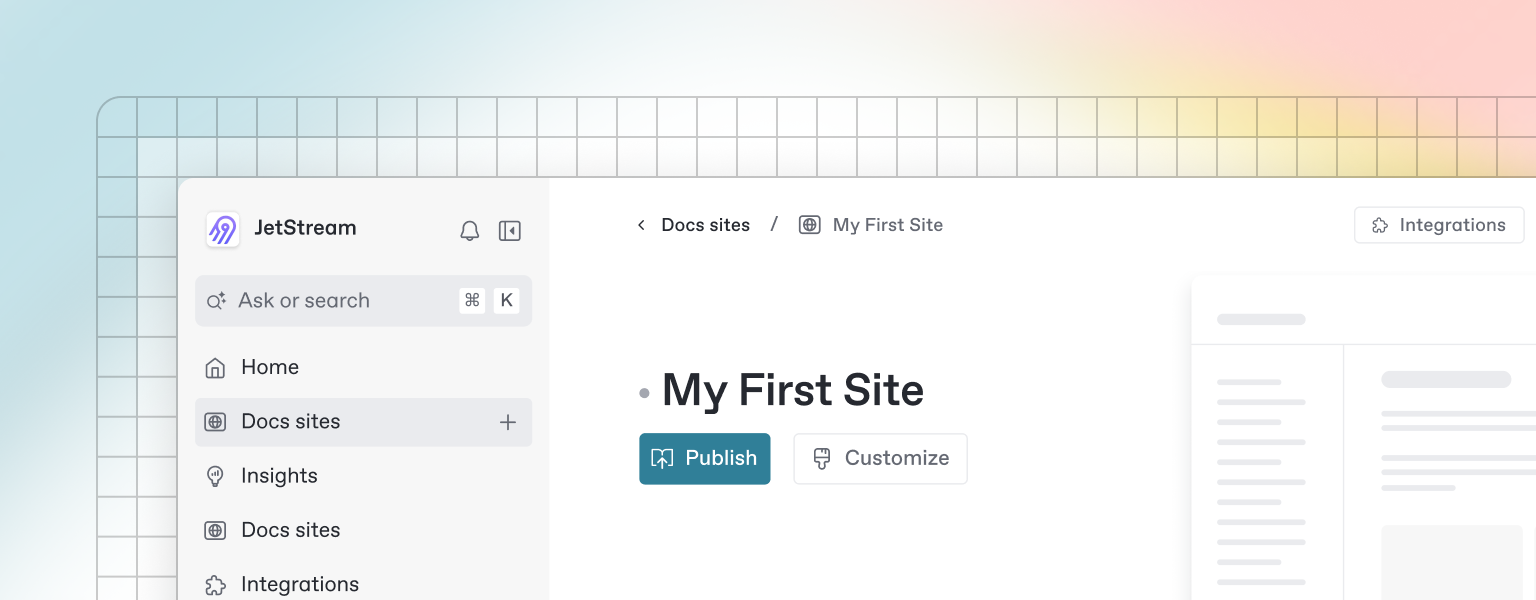
 ```
**9. Focus on Readability & User Experience**
* Use **short paragraphs (2-3 sentences)**.
* Add **bullet points and numbered lists**.
* Use **bold and italics** for emphasis.
**Pro Tip:** Use tools like **Hemingway Editor or Grammarly** to improve readability.
**10. Optimize for Featured Snippets**
* Use **question-based headings** (e.g., "What is SEO?").
* Provide **concise answers** (40-60 words) below headings.
* Format content using **lists, tables, and bullet points**.
**Example:**
```html
```
**9. Focus on Readability & User Experience**
* Use **short paragraphs (2-3 sentences)**.
* Add **bullet points and numbered lists**.
* Use **bold and italics** for emphasis.
**Pro Tip:** Use tools like **Hemingway Editor or Grammarly** to improve readability.
**10. Optimize for Featured Snippets**
* Use **question-based headings** (e.g., "What is SEO?").
* Provide **concise answers** (40-60 words) below headings.
* Format content using **lists, tables, and bullet points**.
**Example:**
```html
 ```
**Pro Tip:** Alt text **improves rankings in Google Image Search** and provides a better user experience.
**5. Use Responsive Images (Mobile Optimization)**
Ensure images **adjust properly** on all screen sizes by using **CSS media queries** and responsive image attributes.
**Best Practice:** Use the `srcset` attribute to serve different image sizes based on screen resolution.
```html
```
**Pro Tip:** Alt text **improves rankings in Google Image Search** and provides a better user experience.
**5. Use Responsive Images (Mobile Optimization)**
Ensure images **adjust properly** on all screen sizes by using **CSS media queries** and responsive image attributes.
**Best Practice:** Use the `srcset` attribute to serve different image sizes based on screen resolution.
```html
 ```
**Pro Tip:** Test mobile-friendliness with **Google Mobile-Friendly Test**.
**6. Implement Lazy Loading for Faster Performance**
Lazy loading **delays image loading** until the user scrolls down to them, improving initial page speed.
**How to Enable Lazy Loading:**
```html
```
**Pro Tip:** Test mobile-friendliness with **Google Mobile-Friendly Test**.
**6. Implement Lazy Loading for Faster Performance**
Lazy loading **delays image loading** until the user scrolls down to them, improving initial page speed.
**How to Enable Lazy Loading:**
```html
